KS2/KS3 Design Technology Teachers: 5 3D Printing Lesson Examples that Meet the UK National Curriculum
In this post we'll be looking at examples of how 3D printing can be used to meet the aims of the UK National Curriculum for Design Technology (KS2/KS3). Let's begin with a quick recap of 3D printing and its ability to shape the future...

28th January 2018 • News
3D printing is a manufacturing process where successive layers of material are laid down on top of each other in an additive process. There are various types of 3D printers that work using different technologies and materials. However, all 3D printers have something in common – they all build up an object layer by layer. This unique way of manufacturing brings about a range of advantages such as less waste material, the ability to create complex geometries that couldn’t be manufactured any other way and the ability to rapidly create prototypes and customised products.
Throughout this post we’ll be touching on various points listed in the Design Technology National Curriculum for KS2 & KS3 and for each point we’ll show you an example lesson plan.
1. Students should be taught to use research and develop design criteria to inform the design of innovative, functional, appealing products that are fit for purpose, aimed at particular individuals or groups (KS2)
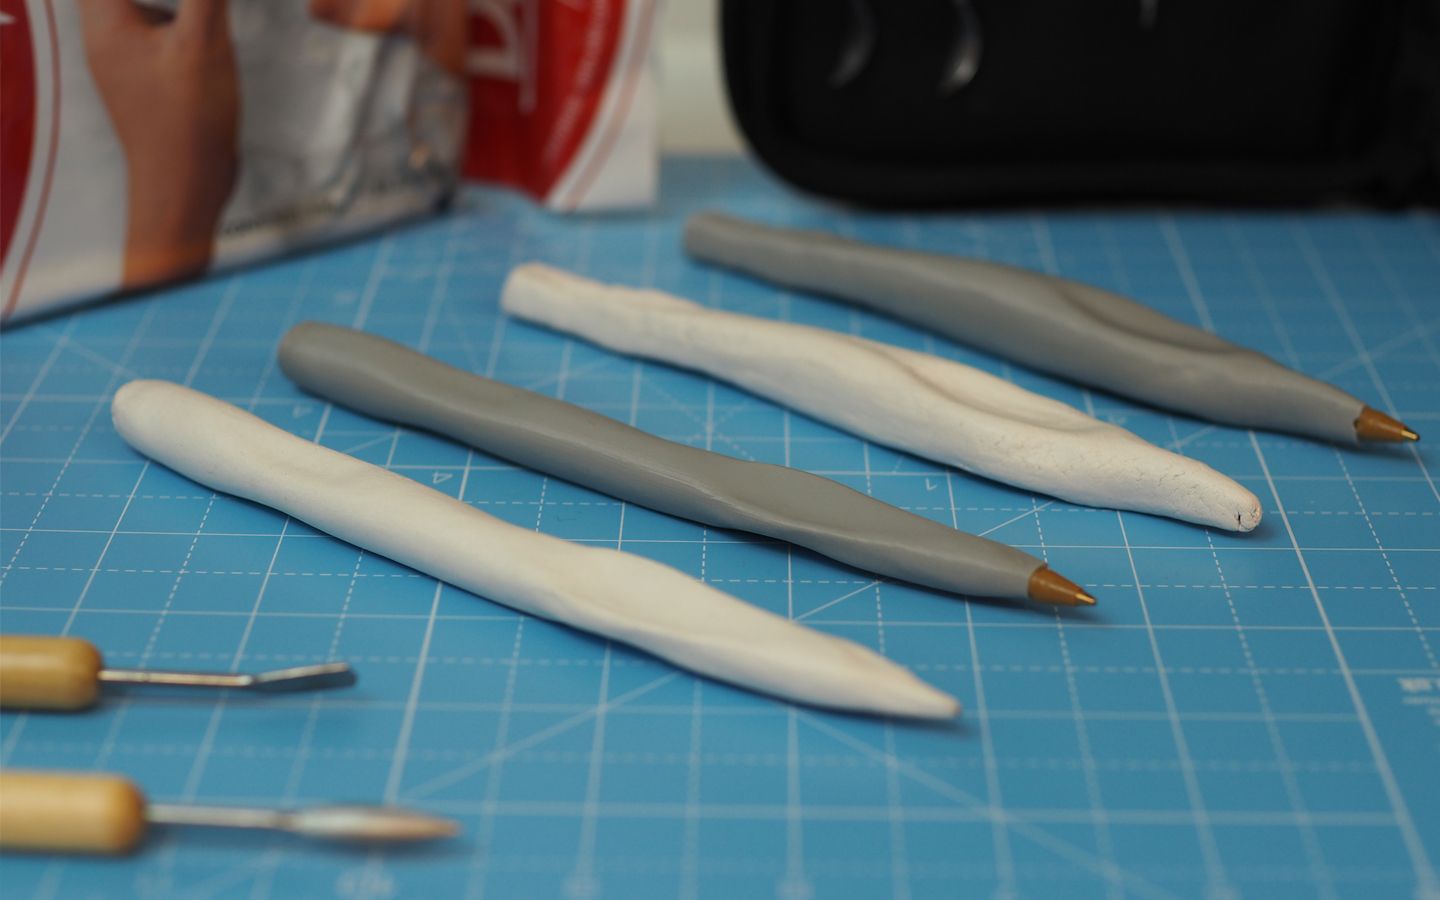
The creation of functional products suited for particular individuals is an extreme strong point for 3D printing. If you think about products like a computer mouse, do you ever question why they are all more or less the same? Why isn’t each object suited to our unique grips or needs? The simple answer is because most products around us are mass produced on some form of assembly line. Production in this method does not allow for customisation or individual designs but with 3D printing, each object created can be completely different and there will be no additional tooling or setup costs.
Take a look at the below image that shows a 3D printed ergonomic pen specifically designed for an individual user. A clay model was created, allowing the user to embed their unique grip into the material. The model was then 3D scanned, edited in CAD and then 3D printed.
2. Students should be taught to generate, develop, model and communicate their ideas through discussion, annotated sketches, cross-sectional and exploded diagrams, prototypes, pattern pieces and computer-aided design (KS2)
Computer-aided design (CAD) has become widely accessible as a teaching tool due to the powerful, free solutions available to teachers. Our favourites include Tinkercad, SketchUp and Meshmixer. Whether it’s engineering, architecture, medicine, art, or a range of other sectors, CAD skills are going to be an essential part of many students’ futures.
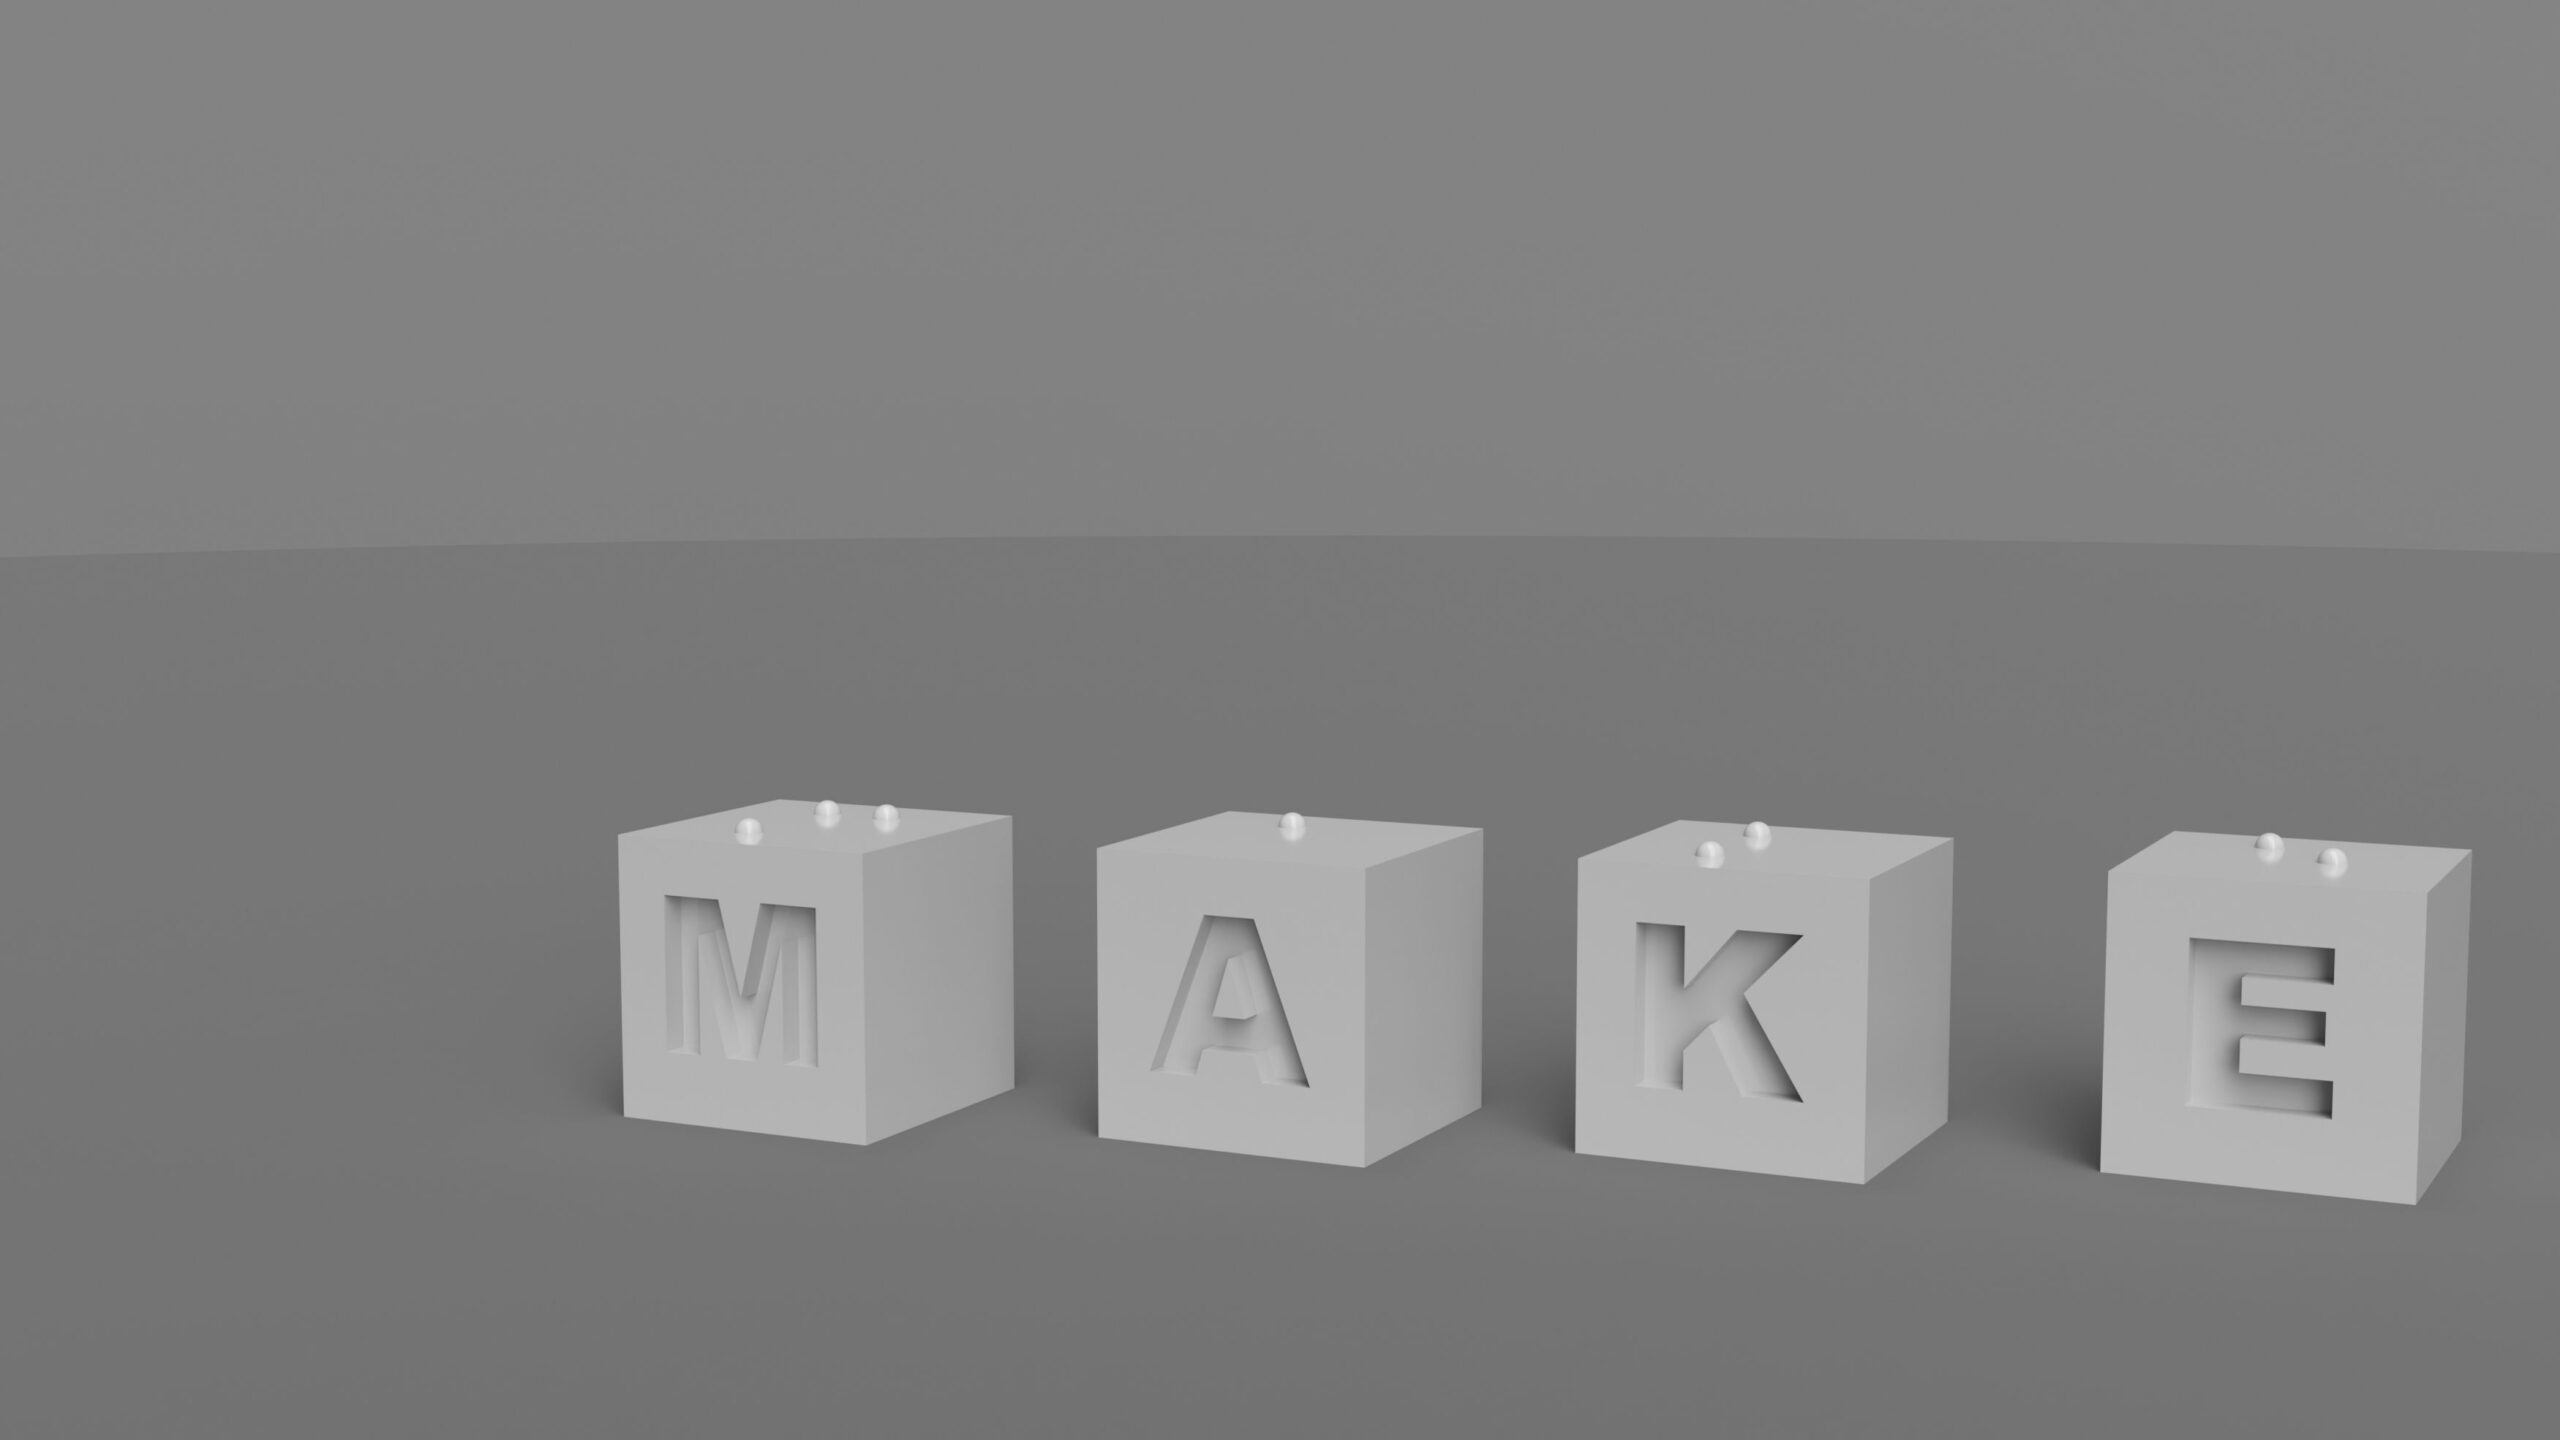
A cross-curricular lesson example is shown in the below image, where students collaborate to design and manufacture their school name in braille. The lesson is a simple introduction to CAD but also incorporates annotated sketches, mathematical calculations and context about braille.
3. Students should be taught to develop and communicate design ideas using annotated sketches, detailed plans, 3-D and mathematical modelling, oral and digital presentations and computer-based tools (KS3)
Detailed plans and 3D modelling are elements that are typical in the design process of architects, engineers and designers. Imagine being able to go through these processes with the addition of a 3D printed outcome that can be physically analysed and improved if necessary.
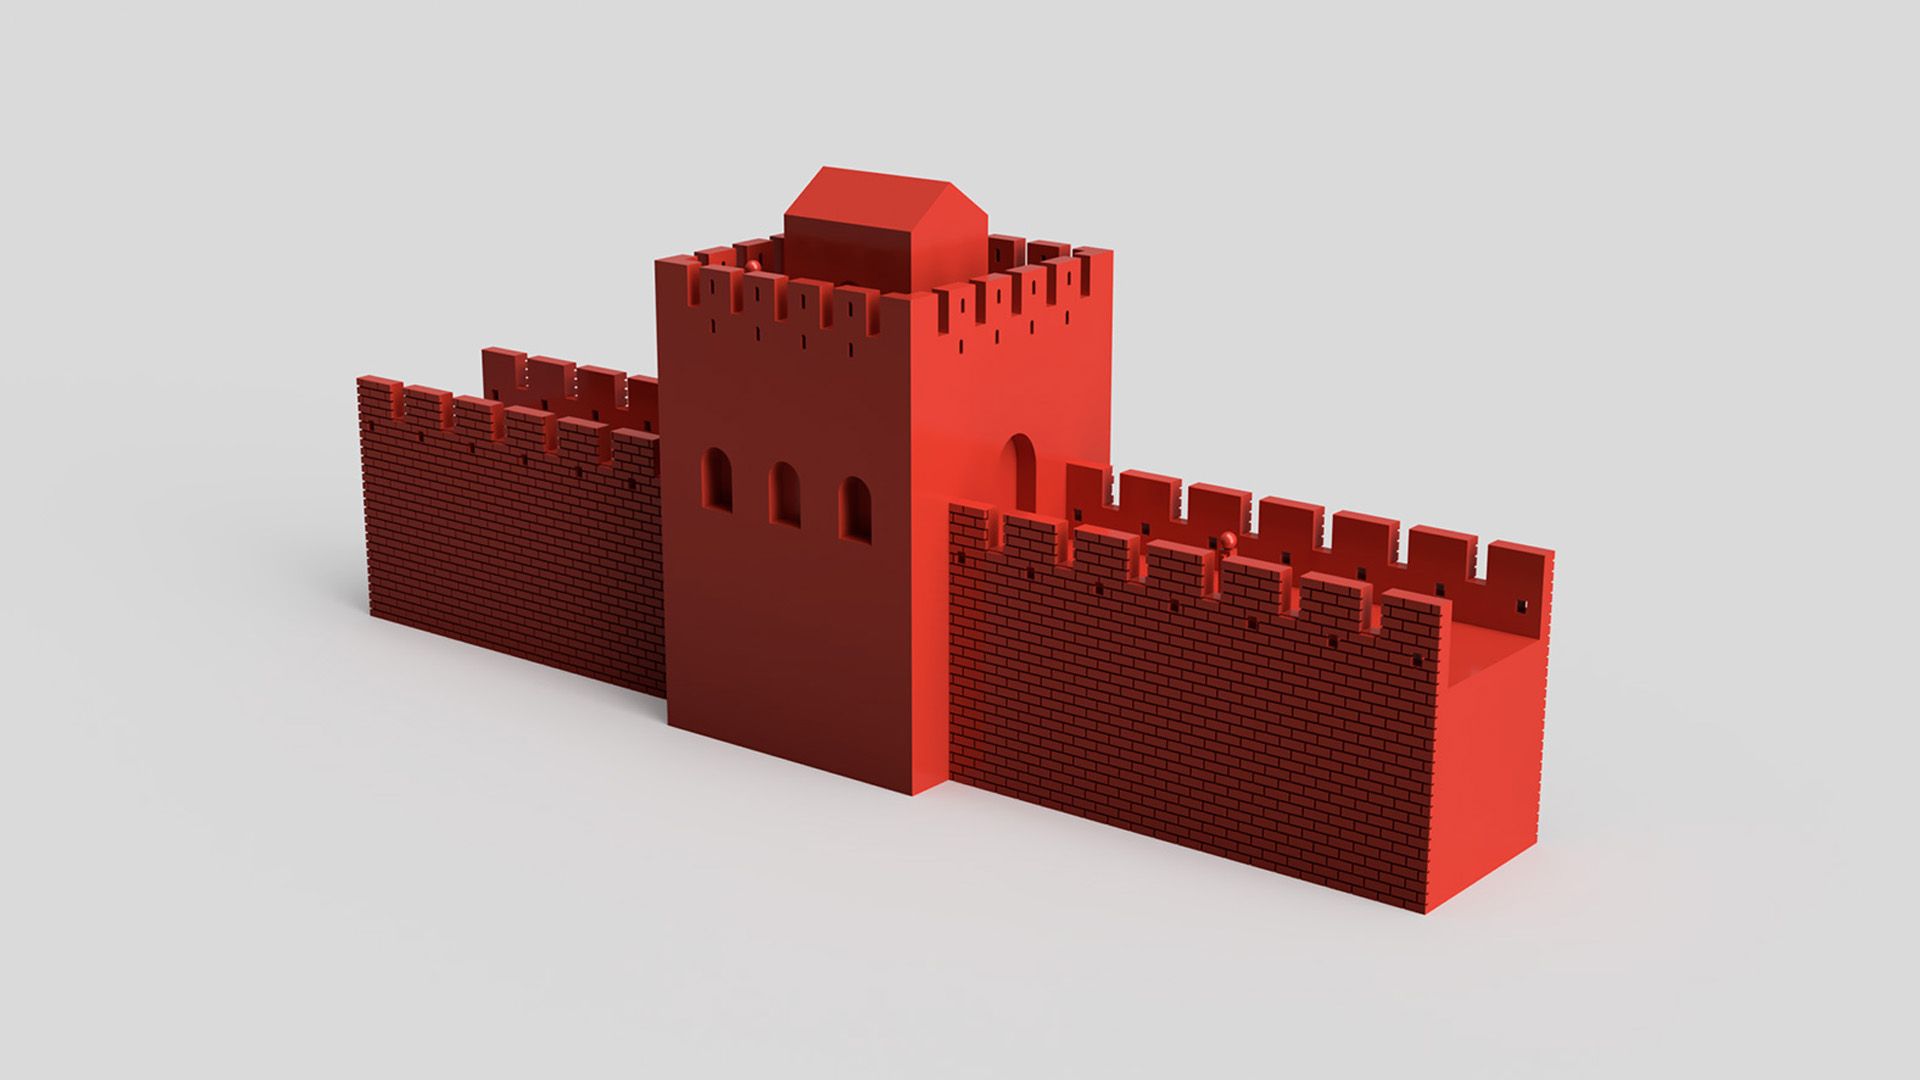
The image below shows an example lesson plan that could be used in a Design Technology classroom but it also incorporates studies in history, maths and computing. Students are firstly introduced to the basic architectural and industrial design of the Great Wall of China. They then go on to design their own Great Wall watchtower by drawing scaled elevation drawings. These drawings are then transferred to Tinkercad software and 3D printed to form a collaborative class model.
4. Students should be taught to select from and use specialist tools, techniques, processes, equipment and machinery precisely, including computer-aided manufacture (KS3)
Computer-aided manufacture involves the use of software to control machine tools. With 3D printing and all CAM solutions, precise software inputs will determine that products are manufactured correctly and accurately. Creating rough 3-dimensional models in CAD are a great way for students to be introduced to the 3D printing process but the real value comes when students begin to draw with set dimensions and design criteria.
In the below lesson example, students collaboratively design and manufacture a 1:50,000 scale contour model of Mount Everest. Each student must calculate the extrusion distances of each contour before drawing their 1:50,000 scale model in SketchUp software. Each design must be drawn to precise dimensions in order for the collaborative model to be assembled correctly.

5. Students should be taught to test, evaluate and refine their ideas and products against a specification, taking into account the views of intended users and other interested groups (KS3)
When creating a new product, prototypes are made so that designers can physically test their solutions. The problem we see today is that it can cost thousands of pounds and weeks of waiting to get hold of a prototype. With 3D printing, you can have a prototype design within a matter of hours! So what does this mean?… It means that designers can create a prototype, then refine their idea and repeat the process over and over again in a cost and time efficient manner.
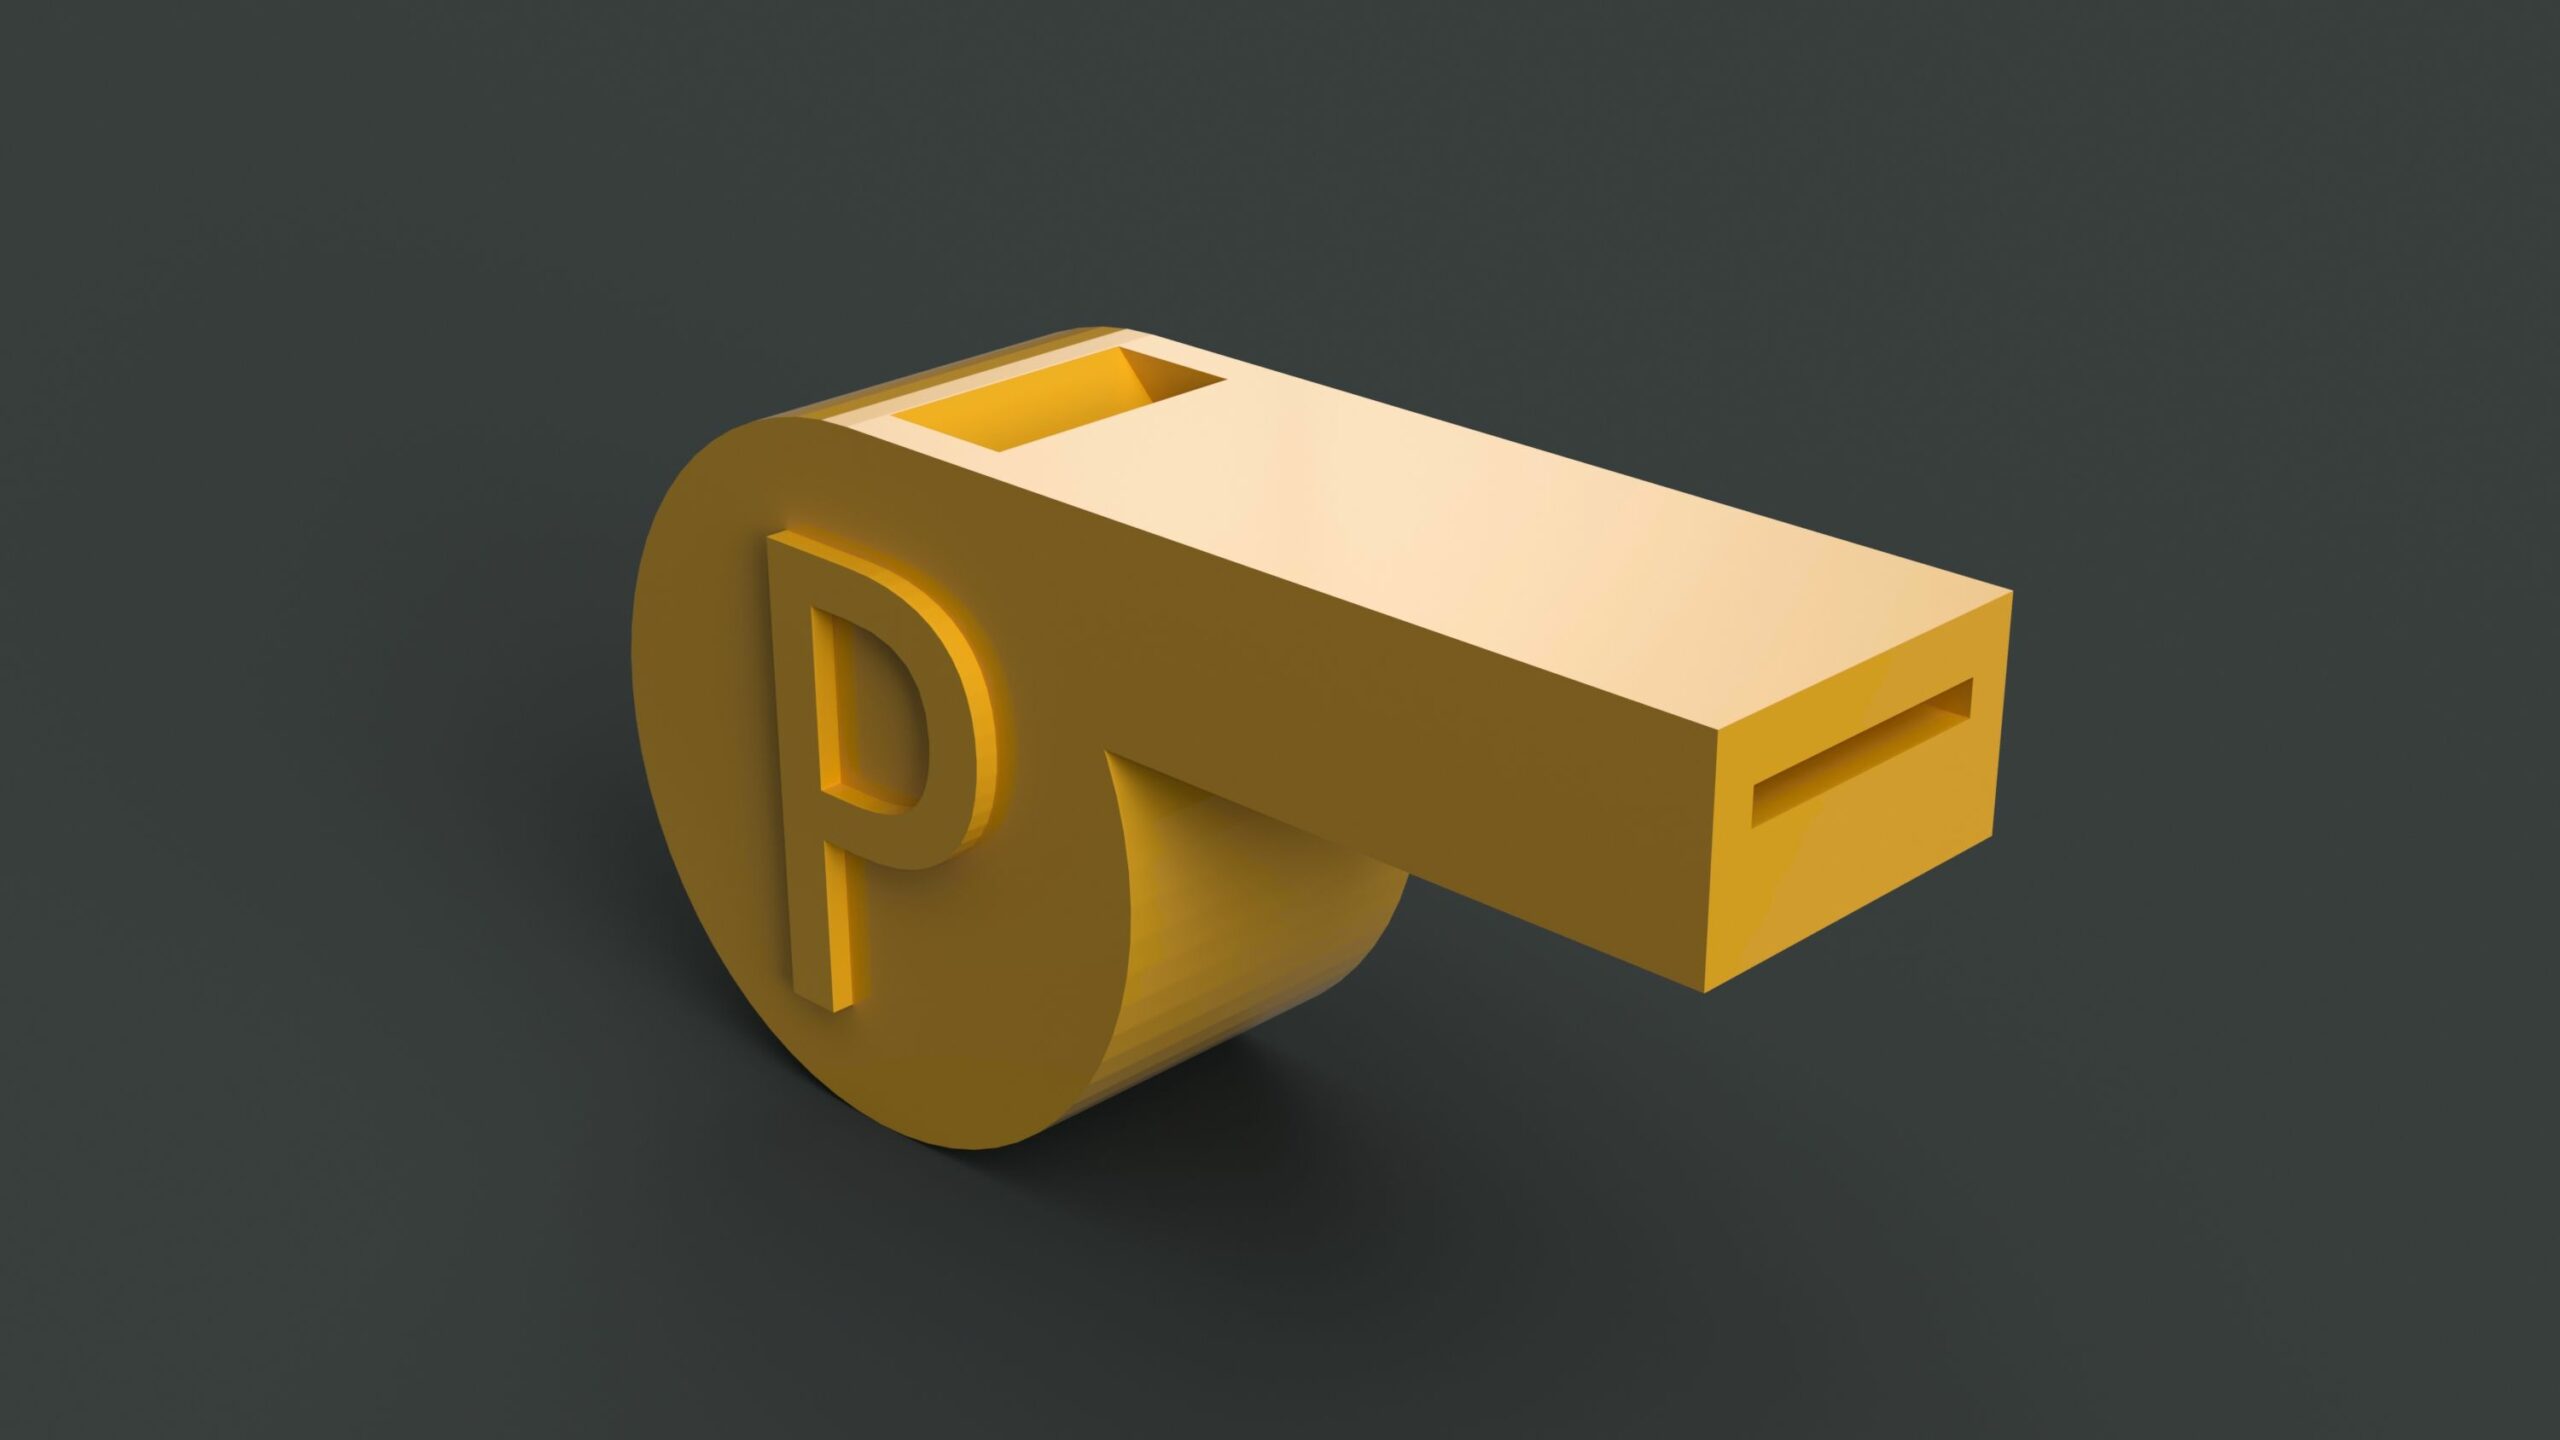
The below example shows a whistle design lesson, where students are challenged to create the loudest whistle. The lesson involves students creating several iterations of their designs, testing as they go along.
We hope you found inspiration in the above examples! Each of the examples shown are lesson plans included in the PrintLab Classroom curriculum platform. Start a 7 day free trial here!