My 3D Printing Journey so Far | by Michael Tang
In today's post we have a guest blog from Michael Tang, teacher at Kameyosek School in Alberta, Canada. Michael was introduced to PrintLab's Certification Course and curriculum by our partner, Imagination Technology, who are doing an amazing job of supporting hundreds of Canadian teachers with 3D printing. Over to Michael, who will be telling us about his 3D printing journey so far.
5th November 2018 • Case Studies
About Myself
My name is Michael Tang and I teach Grade 3 part-time at Kameyosek School. When I accepted the position, I was also told that the school had a 3D printing club that they were looking for someone to lead. This greatly intrigued me since I have always been interested in technology but I did not have a chance to work with 3D printers. In preparation for leading the 3D printing club, I recently began learning about 3D printing and today I’ll be sharing my views and journey with you.

My Thoughts on 3D Printing in Education
I didn’t know that the technology has been around for a while already, but has become affordable in the last few years. This is good news for hobbyists and education because that allows schools to do something like a 3D printing club. I think it’s awesome that schools are introducing 3D printing to children at the elementary level. Their imagination combined with their interest for working with technology will surely produce creative ideas. 3D modeling is a useful skill for the modern workplace because it allows anyone to represent their ideas that can viewed from all perspectives with intricate details if required. As our world becomes more digital, I can definitely see modeling as a basic skill that employers look for as the students we teach today enter the workforce in the near future.
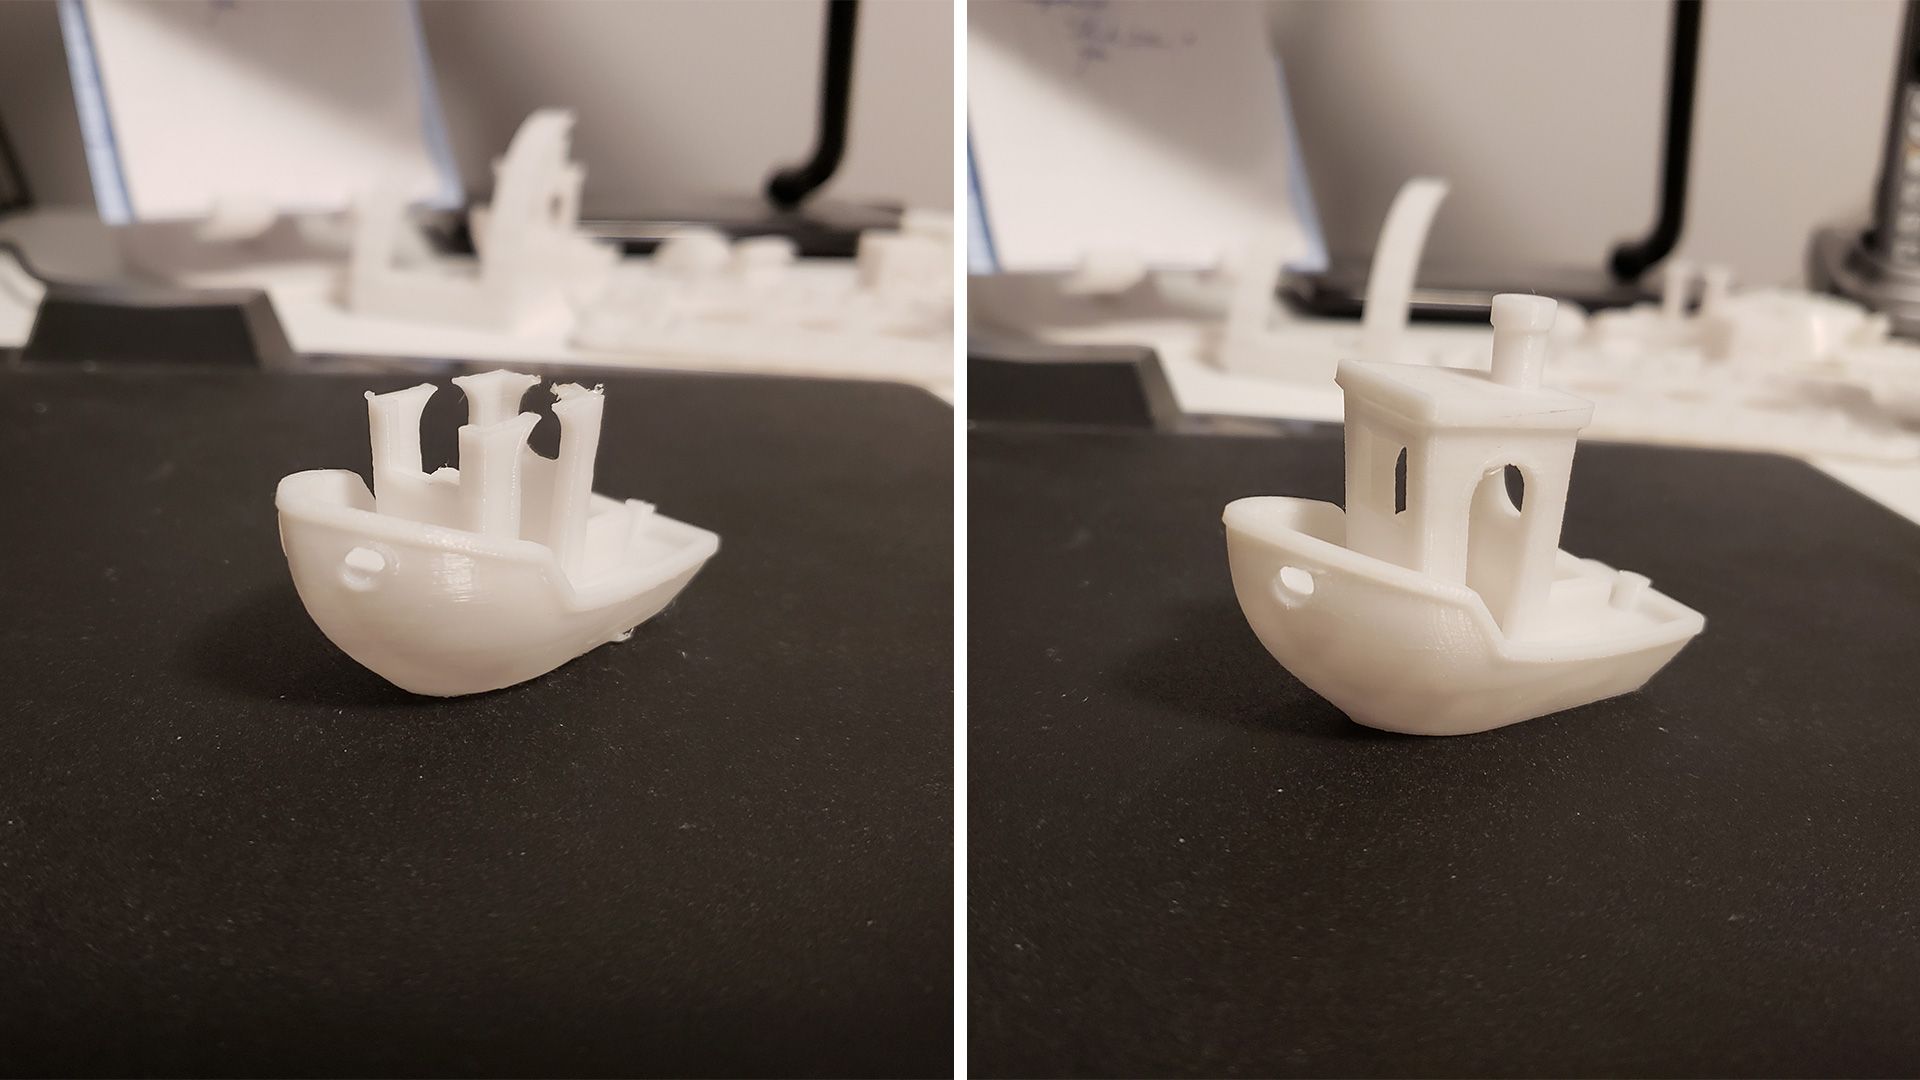
There are still tons of limitations with 3D printing, and the best way to discover them is to actually see your prints fail. With the significant fall in prices of 3D printers, it is quite possible to buy a printer of your own to try at home. Through seeing how my prints failed from models that I found on Thingiverse, it really helped me to learn about different aspects of 3D printing such as overhangs, the importance of a leveled bed, and infill.
The PrintLab Certification Course
As part of my learning process, I recently participated in PrintLab’s Certification Course. Doing the course was a really good introduction to 3D printing and got me even more interested. I was a bit skeptical at first of how a self directed course would motivate me to learn more about 3D printing. However, after I was introduced to the course by Chris from Imagination Technology, I became more and more interested to learn about all the different aspects of 3D printing. Going through all the modules got me thinking about how I could apply this technology to make learning more hands-on and engaging for students.

The final assessment of the certification course involved submitting a lesson plan structure of my choice. In the grade 3 science curriculum, one of the units was to do with building structures such as bridges. I knew right away that 3D printing would be a cool way to integrate the technology which will surely engage the students. Therefore I opted to base my lesson structure on this and here was my submission called ‘Building Bridges’:
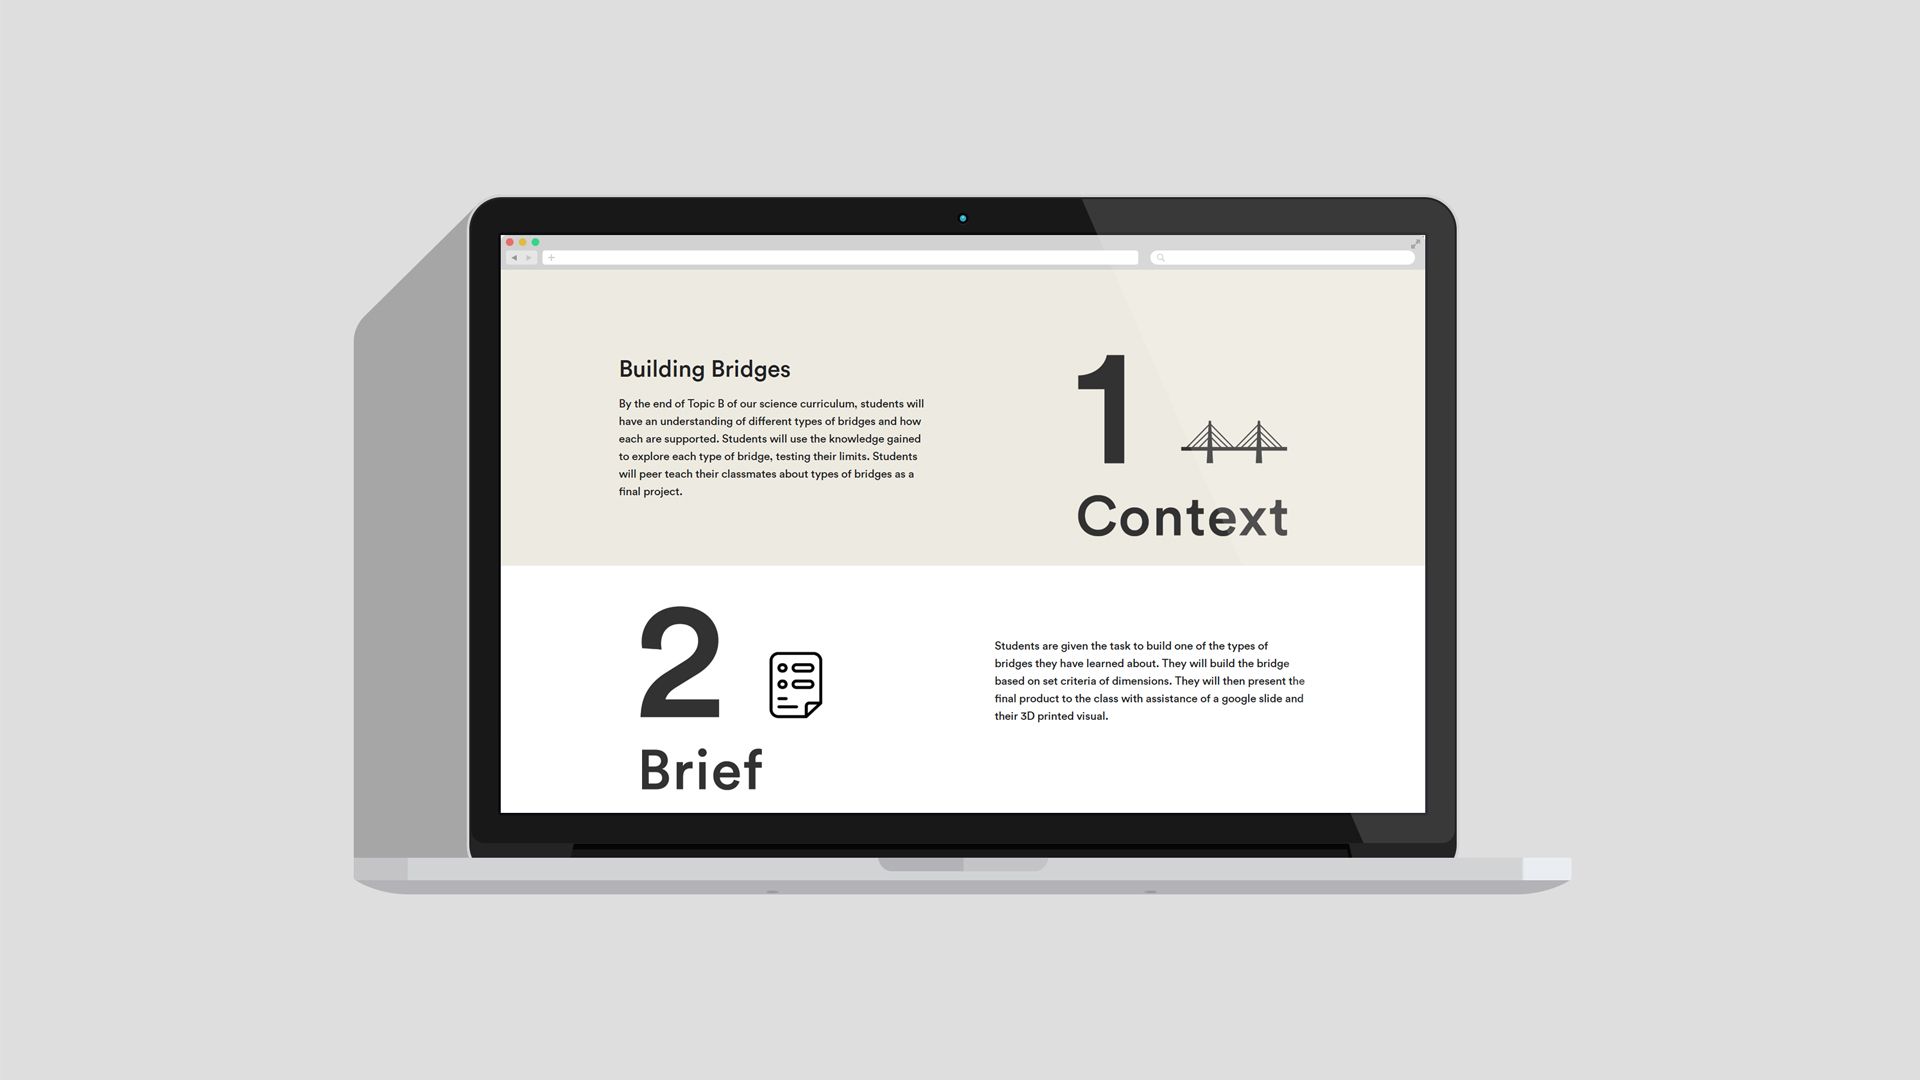
STEP 1: Context
By the end of Topic B of our science curriculum, students will have an understanding of different types of bridges and how each are supported. Students will use the knowledge gained to explore each type of bridge, testing their limits. Students will peer teach their classmates about types of bridges as a final project.
STEP 2: Brief
Students are given the task to build one of the types of bridges they have learned about. They will build the bridge based on set criteria of dimensions. They will then present the final product to the class with assistance of a google slide and their 3D printed visual.
STEP 3: Concept
Students will need to plan out their bridge as a group. Accurate sketching with measurements is modelled and then students will sketch their model according to criteria given.
STEP 4: Design
Assuming students have a basic understanding of how to model in TinkerCad, students are guided by the teacher to use advanced techniques more specific to building their models. Students are then set off to design the bridge based on the sketch they have created in the previous process.
STEP 5: Make
Assuming resources are available, each bridge will be printed for students to accompany their presentation. Students will prepare their presentation while their bridges are being printed.
STEP 6: Analyse
Students will present their google slide along with their 3D bridge. Students may contribute ideas how how it may of been made stronger (how it could be improved, etc).
STEP 7: Iterate
Students may take the feedback given by their classmates to improve their model on the software even if it will not be printed.
A big thank you to both Michael and Imagination Technology for this blog. It was fantastic to see a teacher who is relatively new to 3D printing, plan his own lesson structure! We look forward to sharing more of Michael’s work with you in the coming months. If you’d like to learn more about PrintLab, get started on a free trial here!