Managing 3D Printing in the Classroom with Tinkercad Collaboration Tools
Looking for more efficient ways of managing 3D prints in the classroom? If so, this blog is for you! We all know how challenging it can be to oversee the 3D printing process for large groups of students, and this was the case for our pioneer Aaron Sottile, until he developed an efficient and streamlined method. Over to Aaron to explain more...
8th July 2024 • Tips
Guest blog by Aaron Sottile
Hello everyone! My name is Aaron Sottile and I’ve been a PrintLab Pioneer for several years now. I get to teach 8th Grade Science and Project Lead the Way STEM electives, Design & Modeling and Medical Detectives at Calavera Hills Middle School in Carlsbad, California. In many of our projects, we use 3D printing, which as many of you know has its challenges in the classroom. I had a bit of an epiphany this year, which I thought could help others out too, so I thought I’d share it with the PrintLab community!
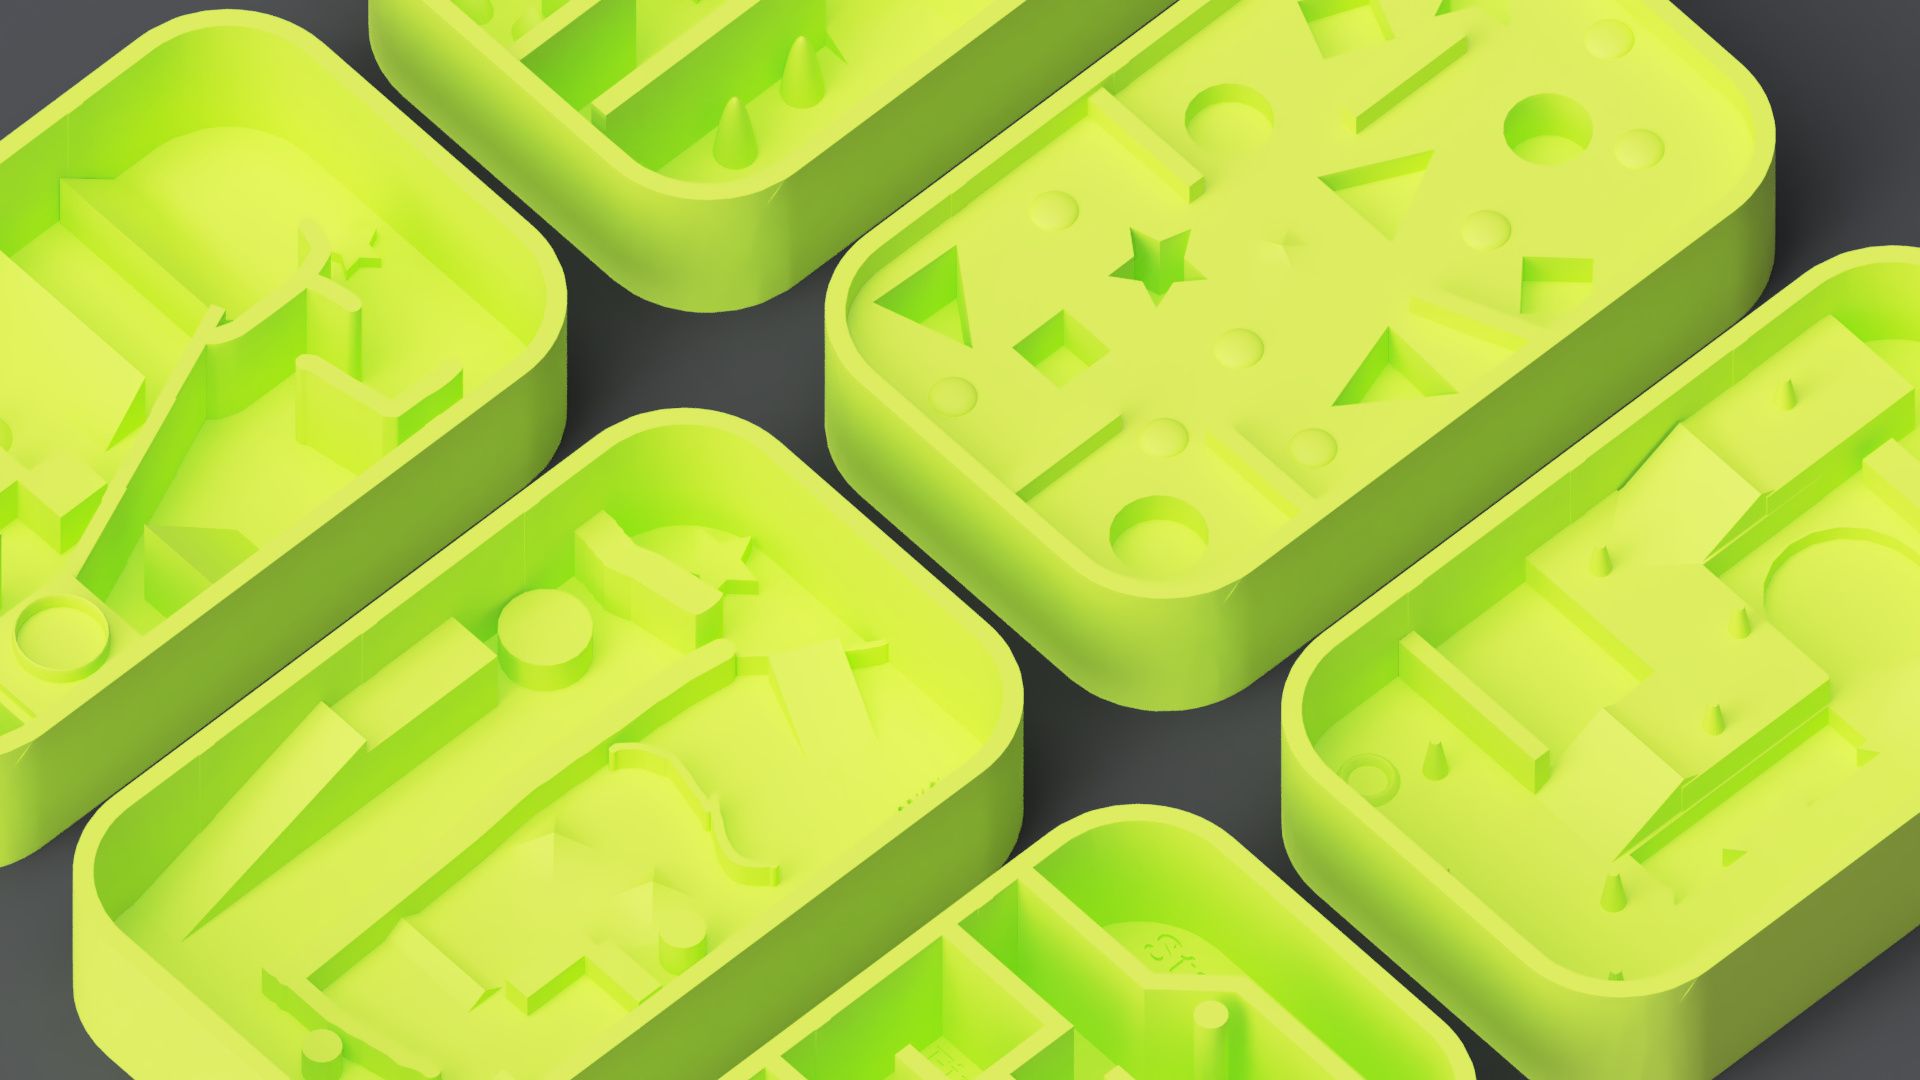
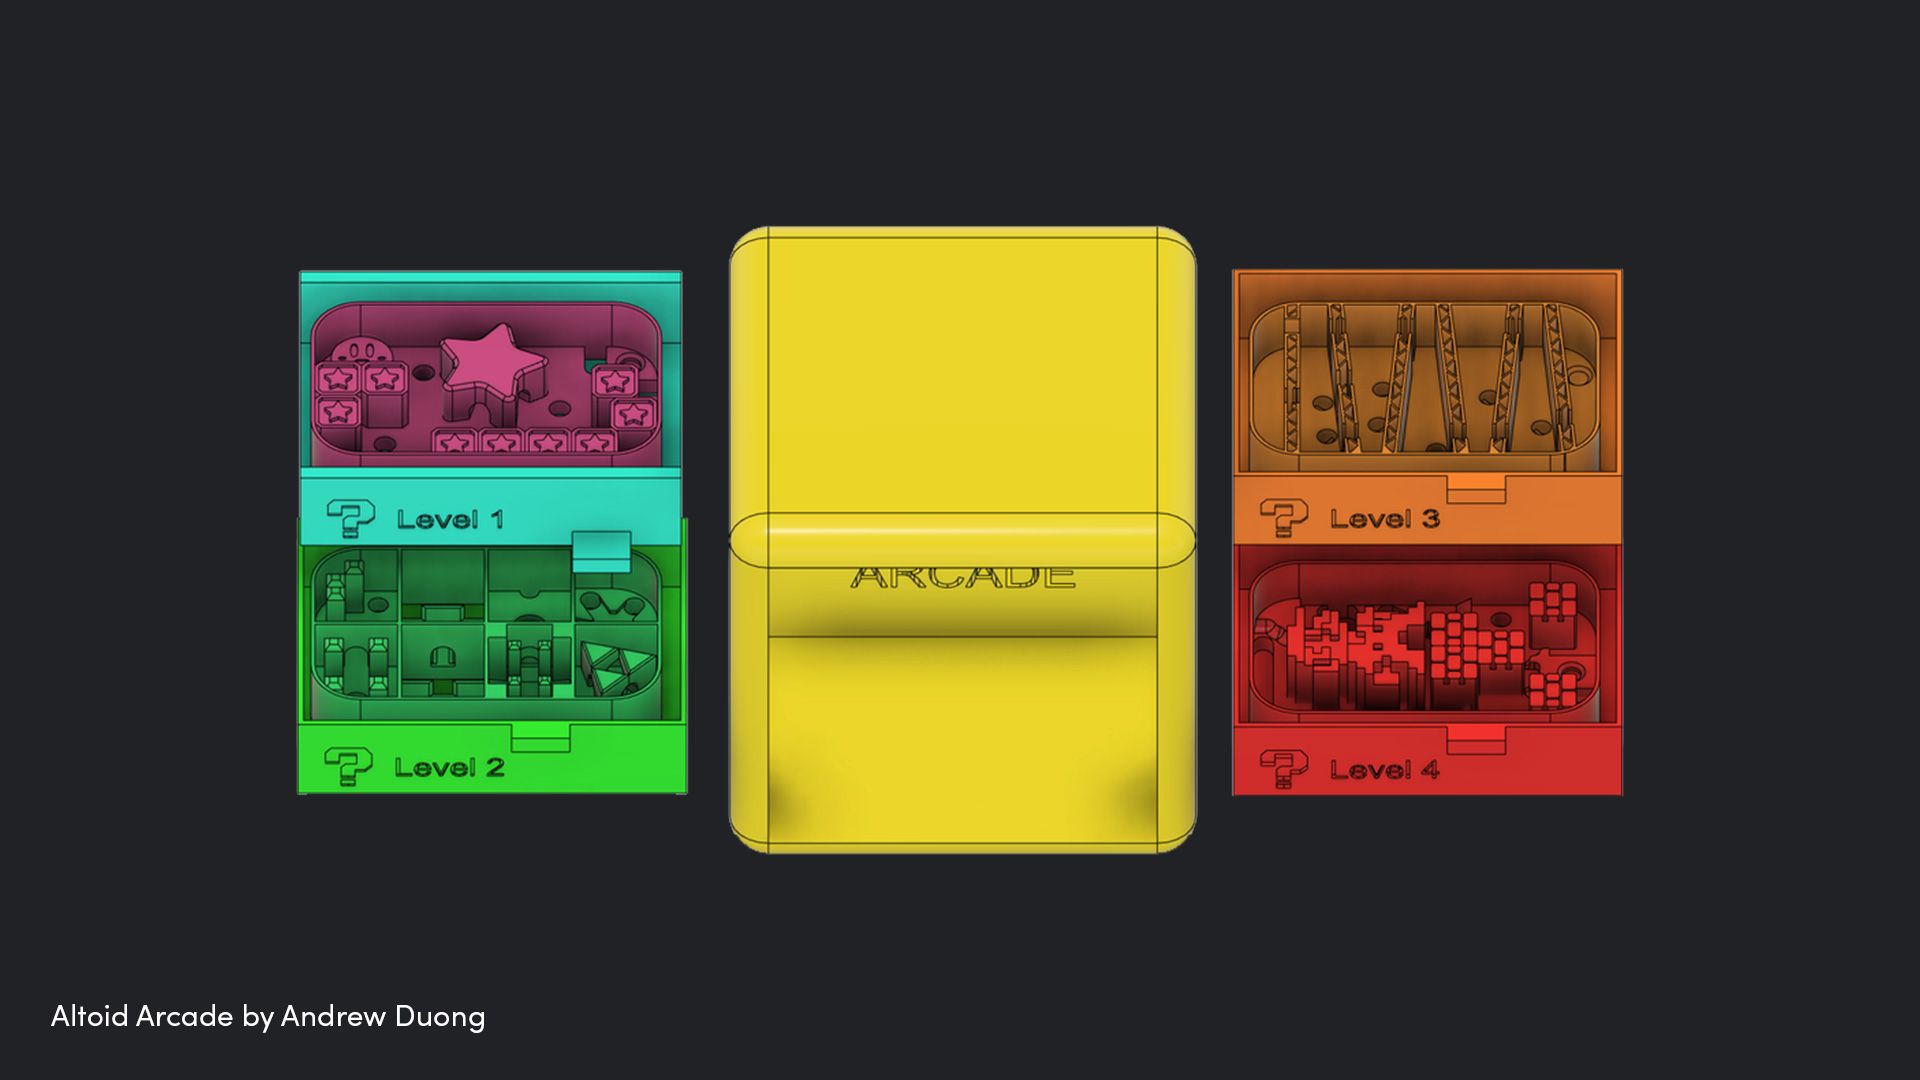
Let’s begin with the challenge – this came to me when I had students creating mini “Altoid Arcade” marble mazes in a project inspired by this instructables find (shoutout to Andrew Duong!). It’s a fun, creative challenge that has students rapidly designing and working within set criteria & constraints.
As many teachers of 3d printing & design courses find, printing individual projects can be rather time consuming and printing designs for each student can be prohibitive. I typically have TA’s assemble batches of objects to print, or assemble those batches myself to print multiple student projects on single print beds to save time. This extra step can get pushed back due to other classroom realities, delaying project completion.
The epiphany I had this year was that I could use Tinkercad’s built- in collaboration settings to have my students assemble the batches of their objects to print for me, saving TONS of time. This had some cool side benefits of allowing students to see one another’s designs for inspiration and allow for rapid sharing and review of designs before printing. I also had multiple eyes on each batch so we caught some possible sources of print errors ahead of time, too!
My solution in a nutshell is to create a number of printbed/blank designs in Tinkercad that match the number of print runs needed to get each student design printed. I then share the links to collaborate on these beds with students using a shared Google sheet where students can access the collaboration links to the print beds and see which print bed they are assigned to and where to place their designs.
Students work on their designs independently in their own Tinkercad accounts, group their designs and then copy & paste them into the shared print beds when they are ready to print. We then review the designs once projects are completed, analyzing for printability and then we are ready to slice and print the student projects!
Here’s a little more detail on each step of the process I took with the marble maze project…
Initial Considerations
When approaching a design/print project, I need to consider the number of printers I have available for the project and the number of students that will be printing. Are they going to be printing individually or in teams? How large will each print need to be? Will the prints be single parted or have multiple components? I like to encourage students to not use supports on their prints if this can be avoided by design, as it saves time and forces students to be creative in their approaches when it comes to print orientation and design.
For this project, I wanted each student to design and print their own mazes. I have 2 Bambu X1C printers, 2 Dremel 3D45 printers, and 1 Creality CR5 printer available for the job. With 36 students in the course, this meant that I could work through the entire job using 6 print beds.
Setting the Criteria and Constraints
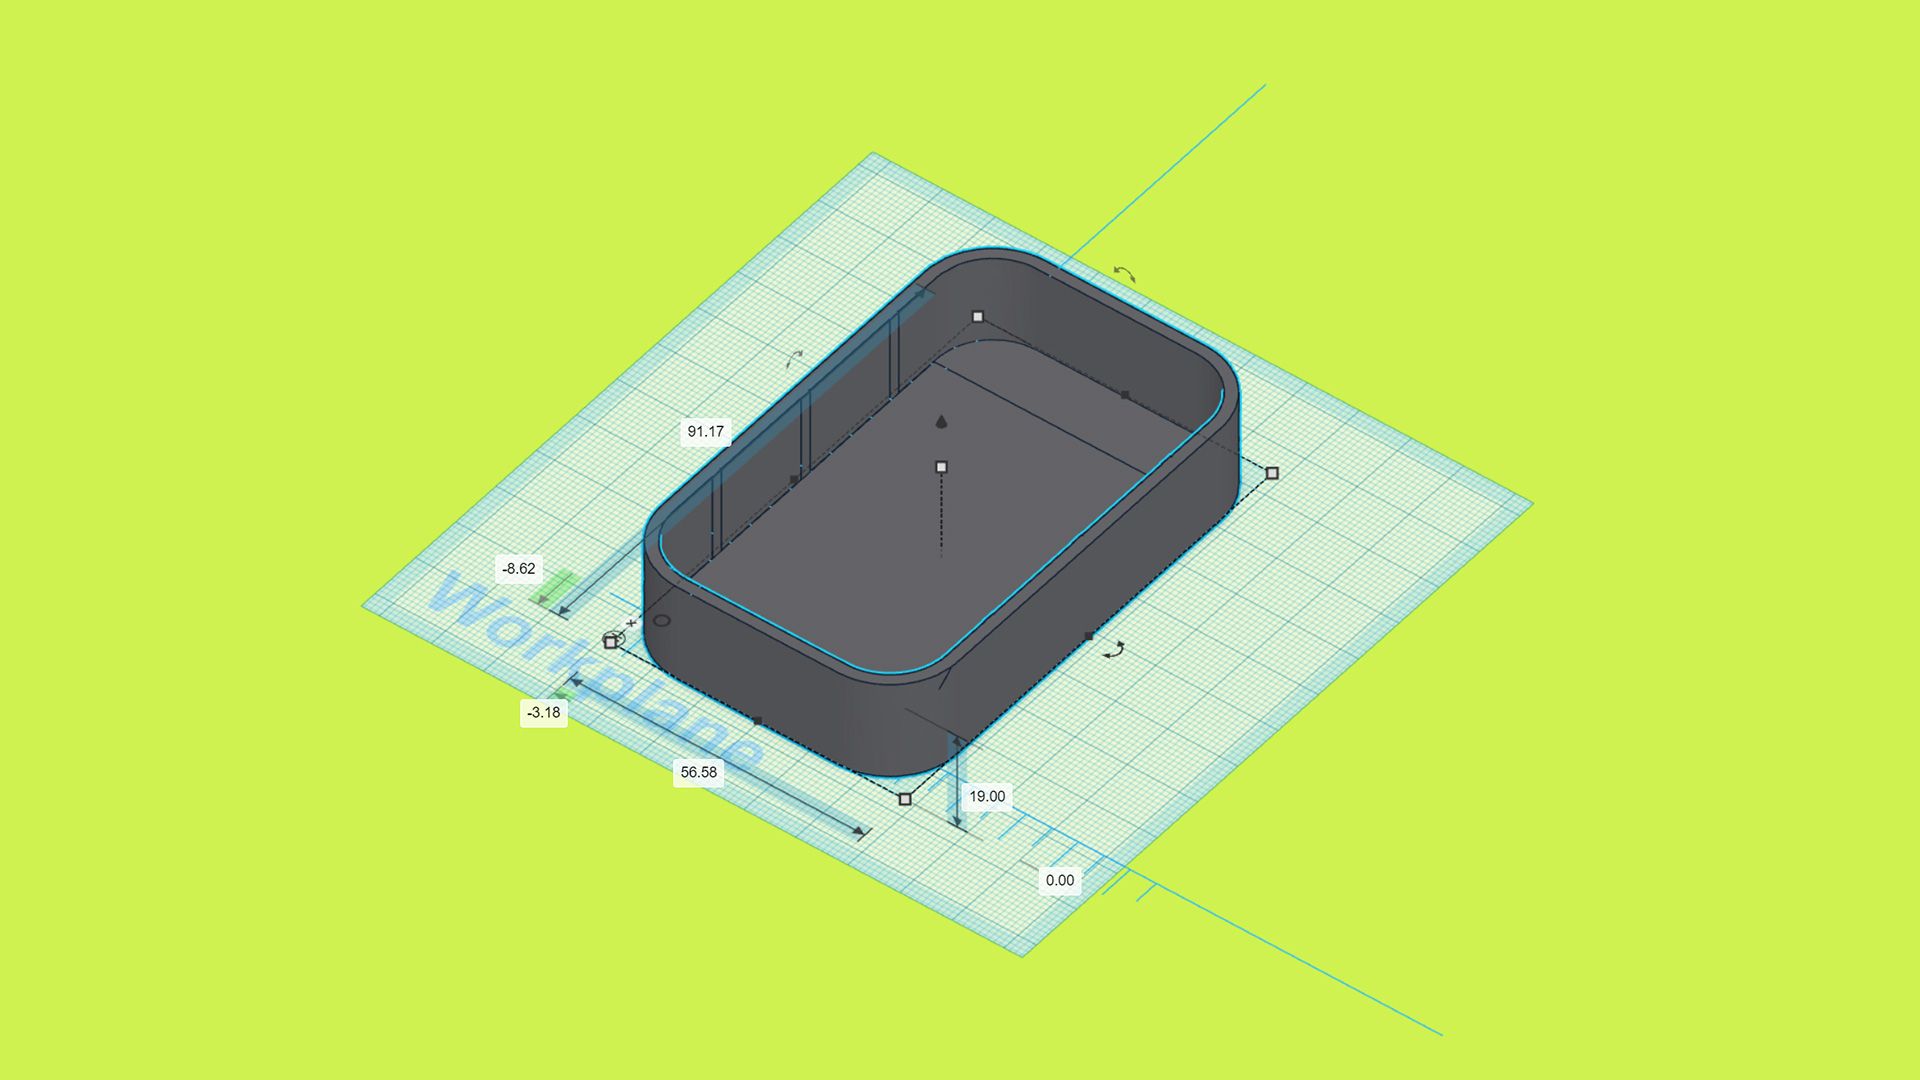
As a starting point for students, I created this base template for the mazes. These were the project criteria and constraints I presented to the students:
-
Maze must be designed in Tinkercad.
-
Maze must allow for the passage of a 3/16 inch (4.8 mm) ball bearing to move from a designated starting to finish point by the user tilting the maze.
-
Maze needs to have at least 4 obstacles.
-
Maze must print flat on the build plate without the need for support.
Creating the Shared Print Beds
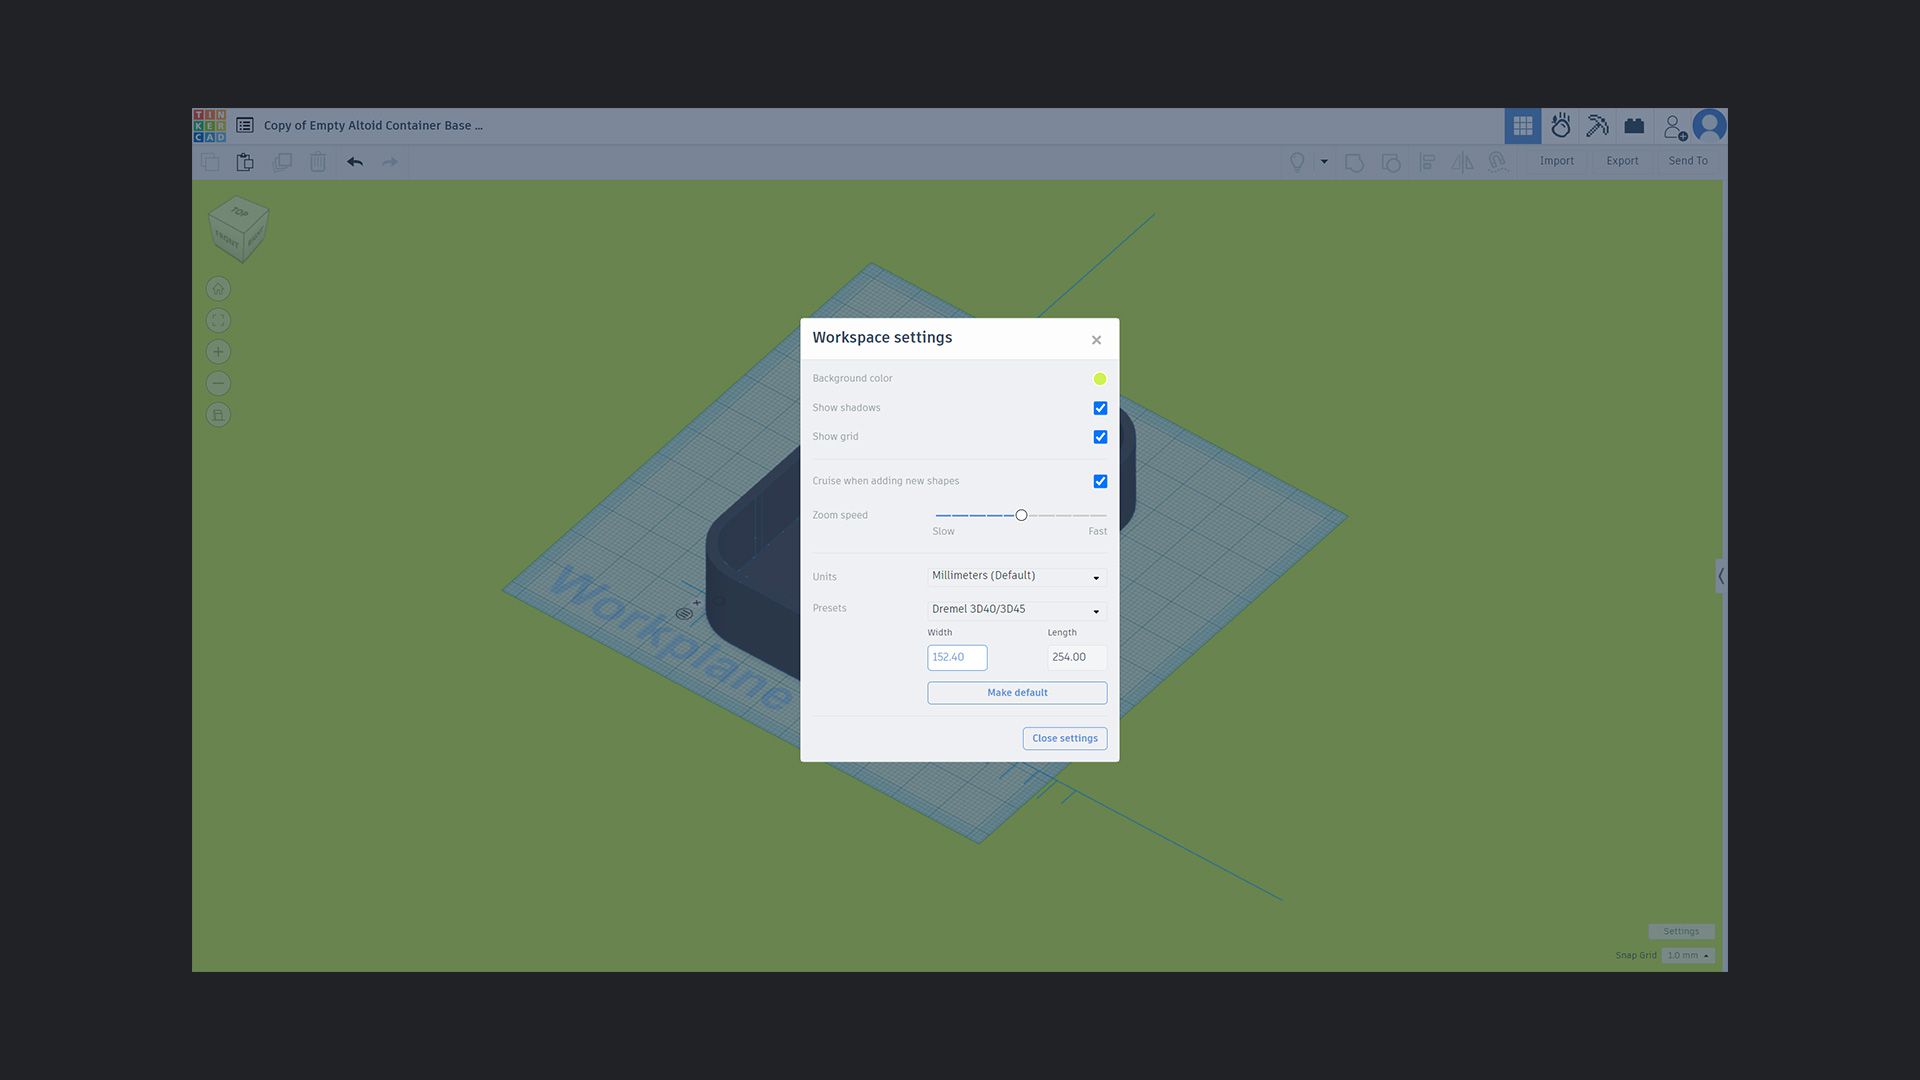
In Tinkercad, setting workplane sizes to match the print beds of specific printers is a simple process using the “settings” button near the project workplane. For my Dremel printers, there are preset work plane sizes, for my Creality and Bambu printers, I simply looked up the print bed sizes and entered them in the custom settings in millimeters. For the Bambu X1C machines, I used a workplane size of 228 x 228 millimeters. For the Creality bed, I used 225 x 300 mm workplane sizes.
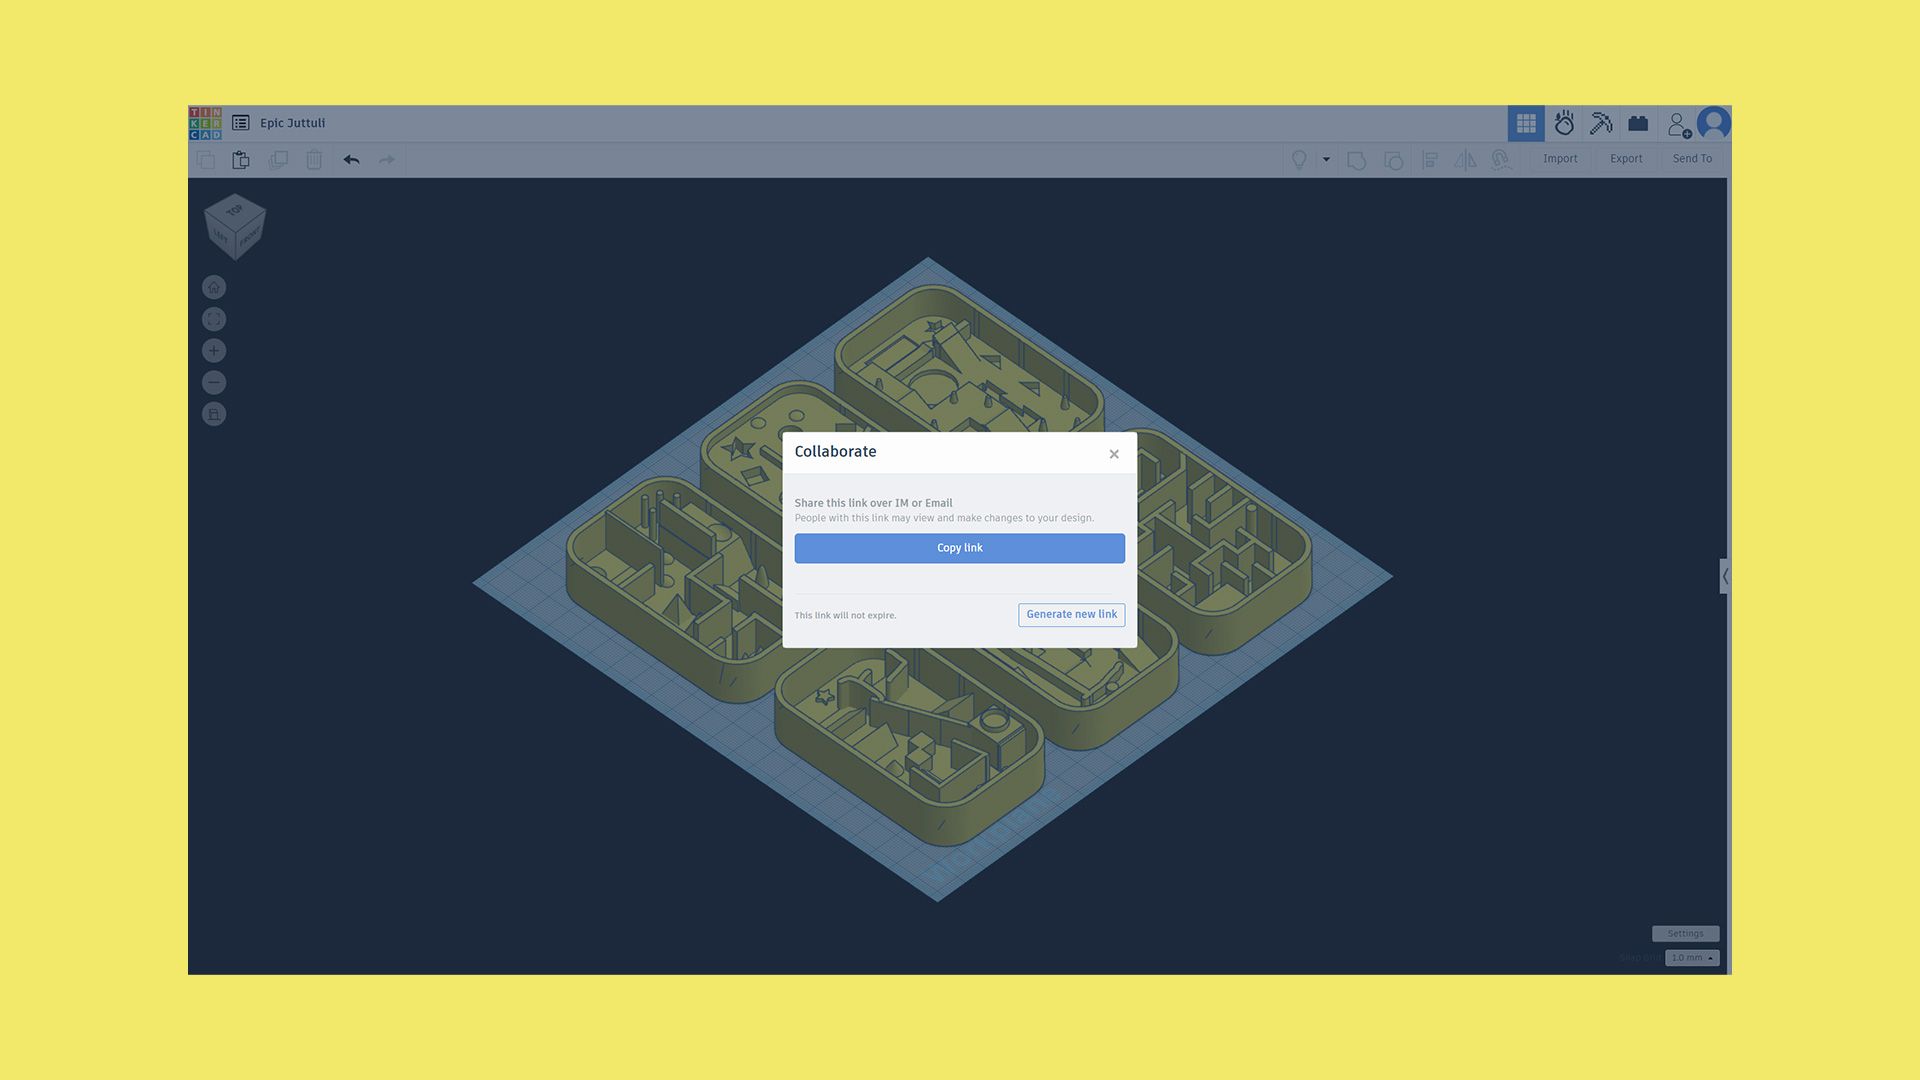
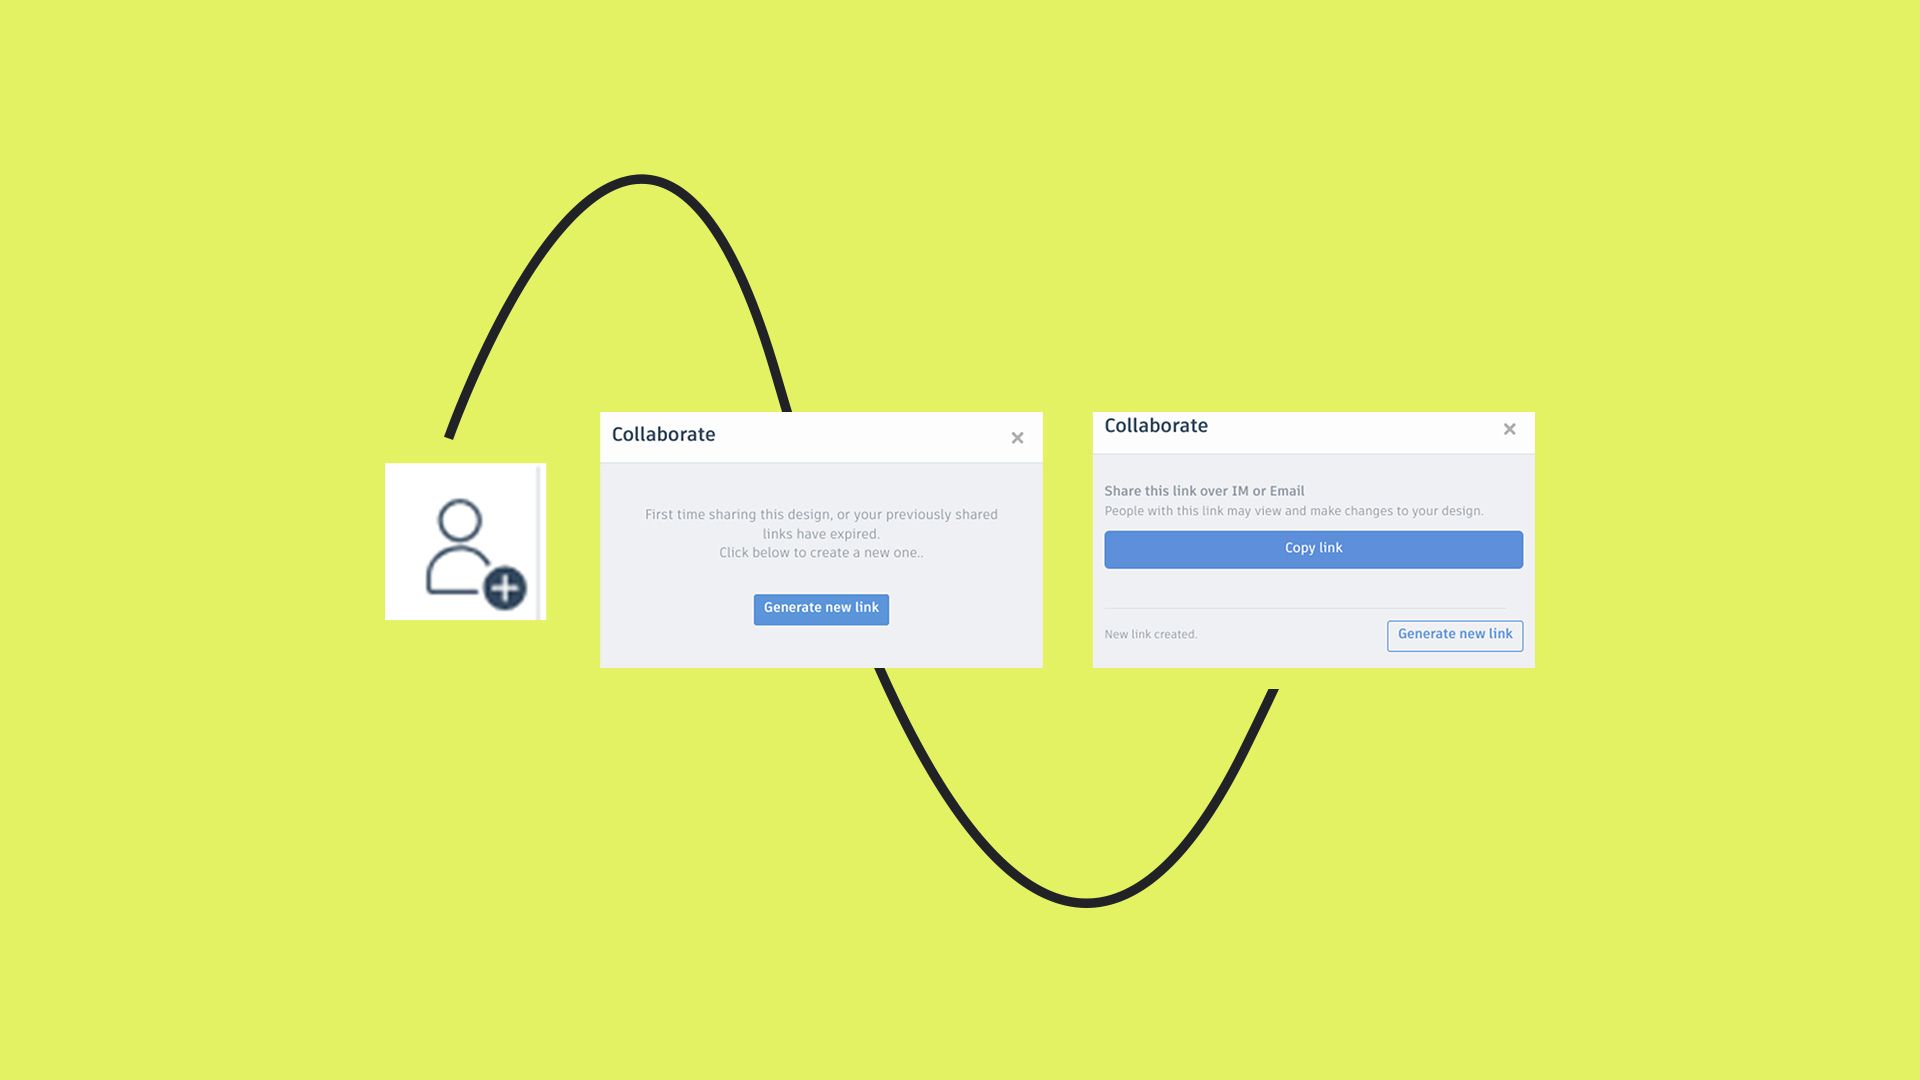
The collaboration tool in Tinkercad was the real game changer for me, this allowed me to put my students in the driver’s seat for sharing their designs and preparing the print batches for the project! This tool is straightforward to use and the links that I generated for each bed that would be a part of this project was linked directly in the spreadsheet that students used to aggregate their designs in preparation for printing!
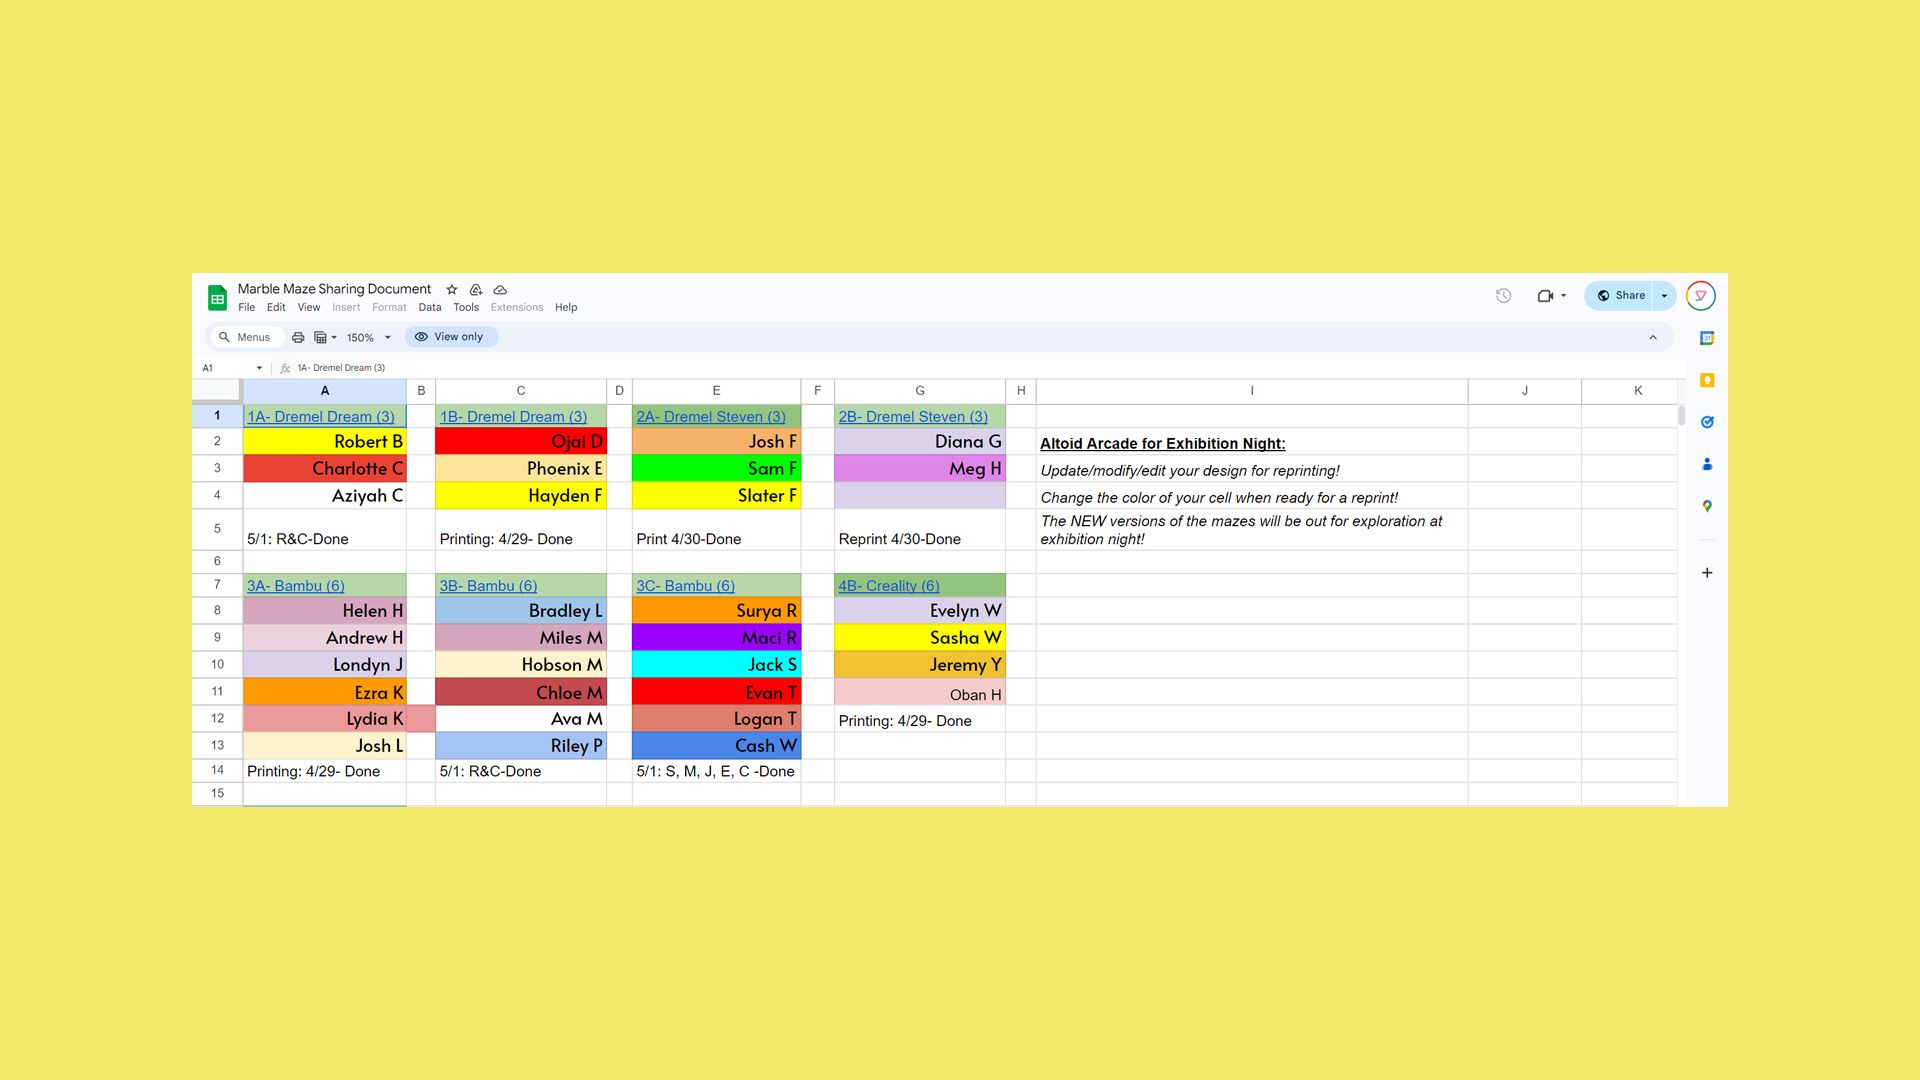
Student access to the different print beds for the project was managed using a shared Google spreadsheet, with editing rights provided to students (we build a lot of trust into this course and teach students about being responsible when working in shared workspaces- digital or otherwise!). We are a Google Classroom school, so access to the project was managed using Google Classroom. Here is what the spreadsheet looked like when done – I asked students to change the color of their cell when their maze was inserted into their assigned bed and ready for printing:
The Project Process
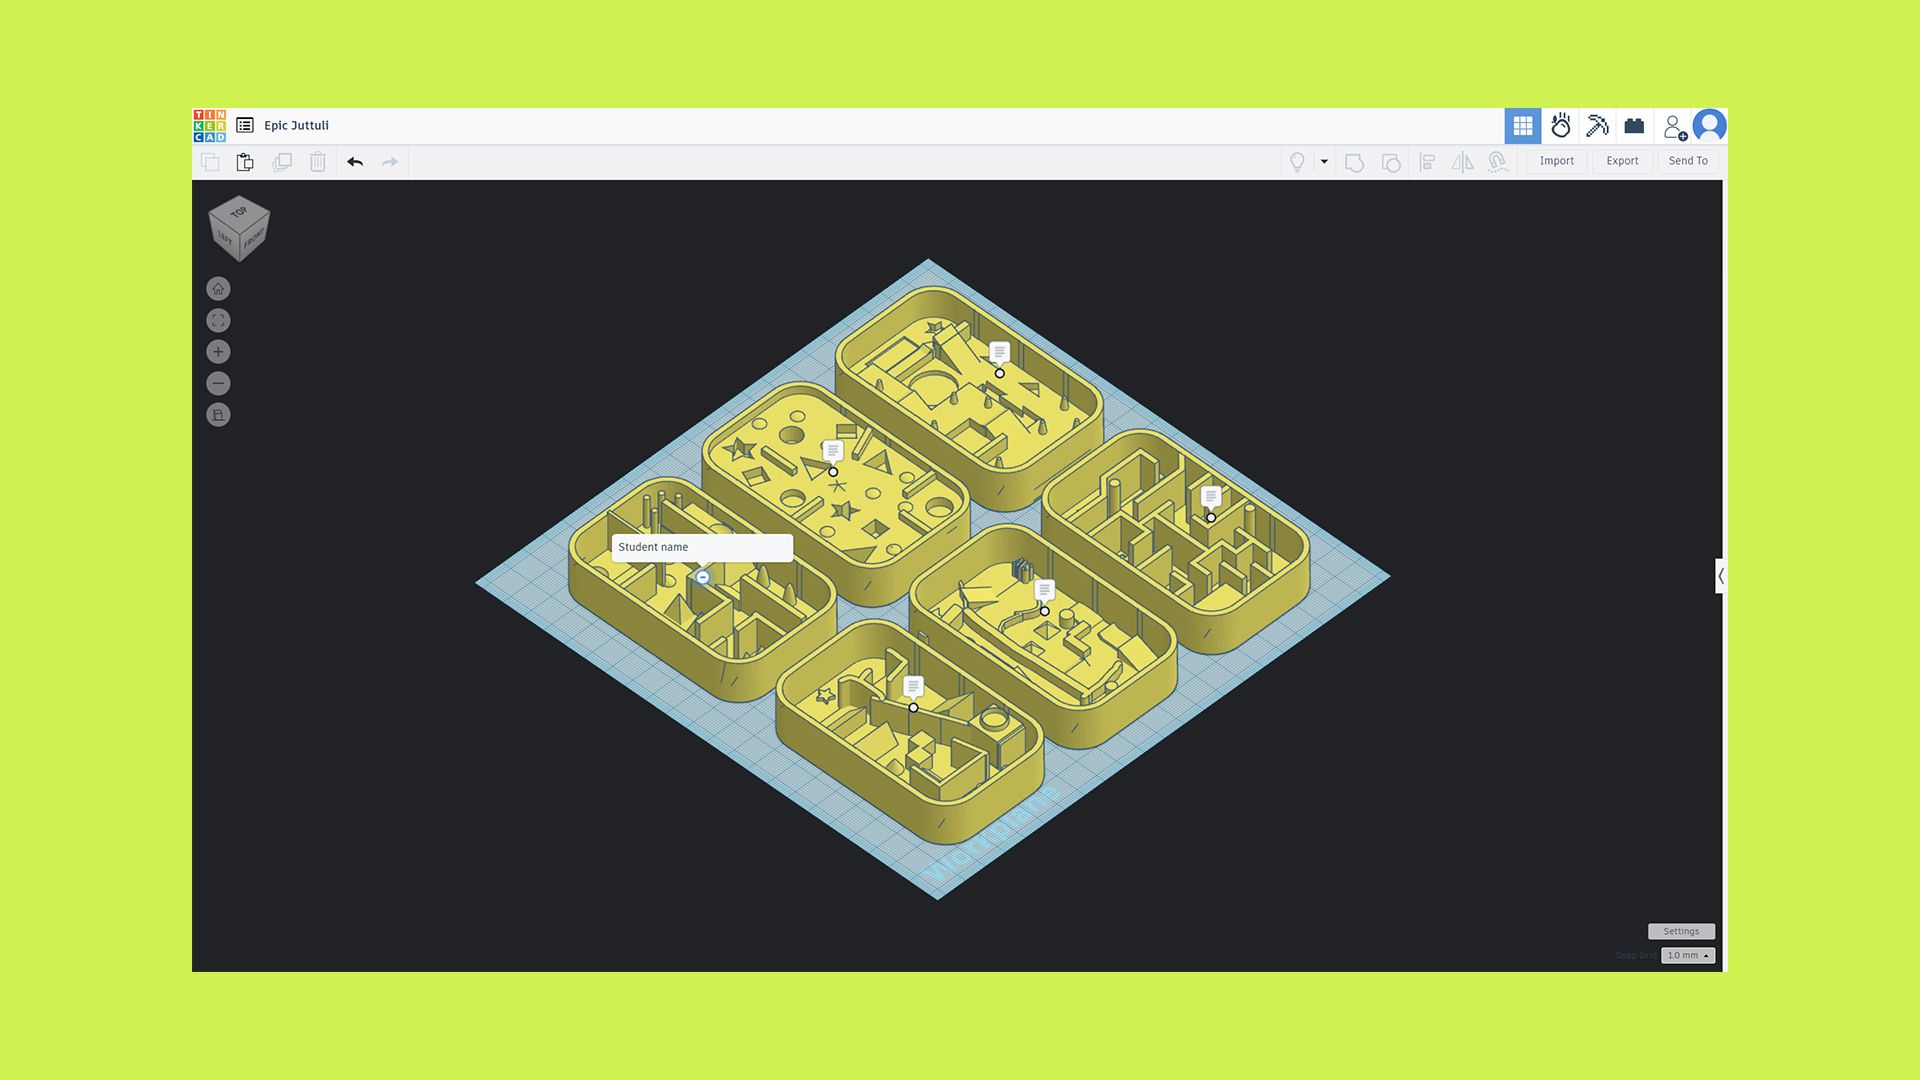
Students began by creating their mazes in their own Tinkercad accounts using the provided template and applying the project criteria & constraints. When the project was due, students copied and posted their designs into the shared print beds, replacing the blank template shapes with their own custom shapes. Grouping of their mazes before copying and pasting was essential, and students were asked to label their mazes with their names using the notes/comment feature in Tinkercad.
Conclusion
So in conclusion, this strategy helped me by collaborating with my students and engaging them in the process of developing the batches of items for slicing and printing. It benefited the students by helping them be a part of the slicing and printing of objects for the project. Sharing and reviewing designs as a class led to collaboration and inspiration for students, and I found the general level of student designs to be elevated when students were actively involved in making their designs public and reviewing designs throughout the design process.
If you’d like to check out the project documentation and instructions for the Marble Maze project, click here to create your own copy. I used this recently with PrintLab’s Spinning Tops project for a fun end of the year design challenge project with similar results, so I think this process works with fidelity and is applicable to a wide range of projects.
Looking to get started with Tinkercad in the classroom? Start a free trial to PrintLab today!