10 steps to getting started with Meshmixer for 3D Printing
Autodesk meshmixer is a fantastic free software for creating and manipulating 3D files for 3D printing. Whether you need to clean up a 3D scan, do some 3D printing or design an object, meshmixer can help. Today, we take you through 10 valuable steps to get you up and running and taking your 3D file preparation to the next level.
23rd January 2017 • Tips
Step 1: Importing a model and basic controls
This is a great place to start and you’ll be pleased to know that a range of 3D file types can be loaded in to Meshmixer including STL, OBJ, PLY and AMF. Importing a model is very simple, simply open the software, click Import and select the file you wish to load. To zoom in and out of a model you can use the scroll button on your mouse and to move around the model use the right click. Finally, Ctrl+Z is to undo and Ctrl+Y is redo
Step 2: Transforming your model
Once you load your 3D model, the next step is manipulating the model so that you can either continue to work on it effectively and make it 3D print ready or if minimal editing is required then you can simply rotate to optimise for 3D printing and export (Step 10).
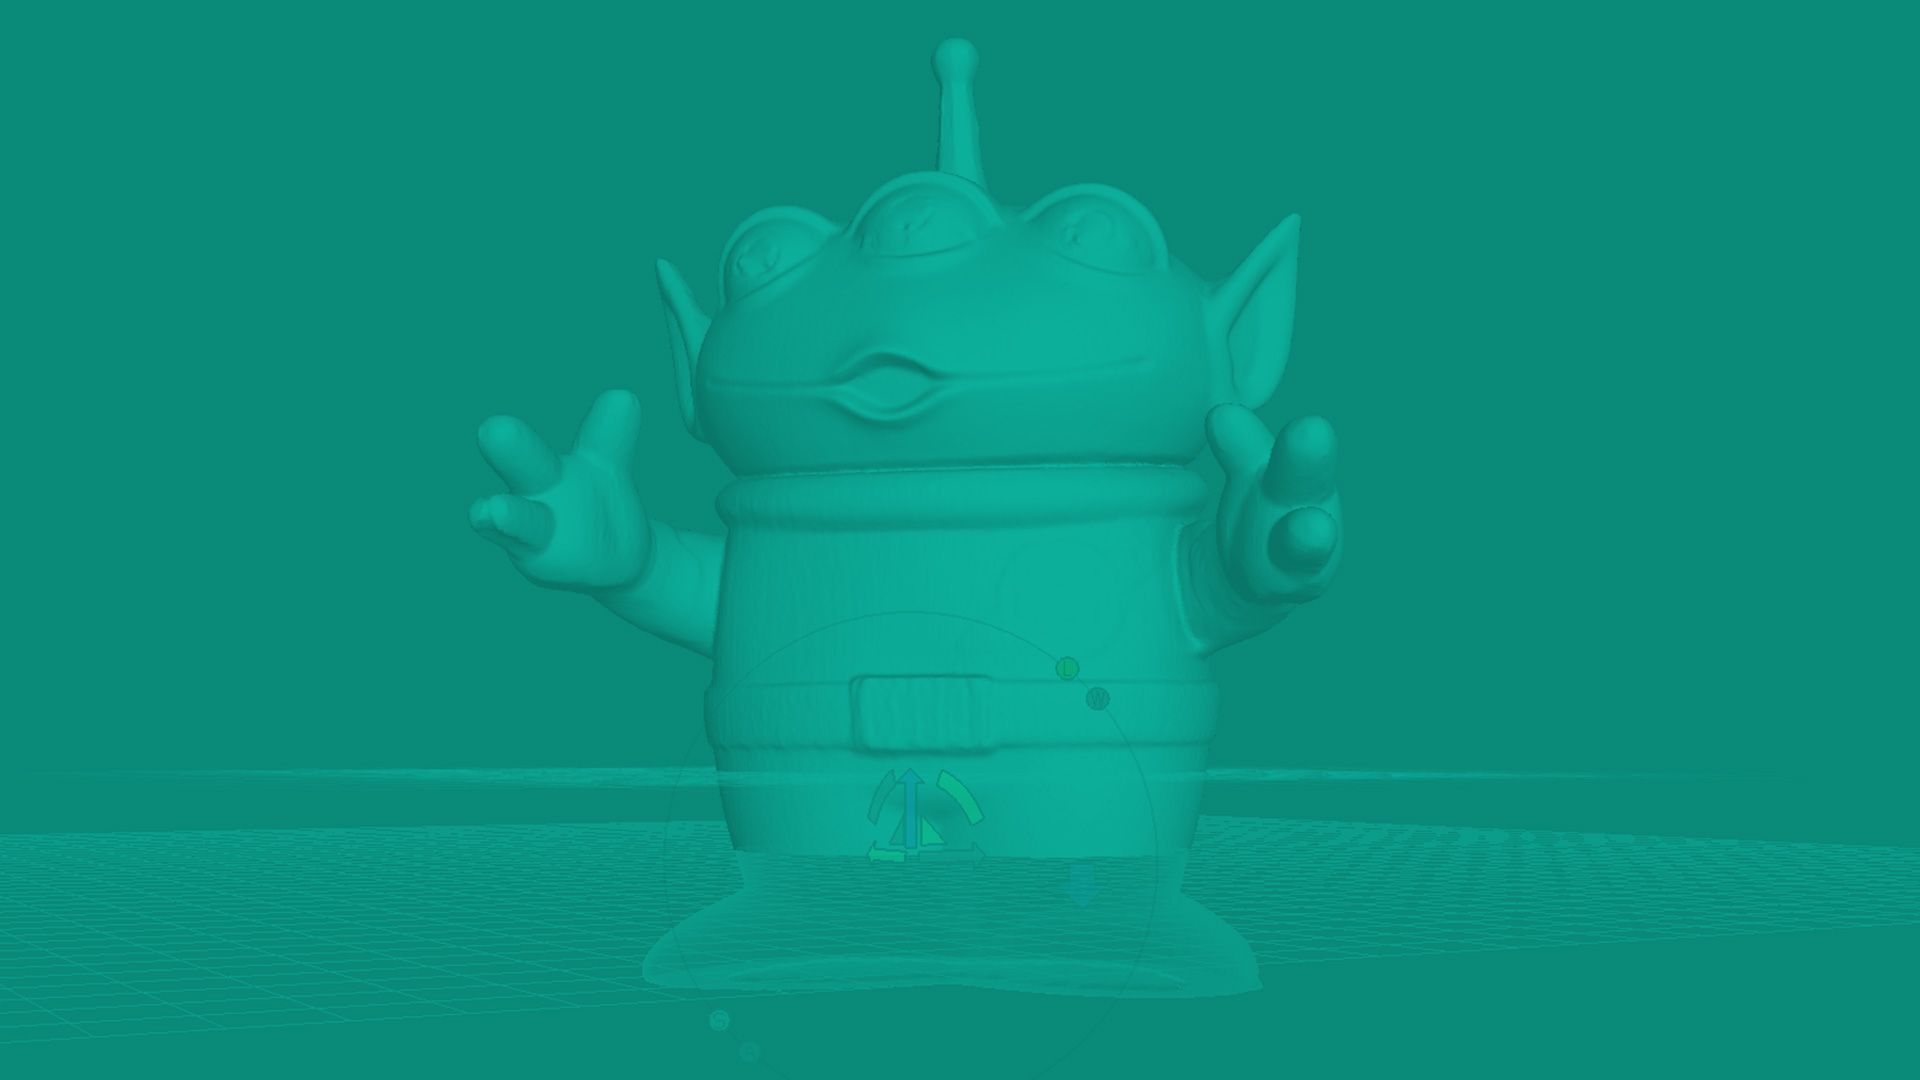
Remember when 3D printing, not crucially but ideally you want two things: Firstly, you want the object to sit flat on the build plate if possible, secondly you want minimum overhangs. An overhang is an area of a model where there is limited support underneath. Anything up to and including a 45 degree angled overhang is printable, however the more you increase this angle, the poorer the finish. You want to orientate the model in a way that overhangs are minimised. Select Edit and Transform. For rotation, simply pick one of the coloured curves (blue, green and red) to transform around that particular axis. Using transform, you can also translate along an axis and thus increase the size in one particular direction. This is done by clicking and dragging the squares at the end of each coloured arrow. Once you are happy with your transformation, click accept to save the changes.
![]()
![]()
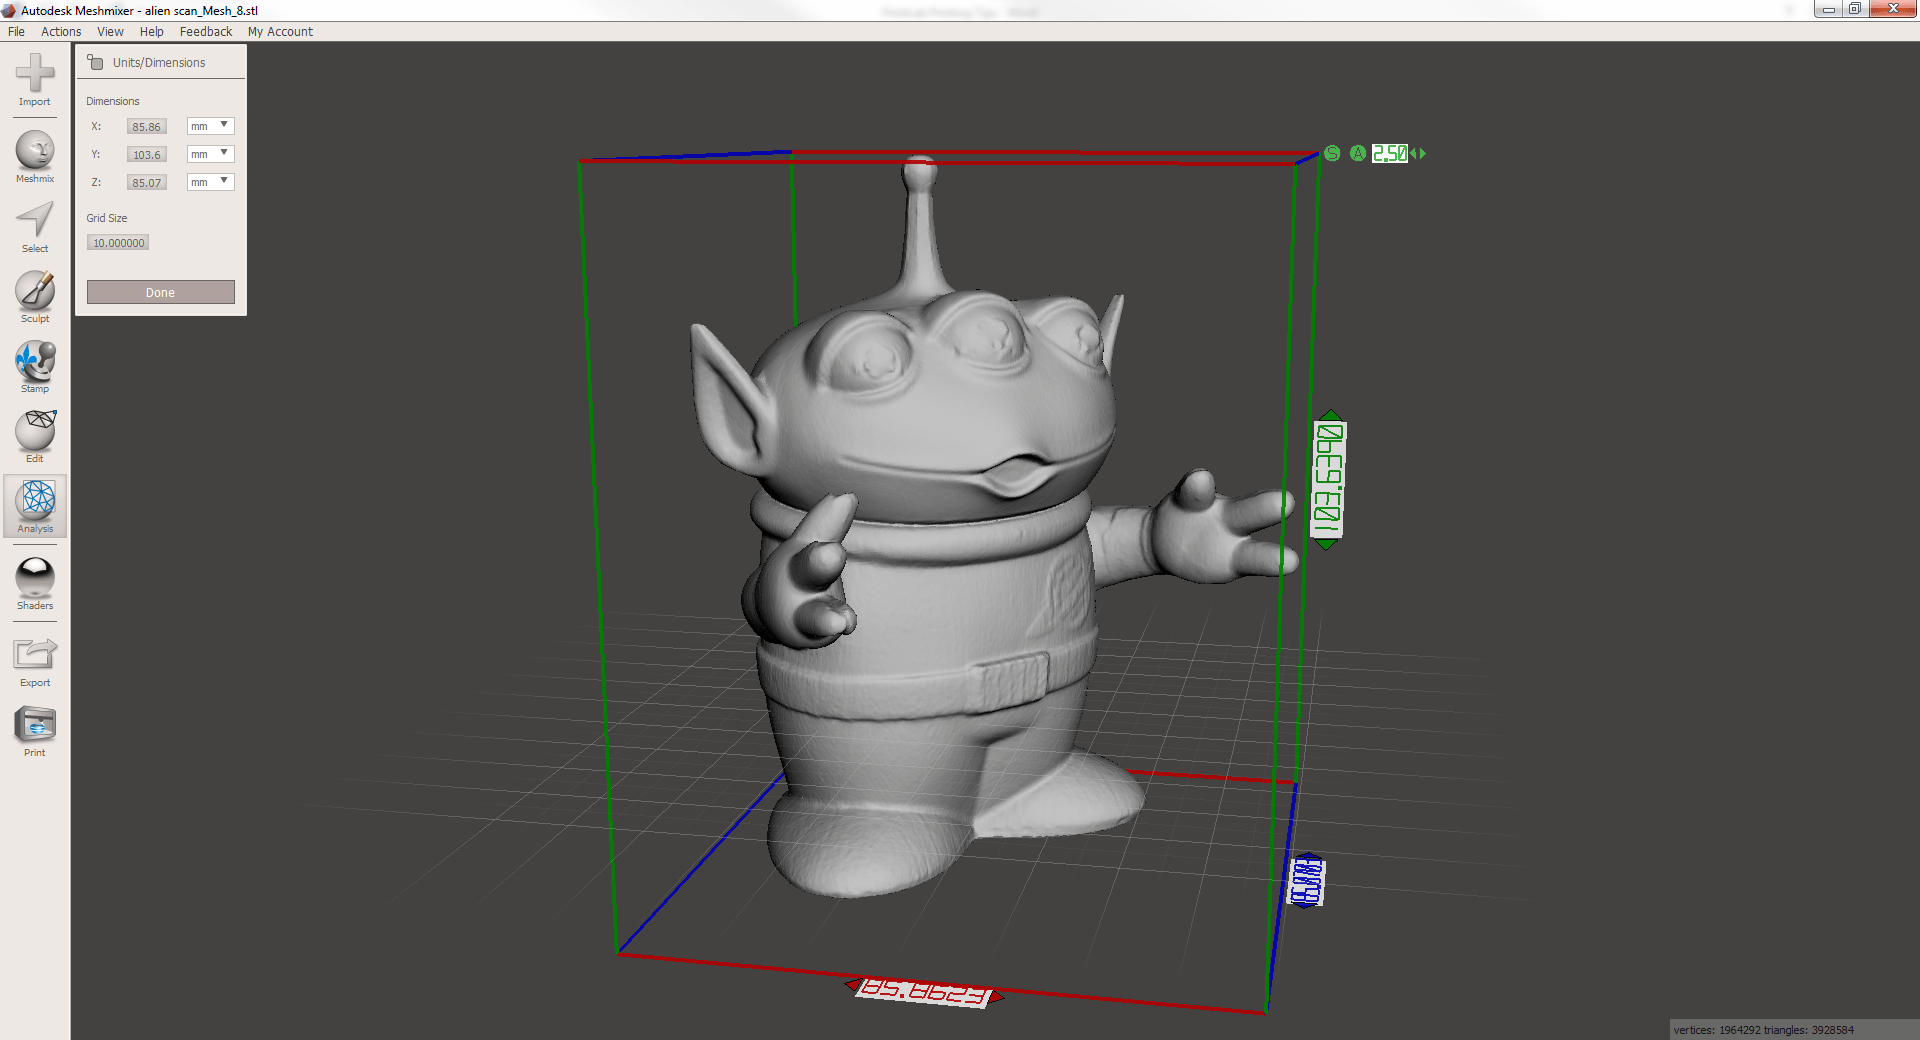
Step 3: Scaling your model
Resizing or scaling your model is usually necessary and if not it is always good to at least confirm your model size before 3D printing. This is easily achieved by selecting Analysis on the left toolbar and then selecting Units/Dimensions. You can alter the dimension along any axis and this will automatically scale your model accordingly. Once you are happy with the dimensions click Done.
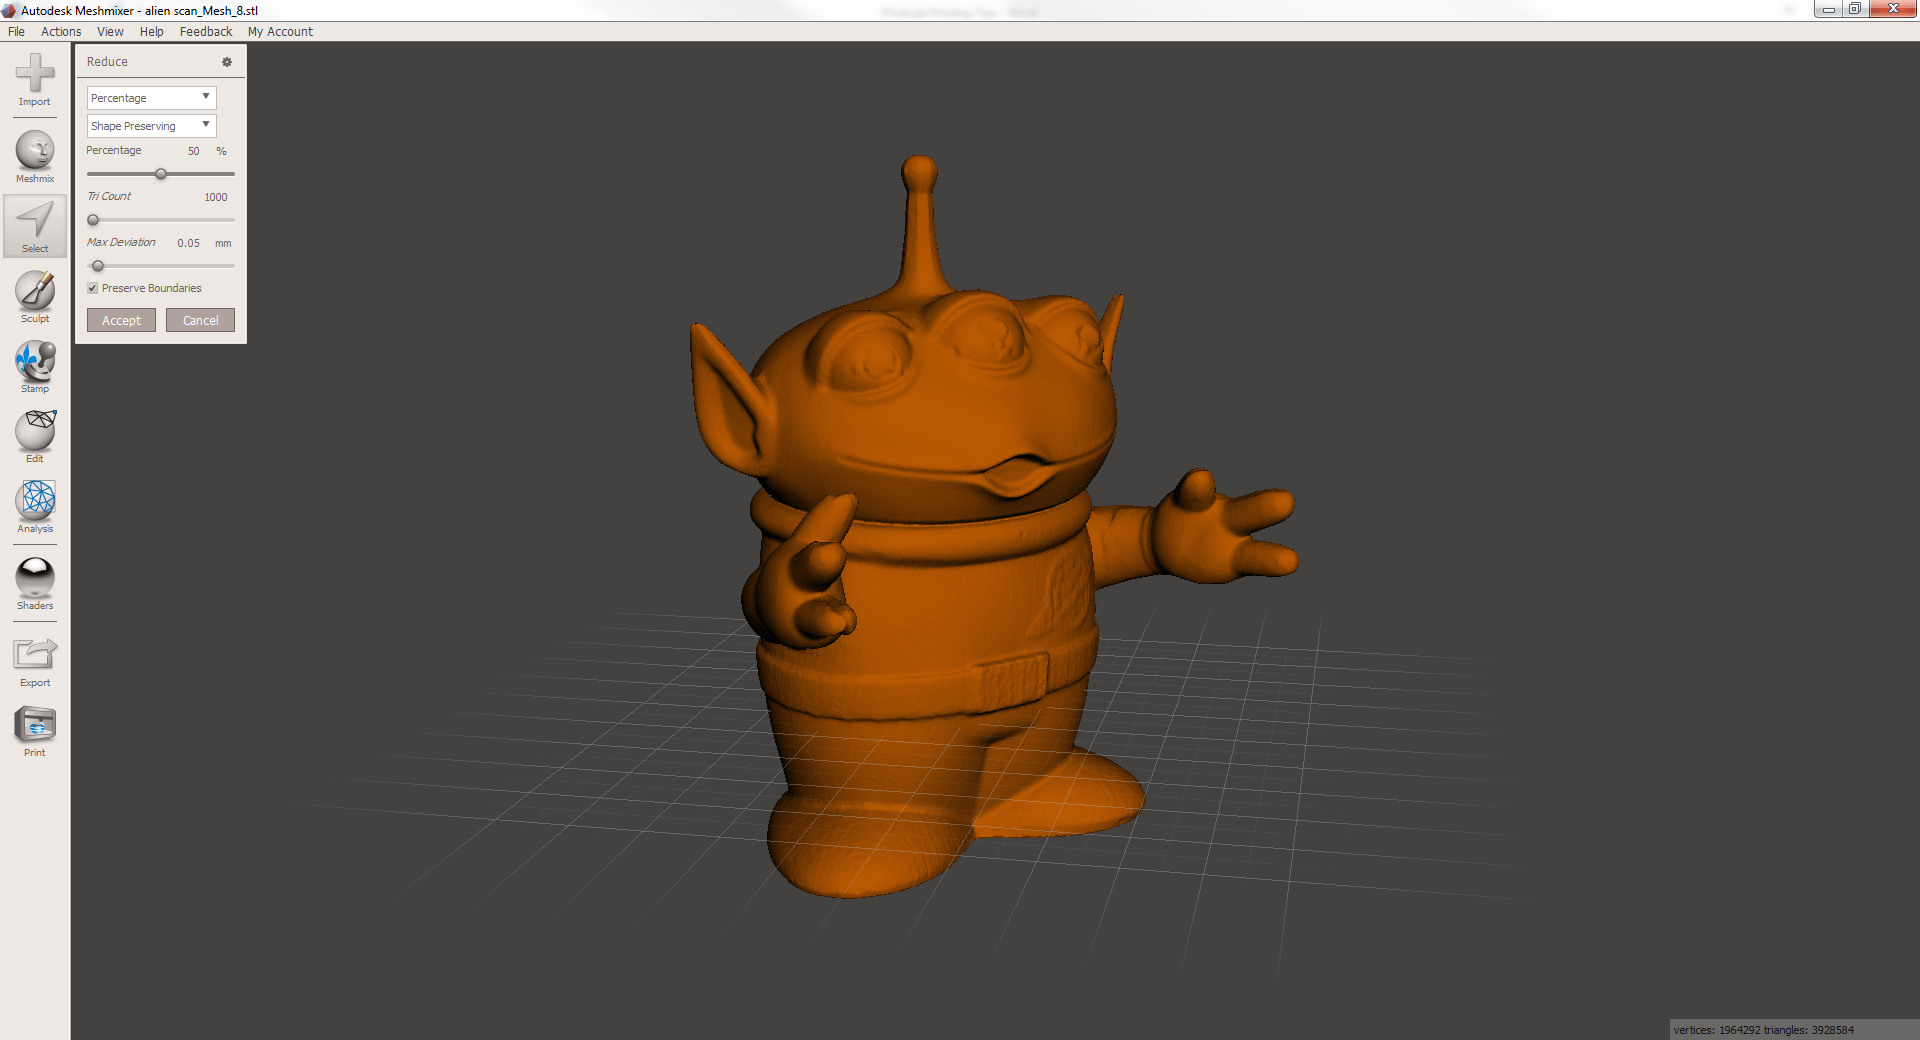
Step 4: Reducing file size
The ability to reduce the file size of your 3D model is extremely useful, particularly if your model is a high quality scan as these can often be over 100MB. A 3D file is generally made up of a series of triangles. The greater this number of triangles the more detailed the model and this means a larger file size. In the case of a high quality 3D scan, reducing the number of triangles fairly substantially will not have a huge effect on the overall quality of your 3D print. To reduce, choose Select and then click on the area of the model you wish to reduce. If you wish to reduce the whole model then double click on the model and this will select the entirety. Once selected, choose Edit and Reduce and use the percentage slider. As an example. If a model is made up of 10,000 triangles and you slide to 80% then you will be left with a 2,000 triangle model.
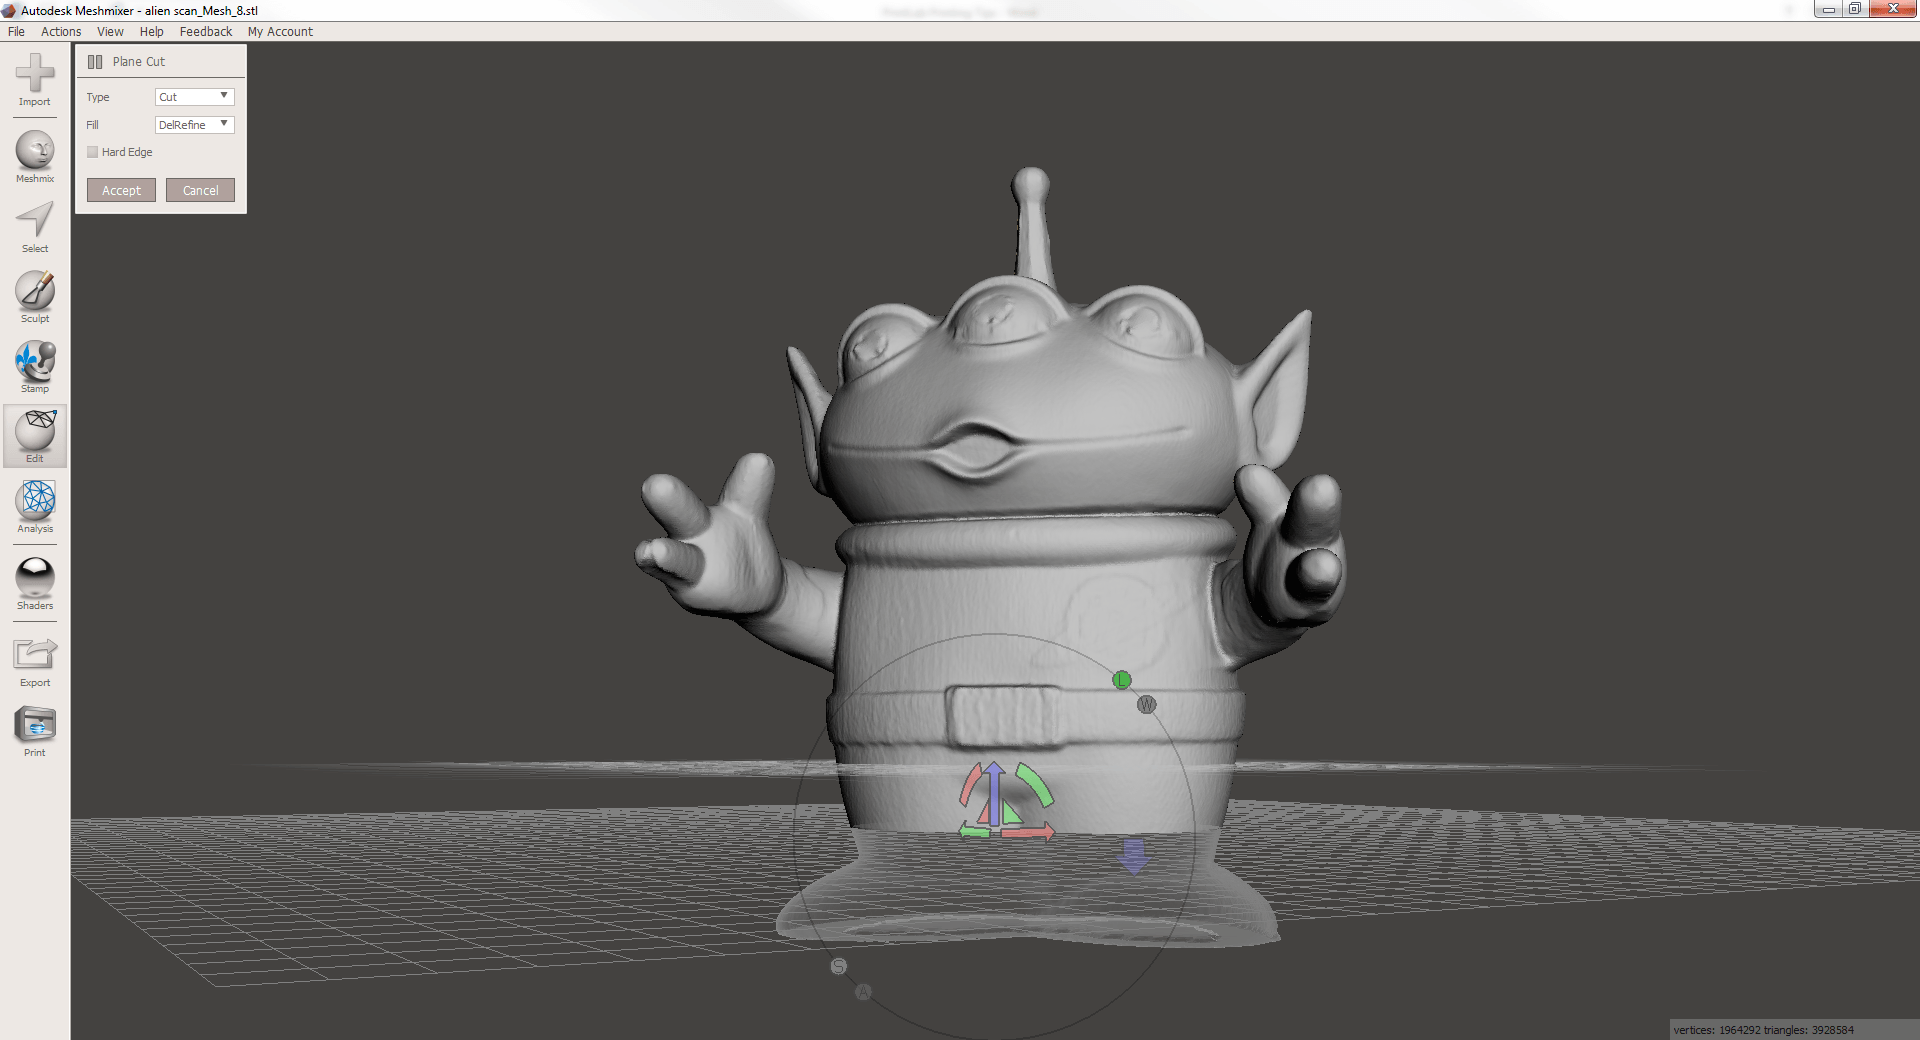
Step 5: Plane Cut
This is a useful tool for trimming parts of your model in any direction you wish. Perhaps there is an area of the model that you want to be completely level or just certain parts that you want to get rid of completely. Select Edit and Plane Cut. You can change the angle of the cut using the coloured curves and the positioning using the arrows. The large blue arrow allows you to select which area either side of the cut you wish to remove. Once you are happy with the positioning of the cut simply click accept.
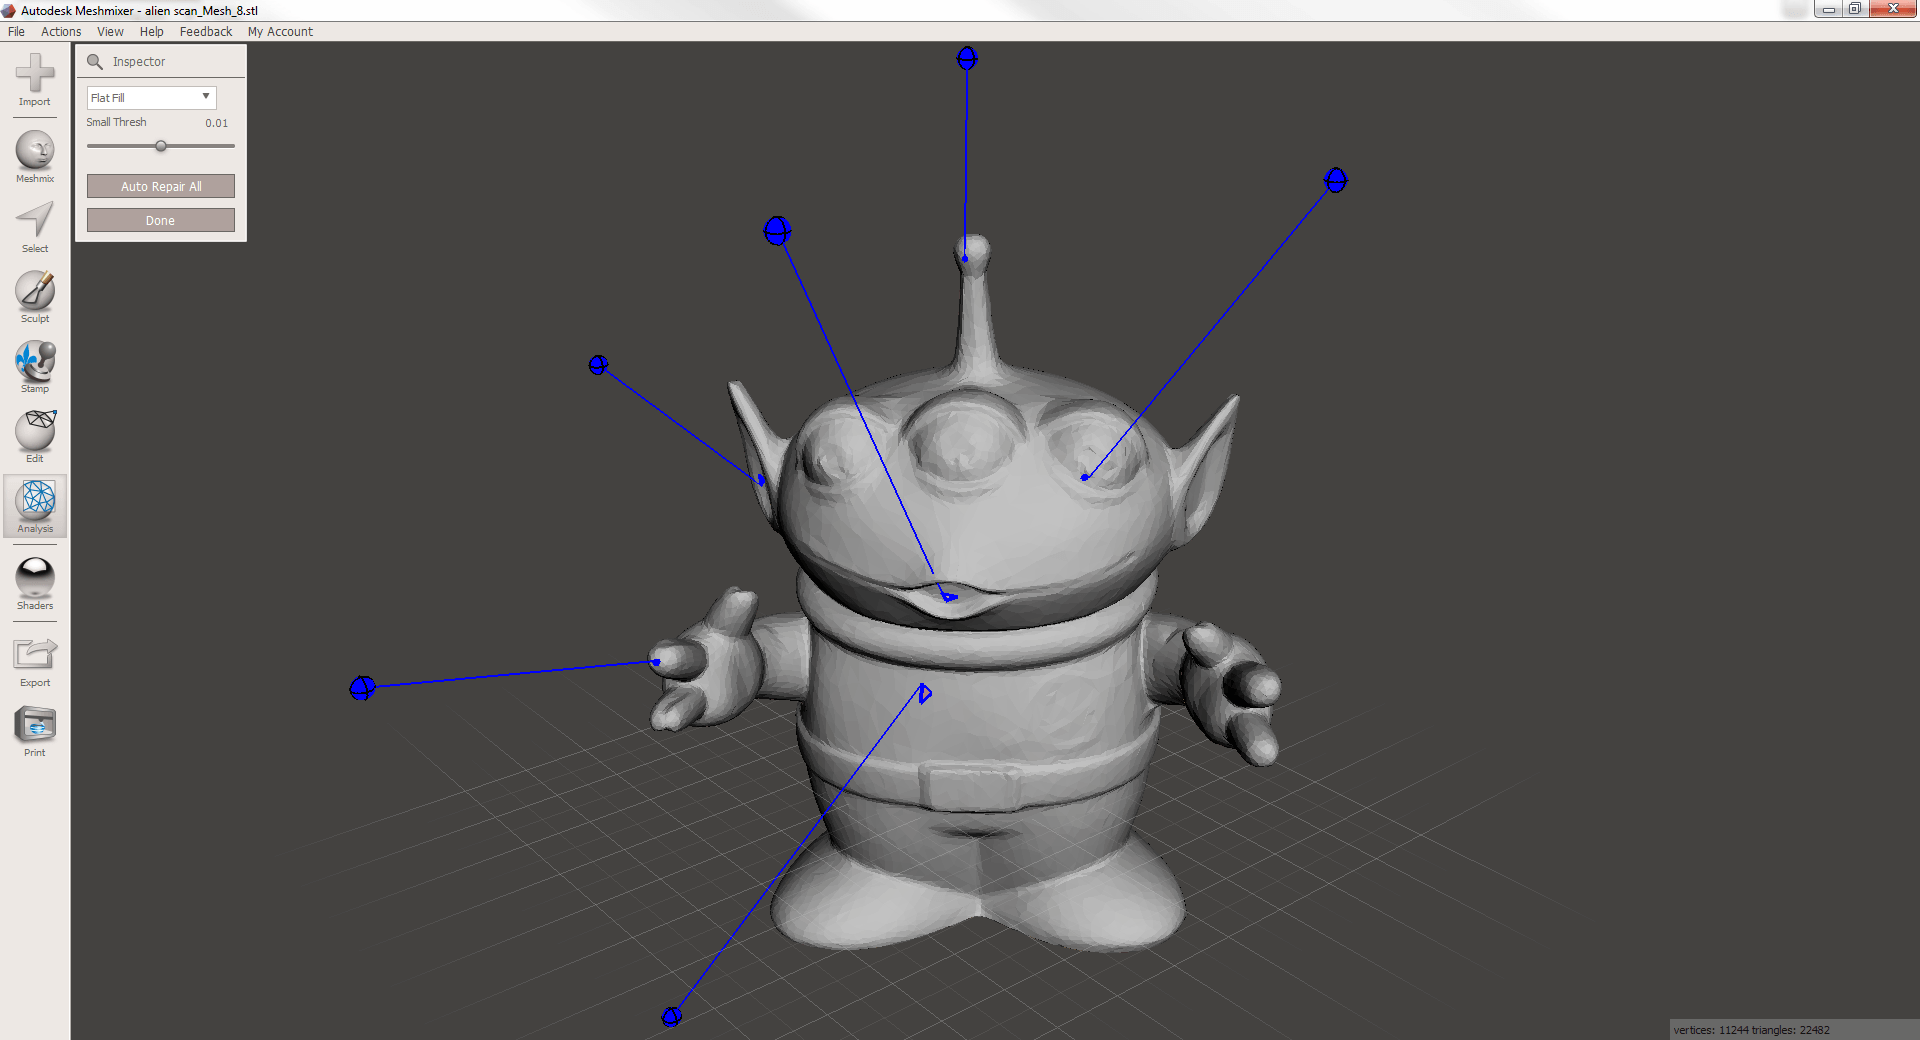
Step 6: Mesh Repair
Your model must be watertight for 3D printing, however occasionally you may encounter a hole or gap in your 3D model. Luckily, meshmixer can help. Select Analysis>Inspector to investigate if your model has any holes. You will be presented with spheres that indicate where the holes are located. There are 3 modes for filling holes: minimal (minimal number of polygons), flat (self-explanatory) or smooth fill (uses surrounding surfaces to create a smooth appearance). You can select different fills for different holes by selecting your preferred fill method and then clicking the sphere you wish to fill using this method, before moving on to another area of the model.
If you wish to repair all the holes with the same method then pick a fill type and select Auto Repair All. The Small Thresh parameter specifies the threshold for what is detected as a ‘small component’. These areas are deleted by auto repair. This can be problematic if your 3D model contains small parts. By reducing the Small Thresh slider, these small component areas will be preserved. Keep in mind, any change you make is easy to undo (Ctrl+Z).
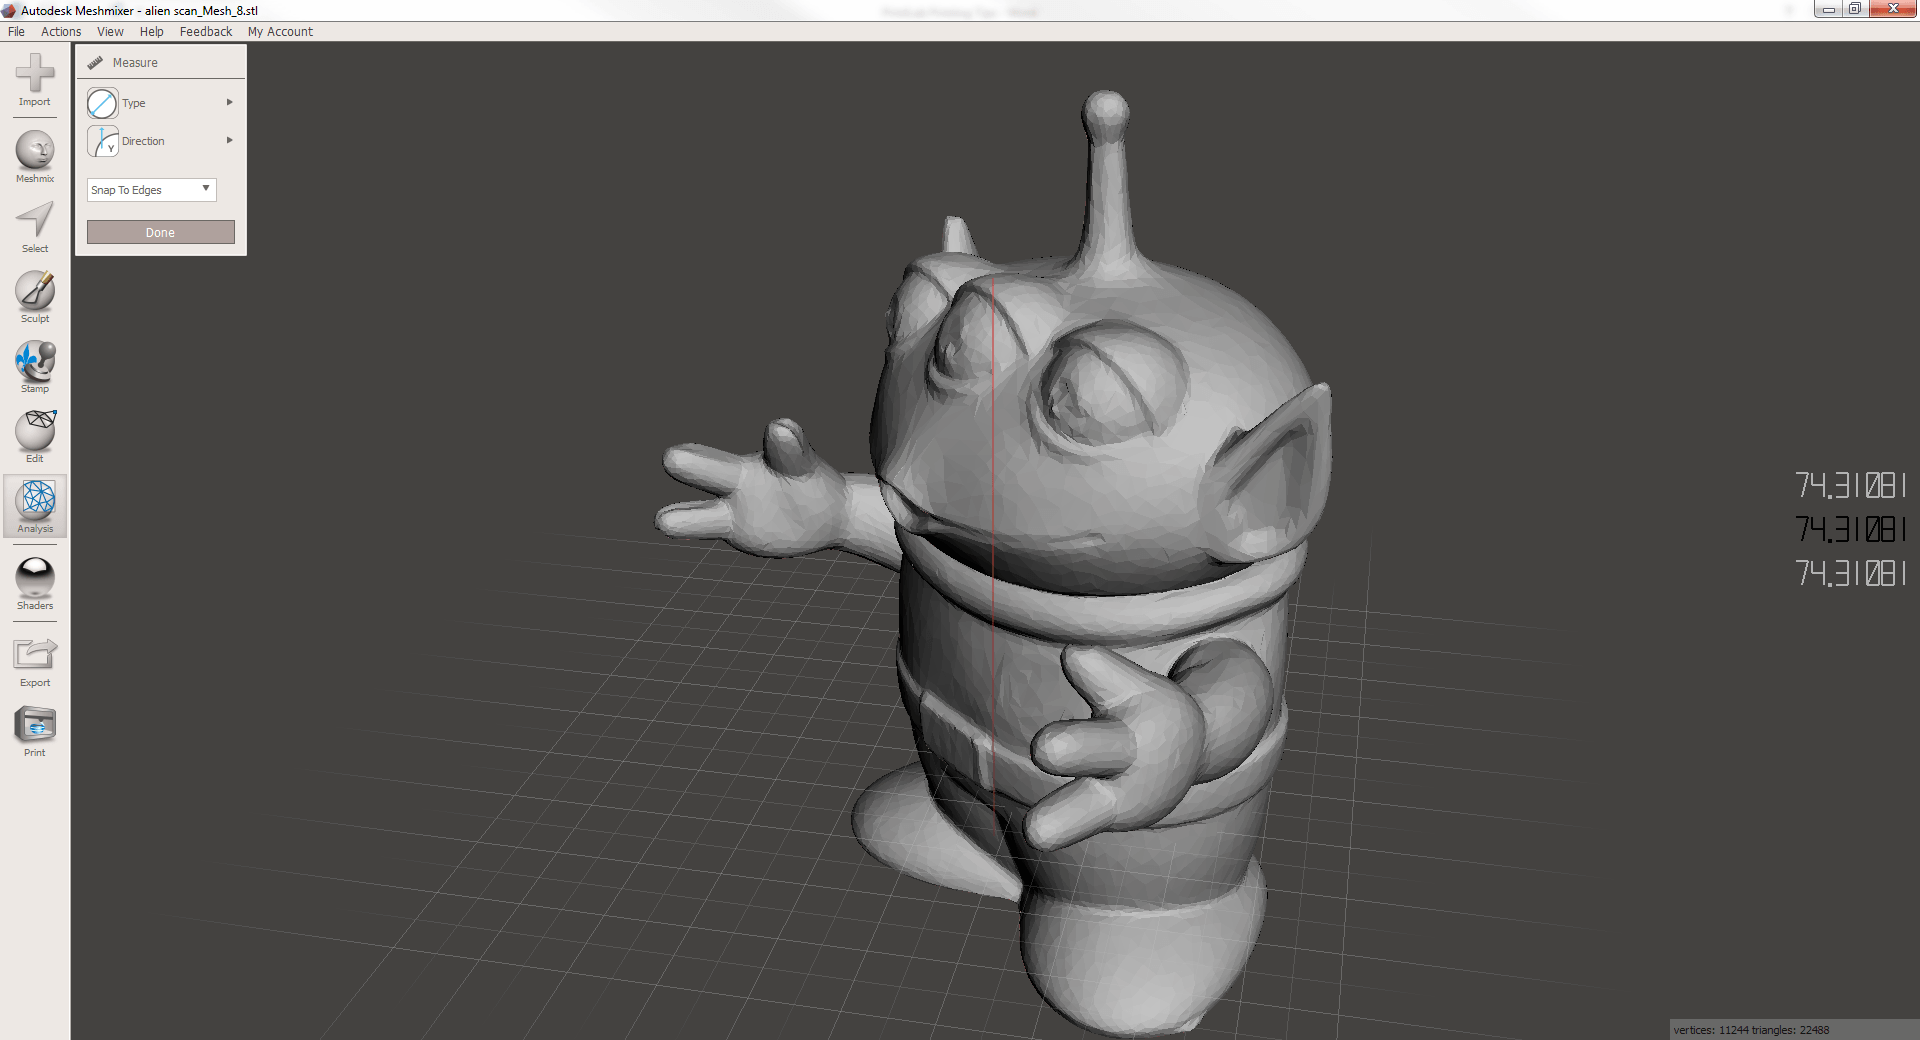
Step 7: Measure
The ability to accurately measure every aspect of your 3D model can be very useful. For example, you may wish to understand how changing the overall scale of the model has an effect on various individual aspects. For producing prototypes and mechanical parts this tool is essential. Select Analysis>Measure and by varying the type and direction you are able to accurately measure any part of the outer shell of your model.
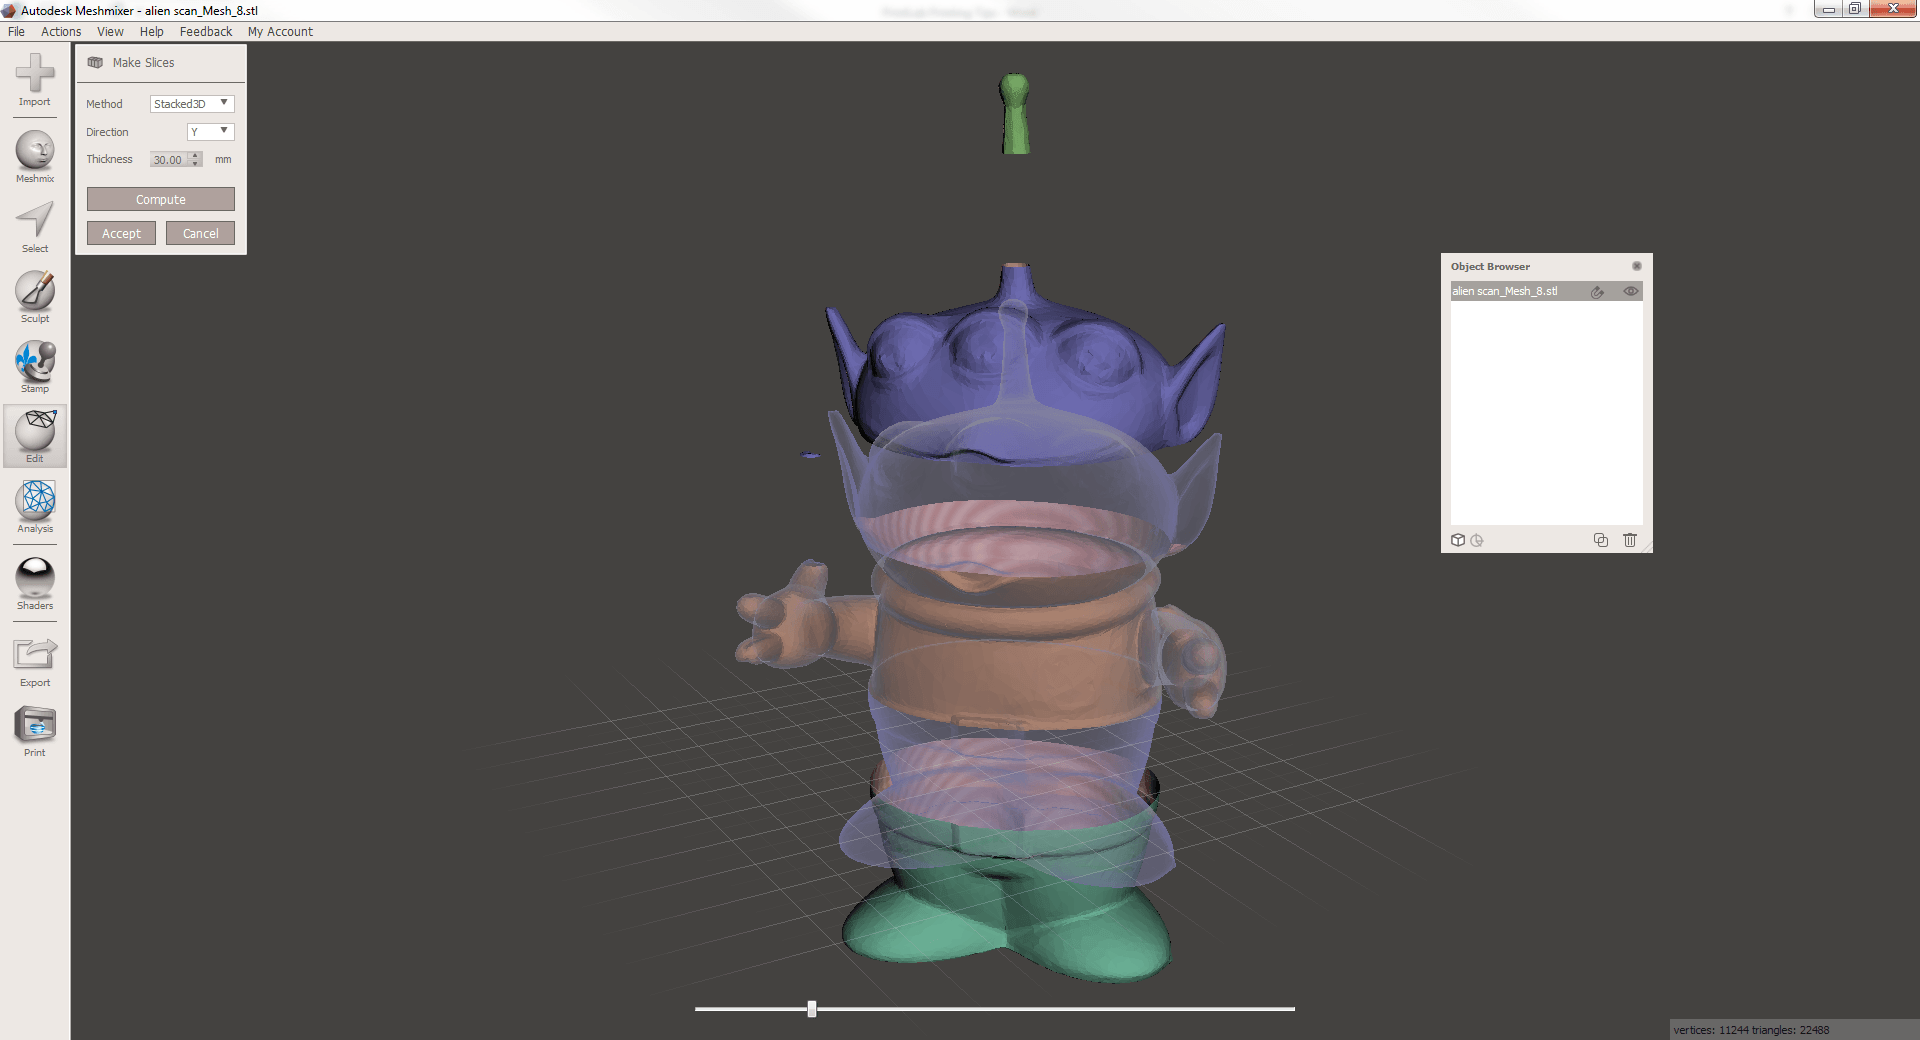
Step 8: Split your model
In Meshmixer you are able to split up a 3D model in to multiple slices. This can be very useful if you have a large model that requires 3D printing as separate components. Alternatively you may simply wish to split your model up so that you can better analyse or study distinct separate areas of your 3D model. Start by selecting Edit>Make Slices. There are two methods you can pick: Stacked or Stacked3D. Stacked 3D incorporates the overall form of your model and is generally the preferred choice. You can choose the direction you wish to create slices in i.e. X, Y or Z and finally select the thickness of each slice. Select compute and you will be shown how your model will be sliced up. Once happy, choose accept and your model will be successfully split into separate STL files.
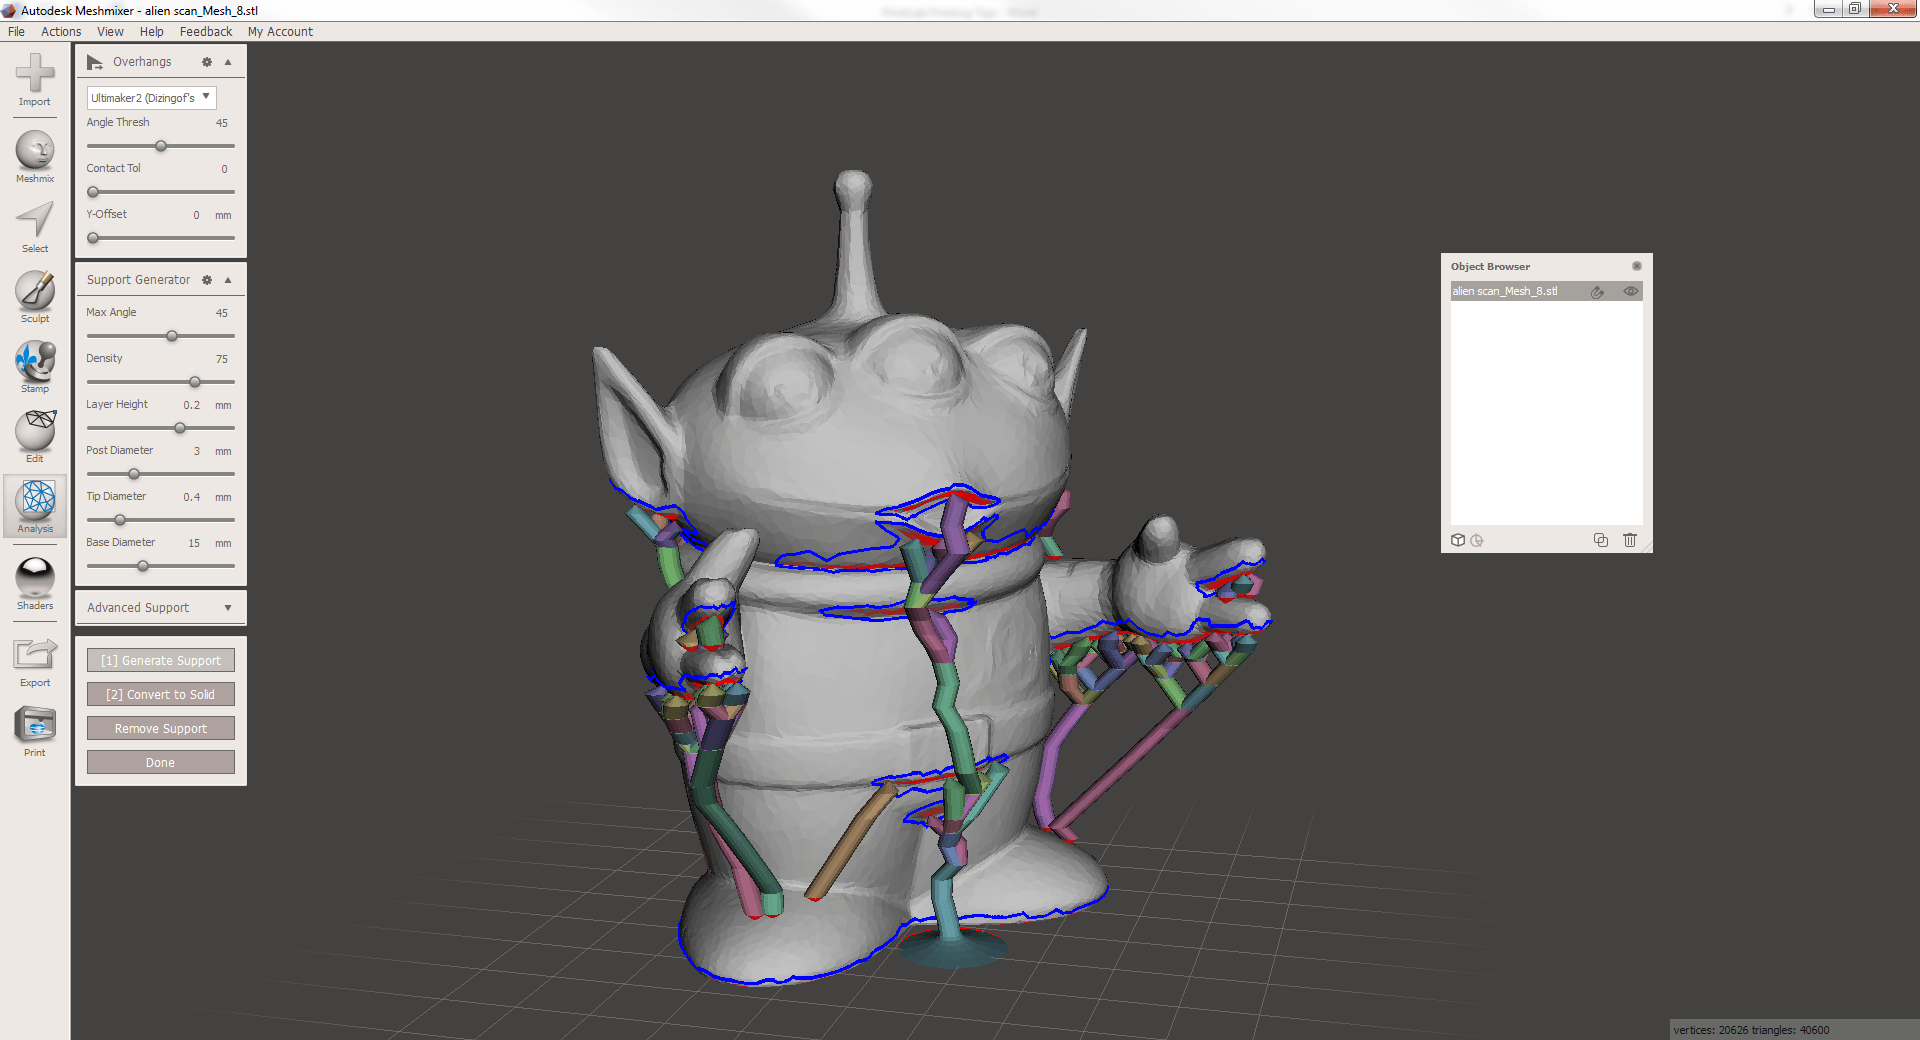
Step 9: Produce Support
If your model has overhangs then it may struggle to 3D print effectively, especially for those areas with a greater overhang angle of 45 degrees. One of Meshmixer’s most powerful tools is its support generation as it is simple and highly effective. Select Analysis>Overhangs to get started. You will be prompted with a number of options such as angle thresh, advanced support etc. Feel free to play around and produce your own custom support settings, however when starting out I’d advise using the drop down (top left) and selecting one of the pre-determined setting options which is available for a number of listed 3D printer types e.g. Ultimaker 2. This will load up all the recommended settings for your printer and then you can easily tweak individual settings if you wish.
For example, if you wish to provide your model with thicker supports you can click Support Generator and increase the post diameter. Some tweaking may be necessary however this tool is very user friendly. To preview your settings select Generate Support and if you wish to revert to tweak something else simply select Remove Support. Once you are happy click Done.
Step 10: Exporting your 3D Model
Once you done editing your 3D file simply select Export and choose the file type you want to save as. Generally this will be STL ASCII Format however other options include OBJ, COLLADA, PLY, AMF and VRML. Then the fun part – 3D printing your model!
We hope the above steps prove useful in your 3D printing venture. These steps are just a small sample of what meshmixer is capable of and in actual fact there is a vast assortment of extremely useful tools, not only for simple editing but also for sculpting and producing your very own unique 3D designs.
Are you an educator looking to bring 3D printing into the classroom? Autodesk (creators of Meshmixer) are also creators of Tinkercad and Fusion 360 and we have a whole lesson plan library based on these software packages to help you out. Start a FREE 7 day trial here.