3D Printing a Microscope: Txantxiku Ikastola School, Basque Country
Today we caught up with PrintLab Pioneer Jokin Lacalle Usabiaga, who is a technology teacher at Txantxiku Ikastola School in Basque Country. In his most recent 3D printing project with his enthusiastic students, they used a simple hack to create a 3D printed microscope.
12th June 2017 • Case Studies
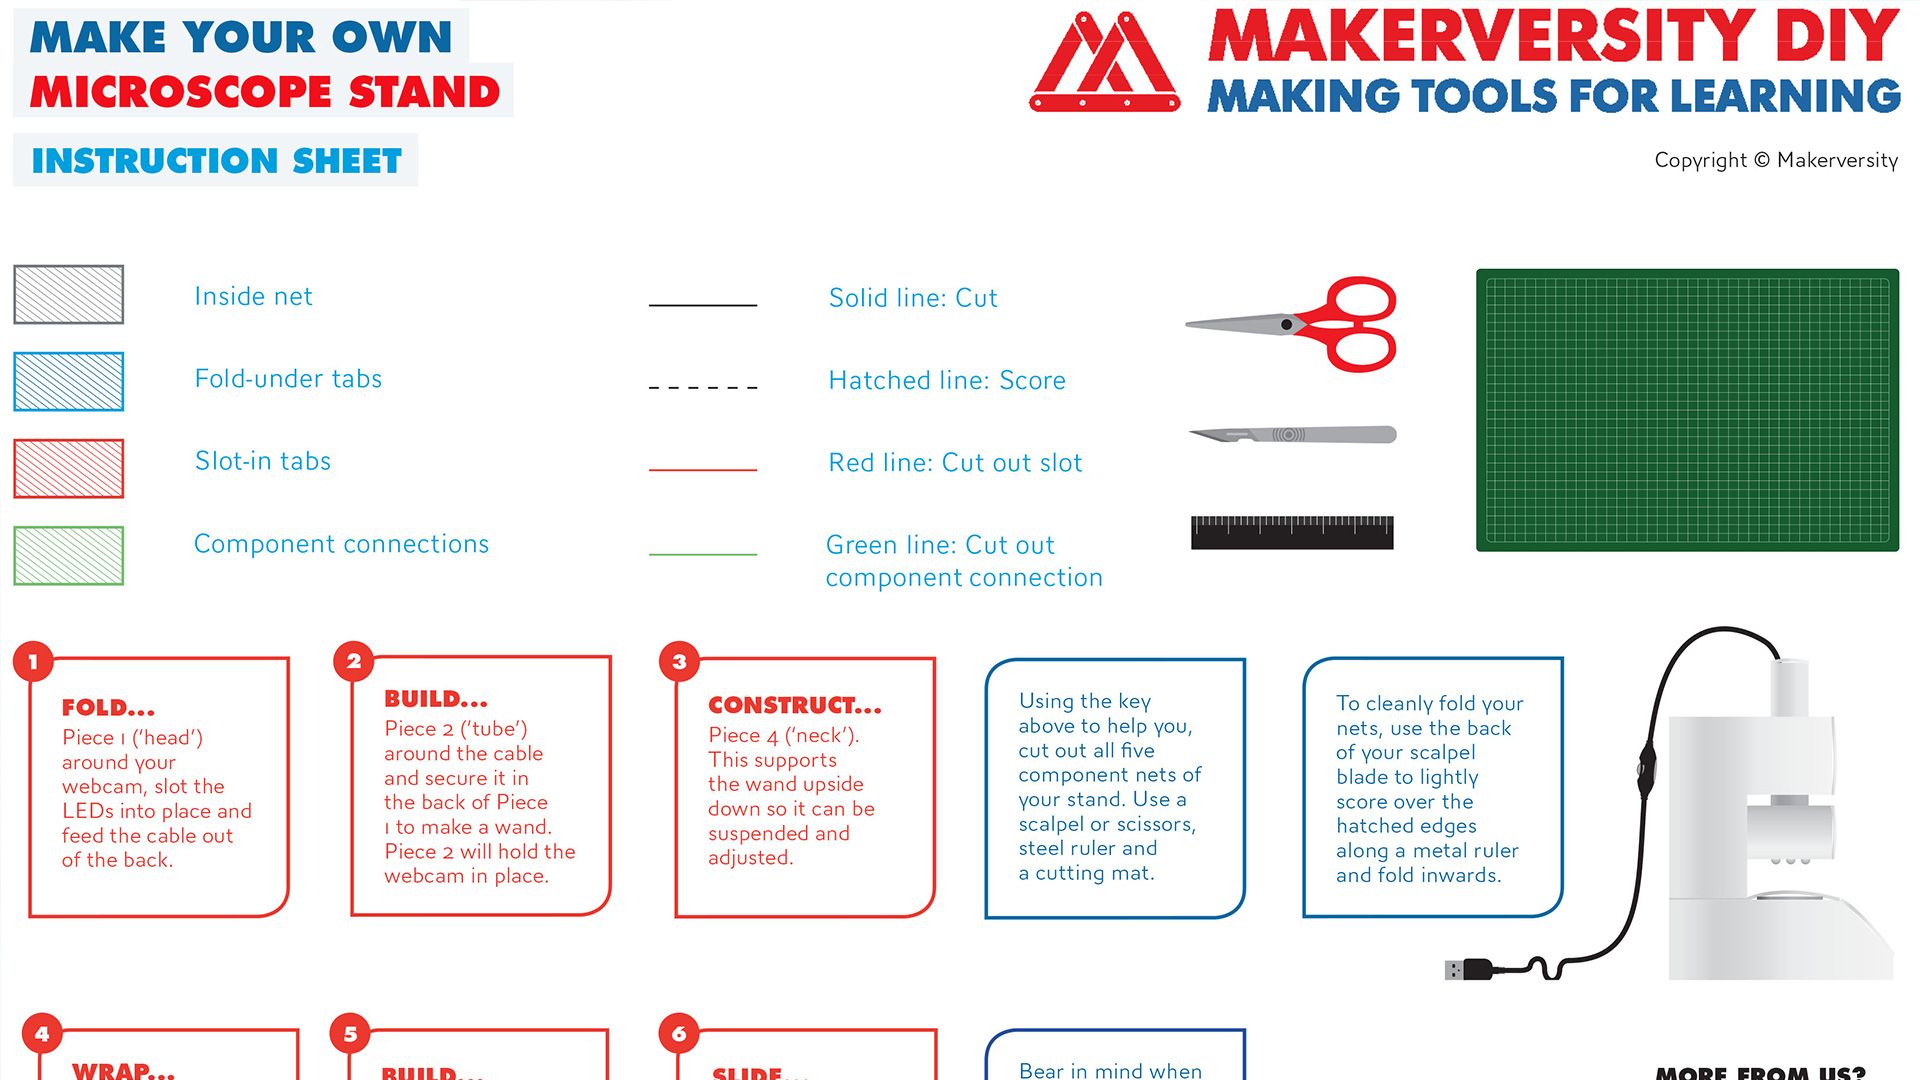
The project was based on Makerversity DIY’s “Make your own Microscope” lesson plan, a creative project where students turn a standard webcam into a microscope. The original lesson plan uses folded paper as the structure for the microscope.
But Jokin and his students decided to take the lesson to the next level by 3D printing their own version of the microscope. Check out the interview below where we learn more about Jokin, his students and their innovative 3D printing project:
Hello Jokin! Great to catch up with you, could you firstly share with us some information about yourself and your school?
Hello! I have been a secondary school teacher since 1997 and during these 20 years I have taught a range of different subject but primarily physics and mathematics. From 2001 to 2011 I worked as the ICT manager at Jakintza Ikastola School but in at the end of this term I got bored of teaching the same tedious subjects, the same old way and with the same bad results. So at this point I decided to leave and I started teaching a group of 14 year old girls and boys with academic difficulties.
We tried to learn in a more active way, resolving problems and developing projects. The experience was really amazing and the best thing that has happened to me in the last 20 years, as a teacher but also as a person. I learnt a lot from those students and I felt that they also had a great deal of appreciation for me. After those wonderful four school-years I knew that there was no way to return back to the “old-school-style” teaching methods. And it was at this point that I became a technology subject teacher
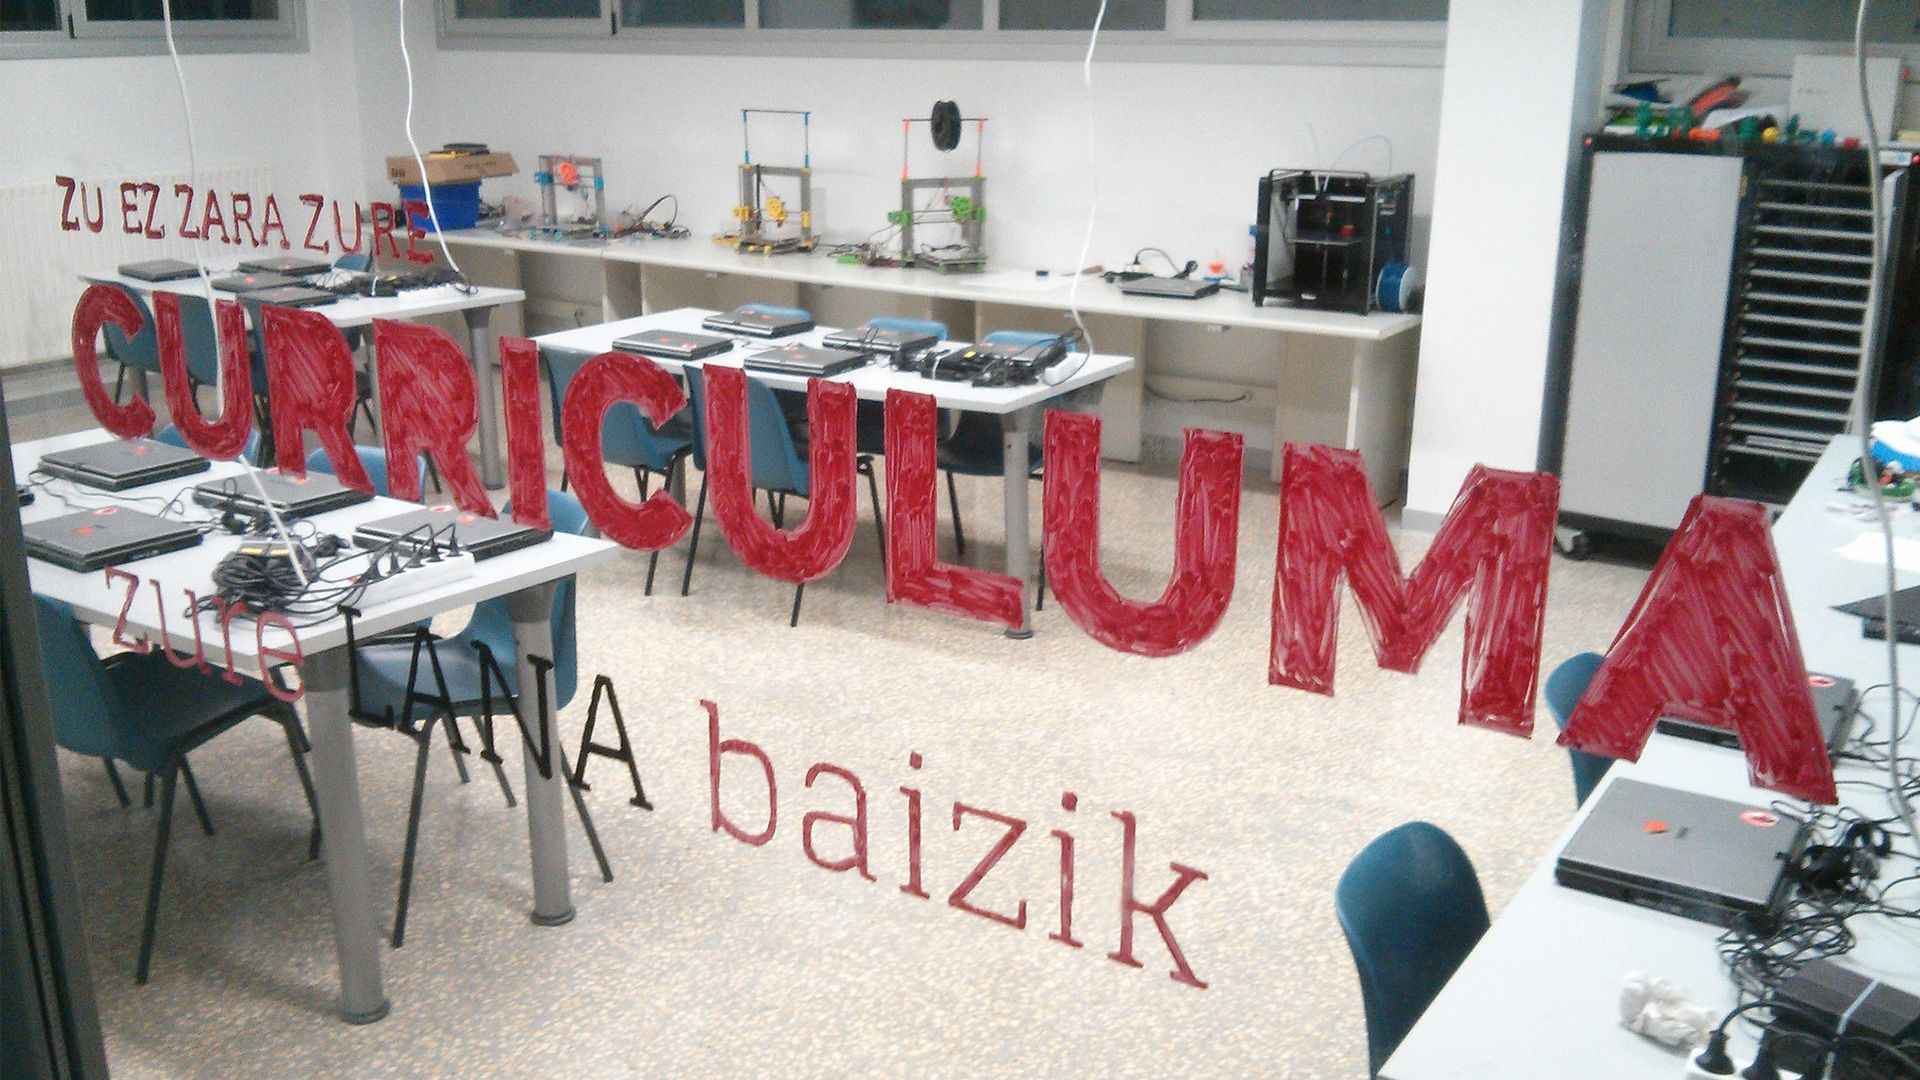
In the summer of 2013, I took part in a workshop about 3D printing for the first time. There I built my first 3D printer, a Prusa i3. I was amazed thinking about how powerful it could be to introduce a machine like that in my education projects. I started looking for funding for a 3D printer and I felt very lucky because I submitted a proposal to a factory called AMPO, who really liked my idea. They sponsored my project with much more money than I could ever expect. Such was the case that with this money we built a little makerspace at our school consisting of a laser cutter, CNC milling machine, 3D printers and much more.
Unfortunately I could only spend a year at the school I was at and then I started working at BQ, a Spanish tech company, as a member of their educational department. After a 9 month stay there, I moved on to Txantxiku Ikastola School, which is where I am currently based.
How has 3D printing been integrated in the schools you have taught at?
In Jakintza Ikastola School we launched a 3D printing club called Hackintza Makers. The students Arkaitz, Eñaut, Ibone, Jon and Eneko did a great job during the time we worked together. Among different things, they built various 3D printers for our makerspace. They also built and tested a mini CNC milling machine – Cyclone. The project I was most proud of was a summer tech-camp that was organised in the summer of 2015. It was called Hackin&Ekin (half English, half basque!). It was an unexpected success, mostly for the teachers and the parents of 42 9-10 year old boys and girls that signed up for the camp.

As for my current school Txantxiku Ikastola, there isn’t currently a large technology club, but it is something we are working on. I can guarantee you that there is a lot of raw material for it and a lot of students who would like to participate, but this school-year has been very busy and it hasn’t been possible.
Having said that the makerspace we have for our students is open most of the time (this is a priority for me). It is open every break-time, lunch-time and some days in the afternoon once classes are over. The goal is to engage with students who have a maker mindset. And believe me, there are a lot of them (more than most of the teachers expect) that enjoy inventing, designing, printing and making every kind of objects such as spinners, key-chains, little pets….
Kepa, Anje and Ander are one of the best representation of students with maker mindsets. They come every break-time and even after the lunch. They are always thinking about how to improve their project, doing prototypes and using their microscope. It’s a pleasure for me to share my time helping them to build their microscope. I have no doubt that their electronic microscope is the beginning of a great STEM career.
What are your thoughts on the Makerversity DIY Microscope Lesson?
When I took a look for the first time at the Makerversity lessons I was really impressed. I thought they could be a great starting point to introduce my youngest students into the world of making and, to develop STEM related skills.
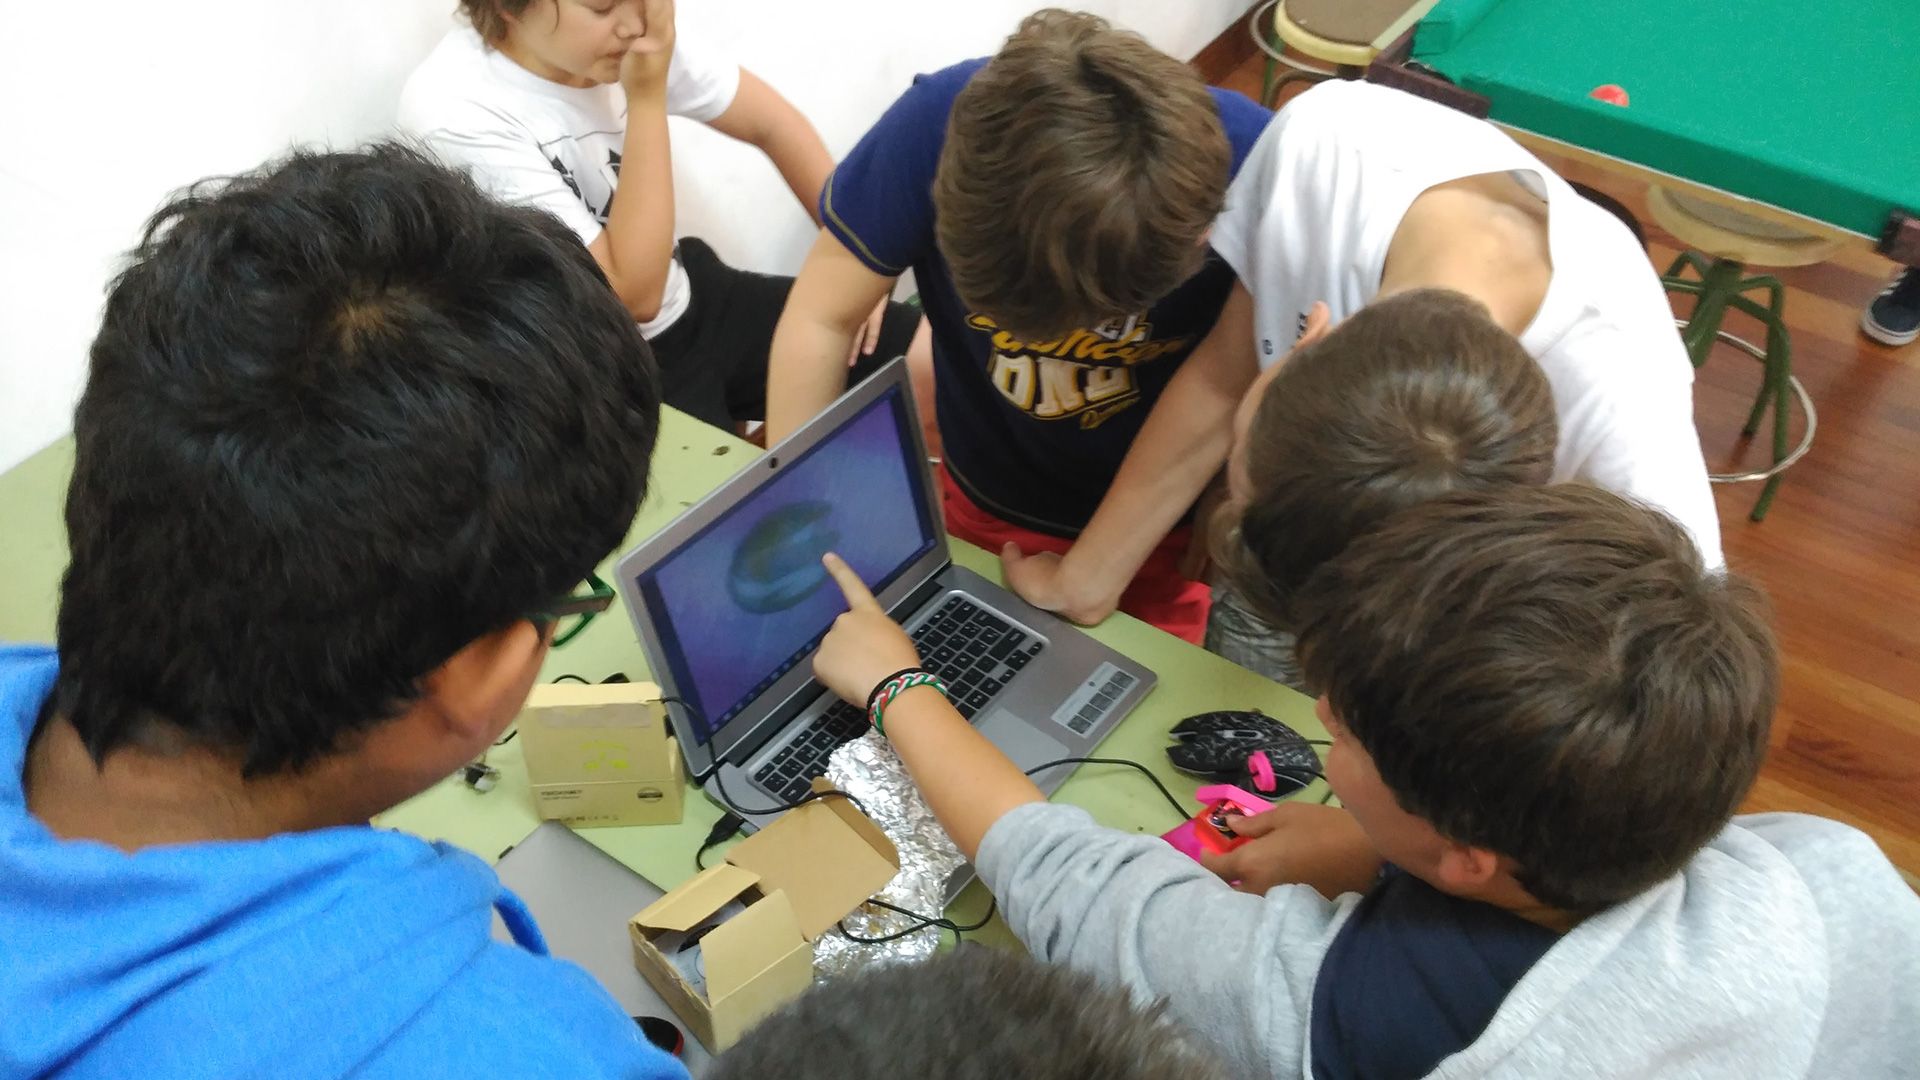
So one day I met Ander, Kepa and Anje and I suggested they choose one of the lessons designed by Makerversity, the one they thought was most interesting. They took their time taking a look at the ten lessons that were in the brochure and they choose the DIY Microscope. And I have to admit that, as they did, I would also choose the microscope. Mainly because is a tool that they could use in different ways and in other subjects such as biology, geology… They could use the microscope to show to the whole class augmented images of different things using a PC and a projector.
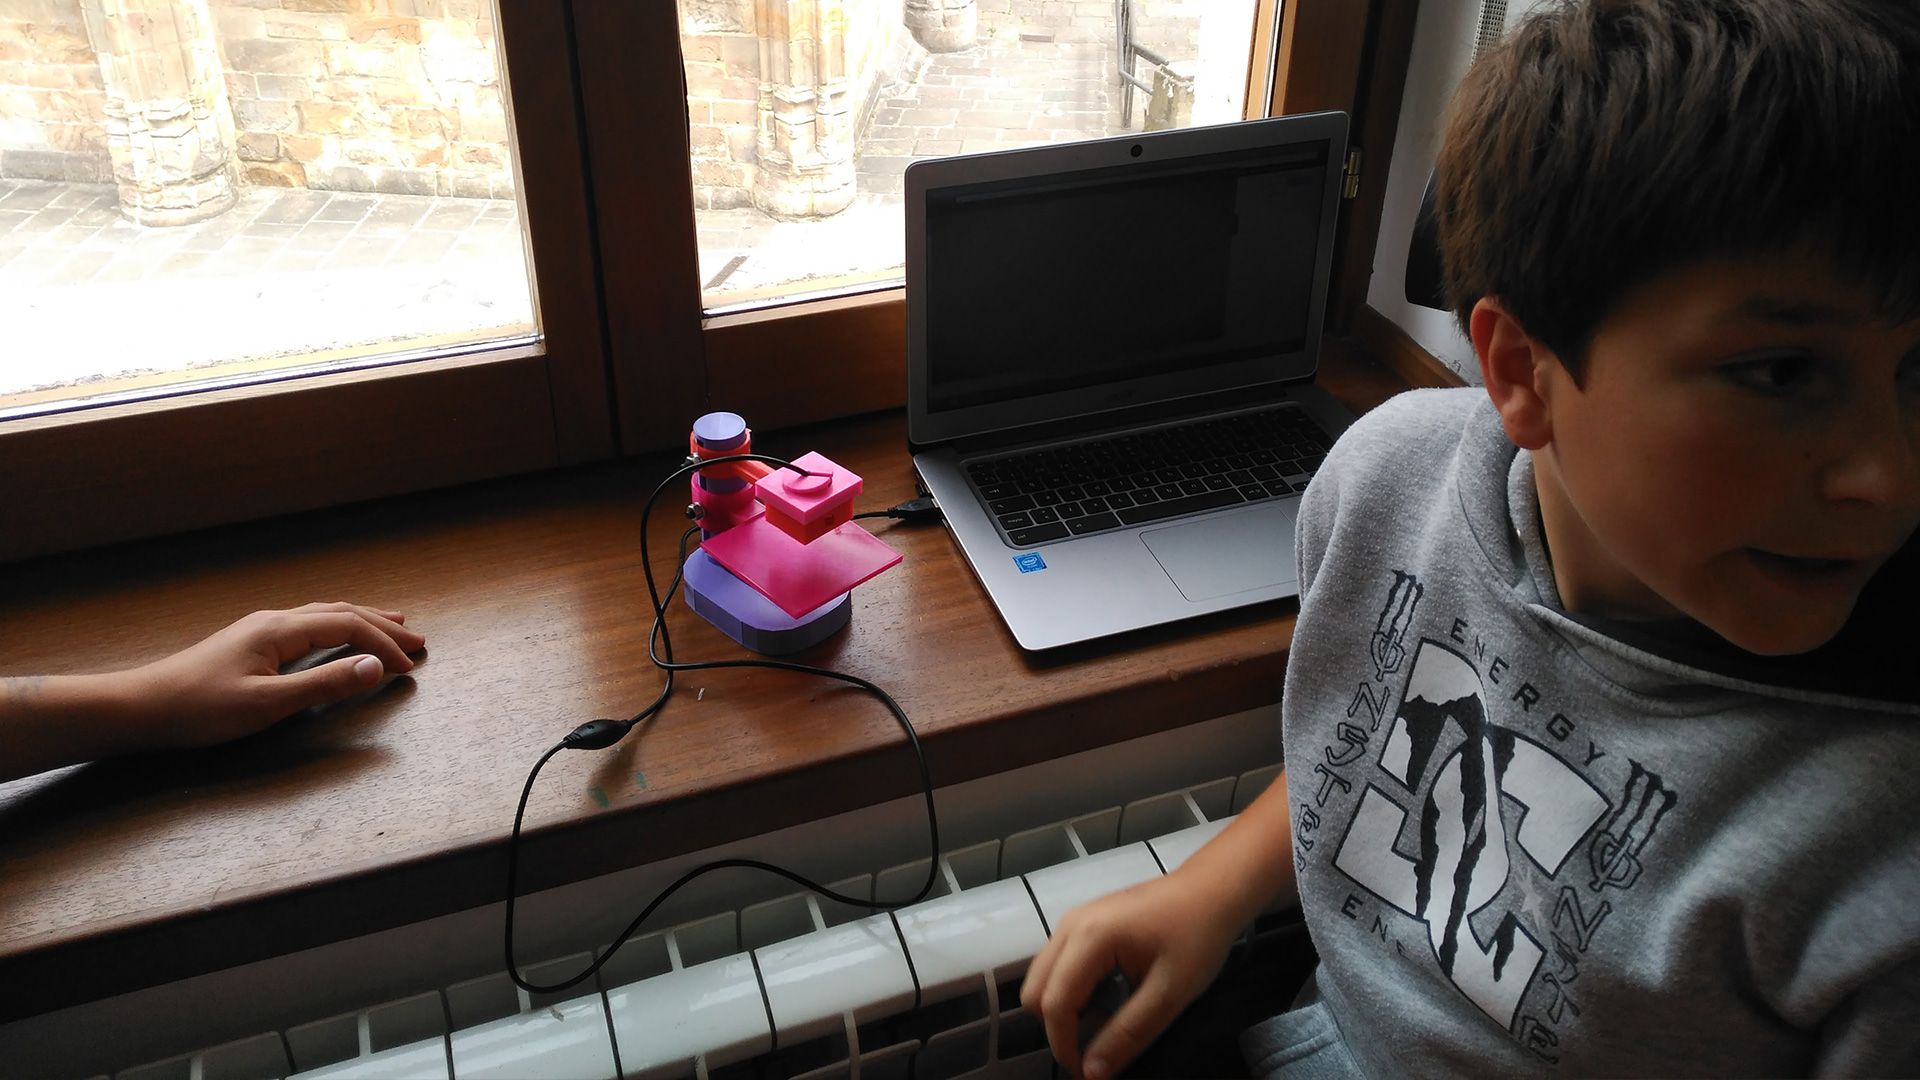
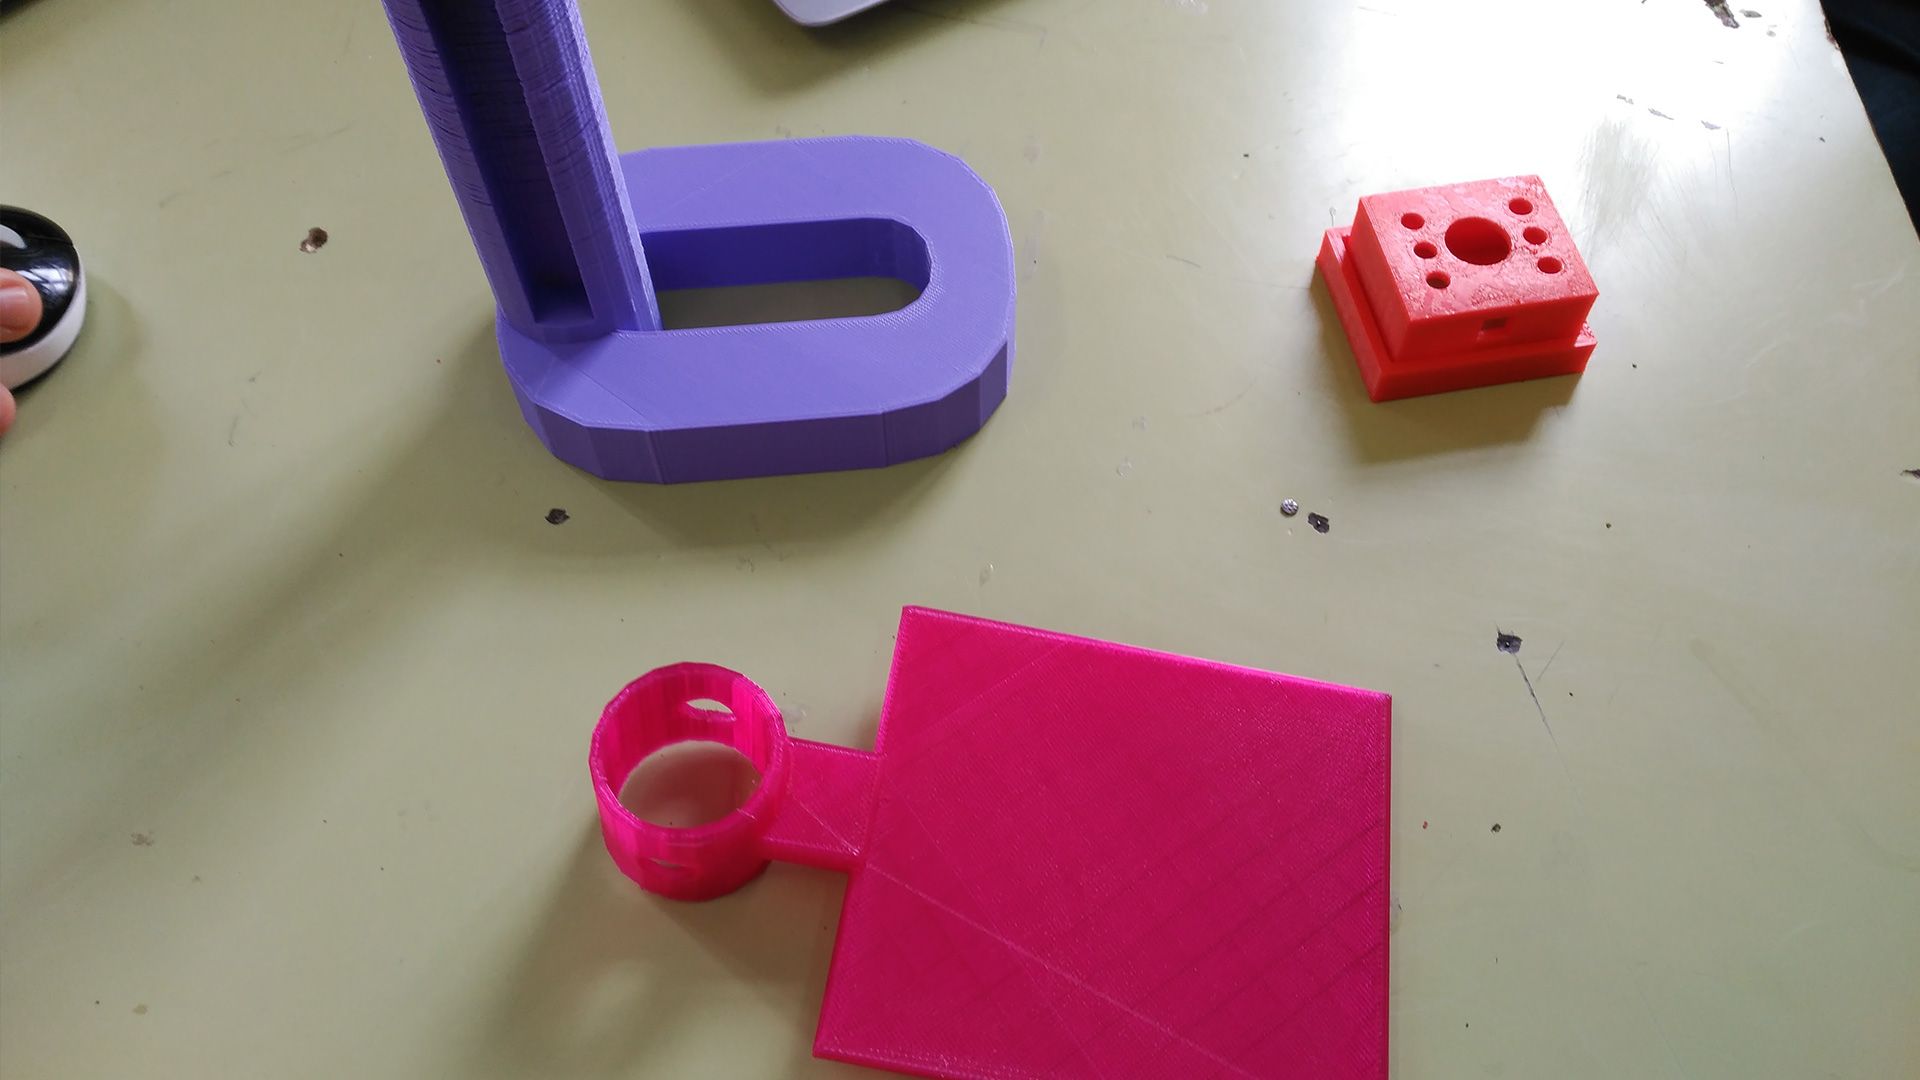
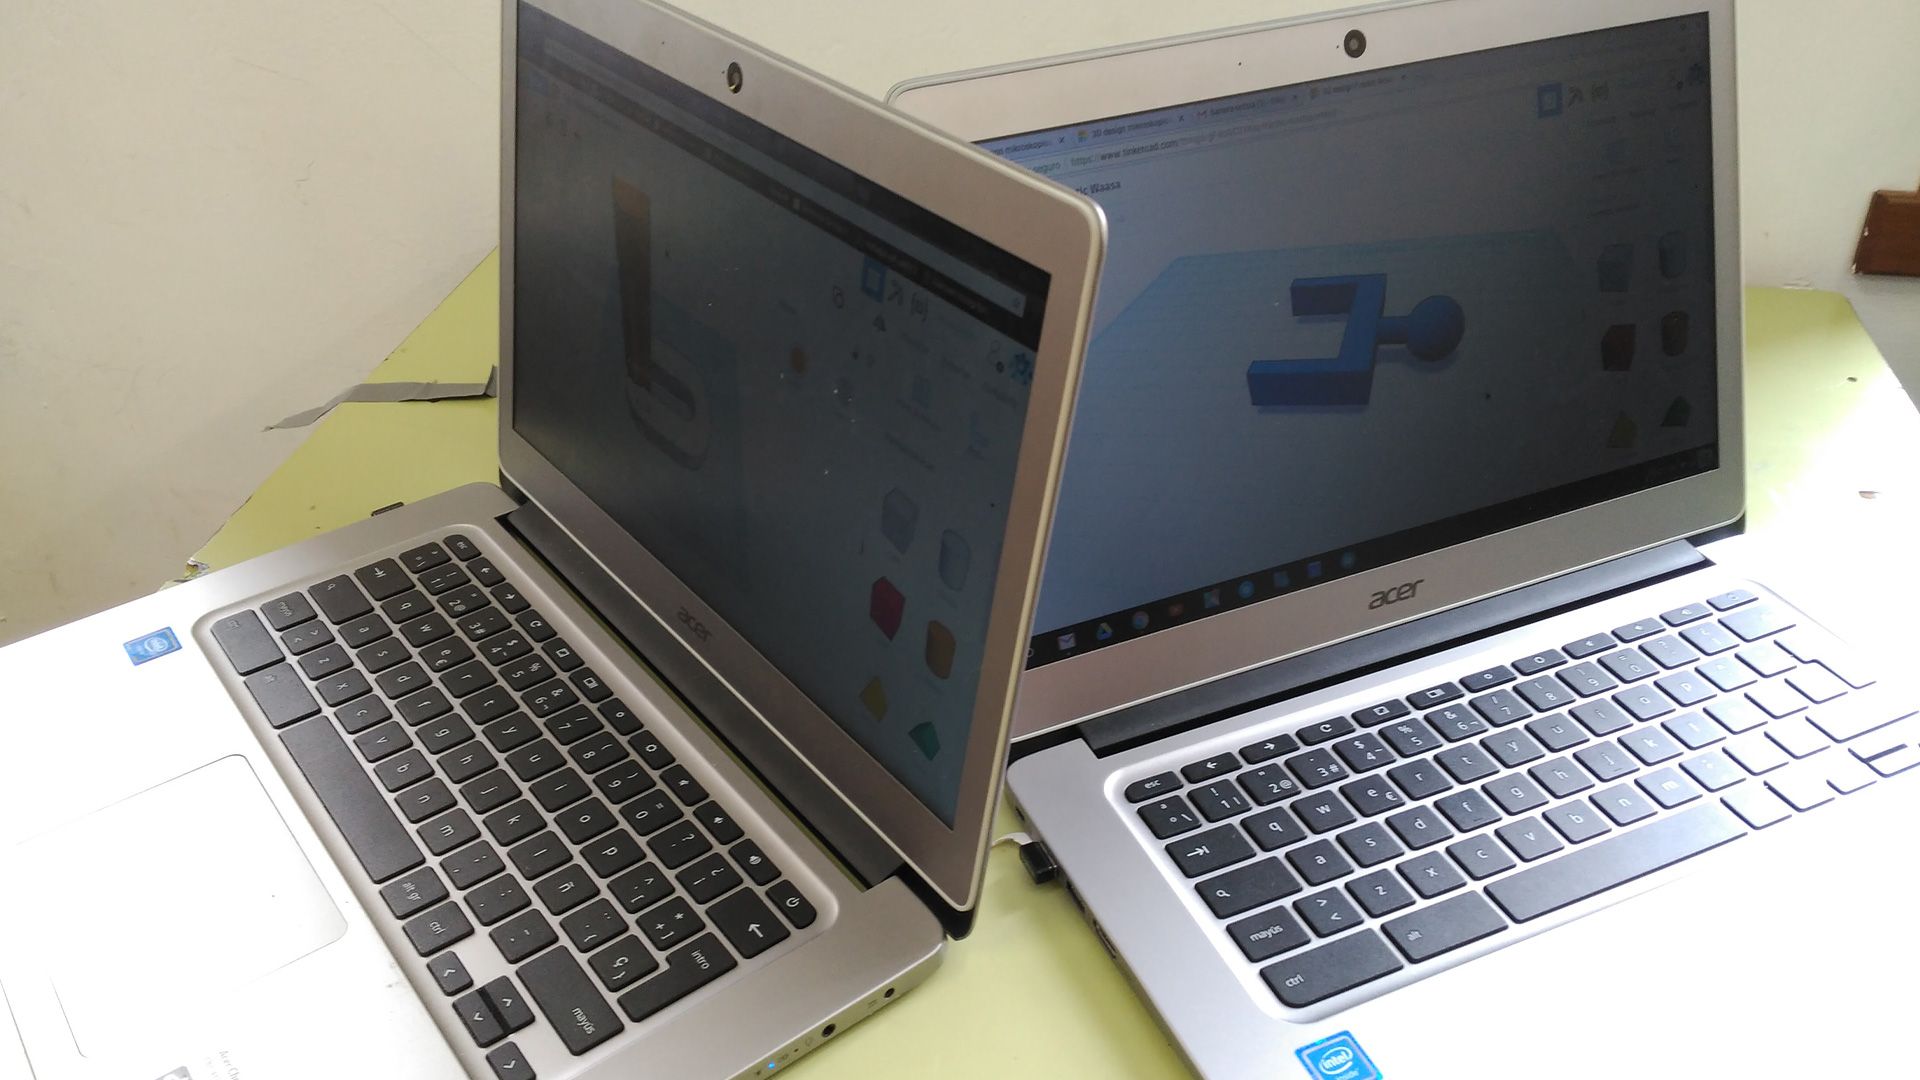
But just after they did their vote, I noticed that there was a little problem with it. The DIY Microscope was one of the few projects that had no 3D printed parts. I explained this to Anje, Ander and Kepa but they decided to continue with it. After a couple of days I started wondering if they could be capable to design some elements of the main structure of the microscope, such as a box for the videocamera, a base plate… I explained my idea and they agreed with it. So, this way, they started designing the whole microscope in Tinkercad. Today the microscope is already finished and it works like a charm!
How did the lesson help you to teach students?
To tell you the truth, I didn’t actually have to teach them too much. Using the lesson plan materials they developed the project after school time and they mostly did all their work alone, showing me that they are very proactive and creative. Working as a team each one assumed their role and their part of the design. Every day they met at the makerspace, shared their designs and decided what changes they had to make.
Sometimes they asked me for help but they weren’t big issues. My main job was to keep them motivated, particularly when things went wrong. I remember one day when they saw the barrel of the lens- they did not measure the depth of the lens holder correctly and they cut the lens through the middle in the wrong place. They were shocked because they knew that they had broken the main part of the microscope. Well, a teacher knows that it’s in this kind of situation when they have to take advantage of a failure and use it as a learning opportunity. We talked about the importance of the measurement mainly when you have to cut objects and, in this case, even more important because without the lens there is no microscope. We also talked about the concepts of risk and failure and the impossibility of been always sure about everything. Our life has plenty of moments when we have to make decisions and we cannot give up for fear of failure. Of course, I bought a new webcam and, finally, they could achieve their goal. I think this was an important lesson for them.
There are more lessons learned. One of them is the importance of prototyping. I printed the stencils with the stand of the microscope. They built it and made a suggestion about the different form and size of the components of the microscope. I printed them twice to measure the different parts with the calliper, especially the head, maybe the most difficult piece to design. They learnt about product prototyping and its main characteristics: a working model, easy to build with a low cost of production.
What did the students have to say about the lesson?
They were deeply involved in it from the first day. I think that one of the reasons it was successful is because of the quality of the teaching materials. They are very well designed, very visual and it makes it very easy to understand the goal and the process of each project. Although a thorough teacher’s guide is included, students managed with just the lesson plan and instruction sheets themselves.
In addition, I think the ideas and the proposals behind each lesson are very motivating for 9-12 years old students. And what is more important for me is that they are designed keeping in mind questions such as gender equality and inclusive education.
Now they have finished the project they are improving it. Thanks to Jose Luis Villarejo (@movilujo in Twitter) they are developing the 2.0 version of the microscope. Jose Luis gave my students two laser lenses for free to better its zoom. Now they are working on the design of a lens adaptor to the head of the lens tube. Their goal is to take more detailed pictures of different objects.

How did you recreate the lesson to involve 3D printing?
As I told you before, it wasn’t very difficult. Kepa’s previous 3D printed window handle (http://bit.ly/2j4jdlL) was an incentive for them. So they did not hesitate to face the challenge.
I’m convinced of the importance to use free software at school. Technology is not neutral so I think that, as teacher, I have a responsibility with my students of teaching them in liberty. I always try to use free and multi-platform tools in my classes, such as Openscad or Freecad. But I am also aware that those kind of applications can be a little bit complex when we are dealing with young students.
For me is important to set a balance between freedom, complexity and accessibility mostly when we are talking about teaching 3D design to young children. So I proposed to them to start designing their microscope in Tinkercad. They were already familiarized with it so I only had to teach them a few things: how to properly set the size and the position of an object, how to align and how to group/ungroup objects as well as some other things.
They shared their designs together and they did peer reviews of them. They sent me their designs of the different components and I printed them as soon as I could. There were always some details that needed to be refined but it took no more than two or three times to get the design right.
What advice would you give to other teachers looking to introduce 3D printing in their school?
My advice does not concern only 3D printing. It involves everything related with maker education and growth mindset. We live in a world (not only the school) that still believes that learning is equal to study. And it looks down on other ways of learning, such as learning by doing.
We live in a world where a lot of the traditional knowledge we need is just one click further from our needs. We could say that we have a virtual memory on the net and, thanks to the technology, in our pockets. At the same time, the complexity of the time we are living in, demands another kind of learnings more focused on what is called “soft skills”. There is no way to learn these kind of skills the traditional way.
In addition, our students (the word “student” itself denotes an old way of understanding learning) are used to learning in a different way and using different devices than we were. They do not trust in the information itself, they want to practice with it, developing projects and making. They make and they learn. And if there is some information that is needed in some stage of the project, they don’t need a teacher to know about it. They just take out their phone from their pocket and look for an answer to their doubts.
But there is a lot of learning that is impossible to achieve from our phone. Those kind of learning are most related with methods and attitudes. I think that the best way to teach this kind of learnings is the maker education.
Project development, inquiry based learning… are different ways to approach the needs of our young students. It’s not easy for teachers to change the mindset that has been the standard for the last two centuries (or more) but when we left those beliefs behind and we decide to step forward, the teaching experience is matchless. As I said before, there is no way back to “oldschoolstyle” classes. They learn, they enjoy going to school and we love to work with such as motivated students.
A huge thanks to Jokin and his students for sharing their background and experience with us! It’s an honour to have them as our Pioneer and we look forward to sharing more stories from Txantxiku Ikastola School. To finish off today’s blog, here’s a short video showing the microscope in action!