5 Steps to Creating Beautiful Visuals in Tinkercad
3D visuals can play a key part in portraying a design or communicating a message. With the growing amount of content in the world, it's as important as ever to ensure these visuals are interesting, balanced and beautiful - whether it's for a portfolio, website or to present to a client. Design software packages such as Autodesk Fusion 360 have amazing rendering features enabling you to create photorealistic imagery of your designs. But where does this leave Tinkercad users who don't have these features? Is it possible to generate beautiful images of Tinkercad designs?
4th January 2021 • Tips
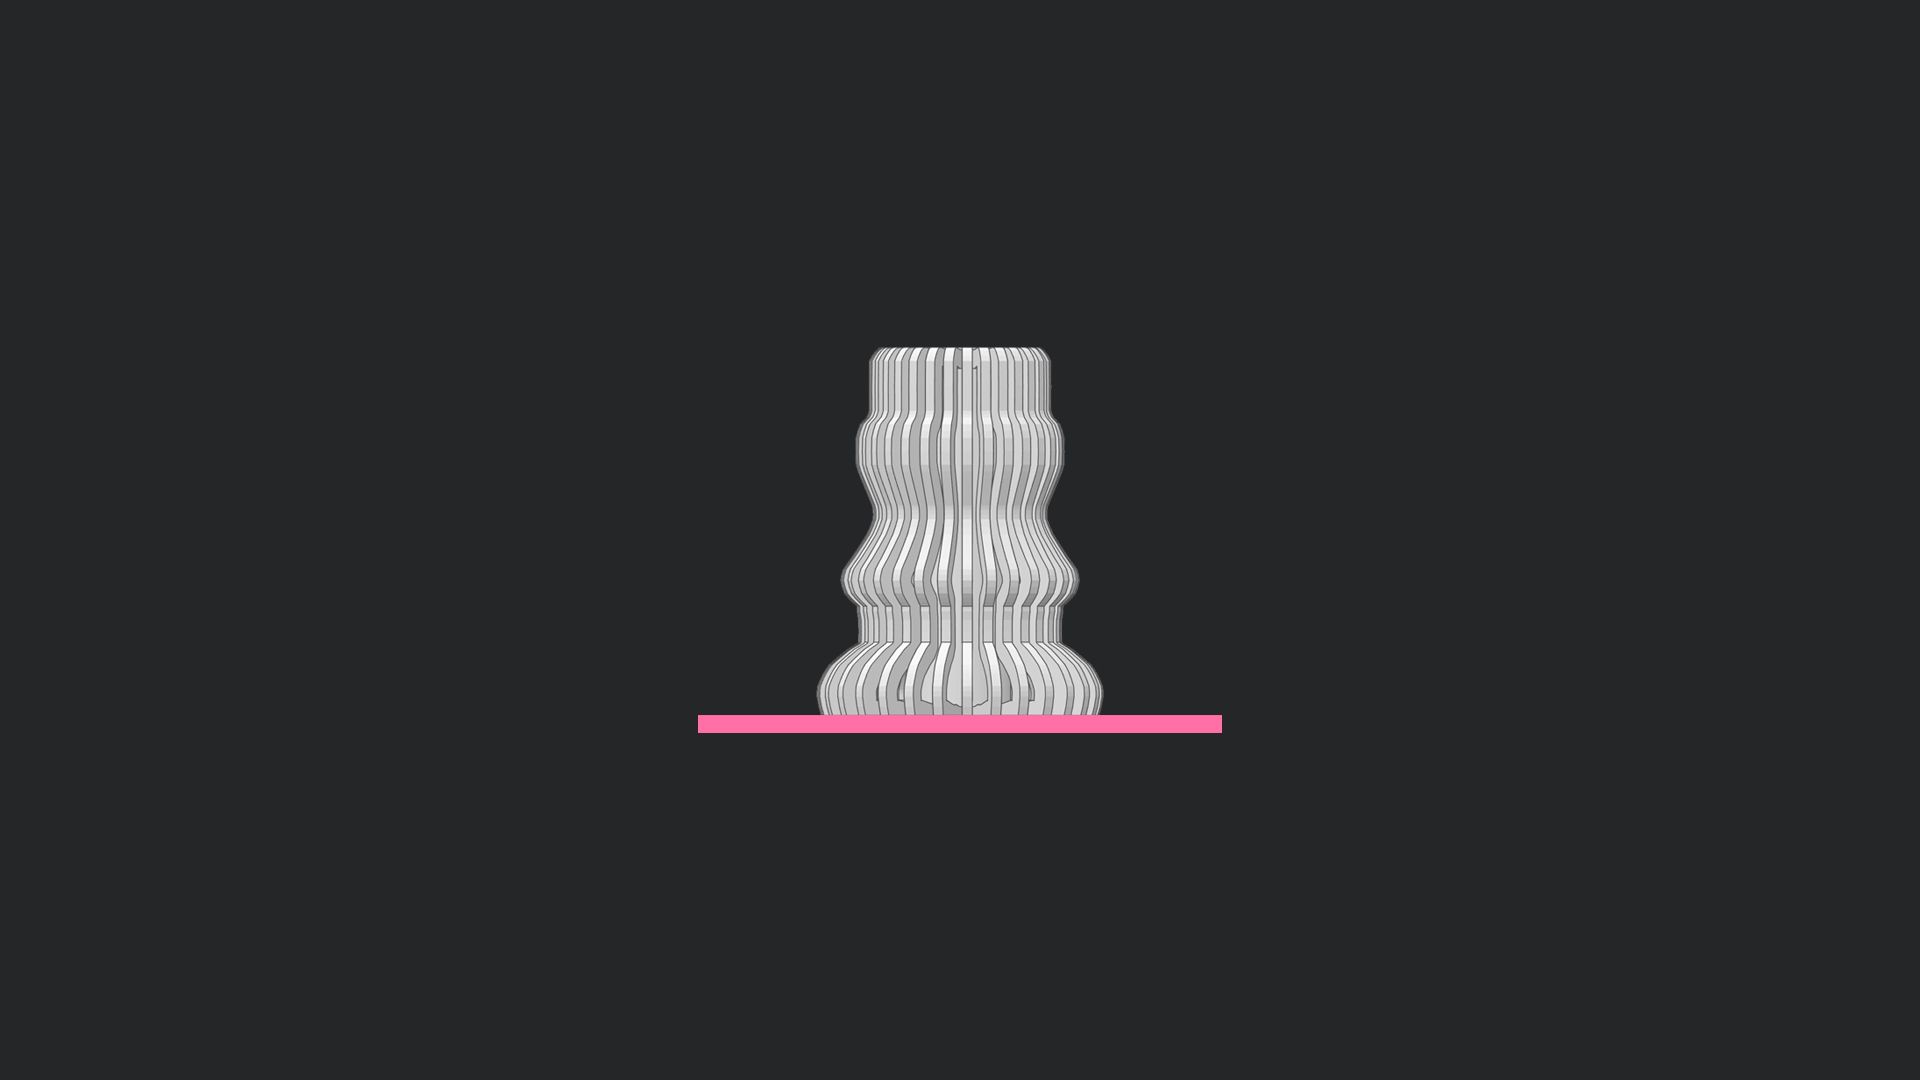
Yes it is! And in this blog, we’re going to look at 5 steps to help you do just that. The example we’re going to use is the below vase, which was created with Tinkercad’s scribble tool to create a side profile, which was patterned around a central hole. **As a quick side note, it is possible to send Tinkercad designs to Fusion 360 to access rendering features but for the purposes of this blog, we are exploring the creation of visuals directly from Tinkercad**.
STEP 1: Context
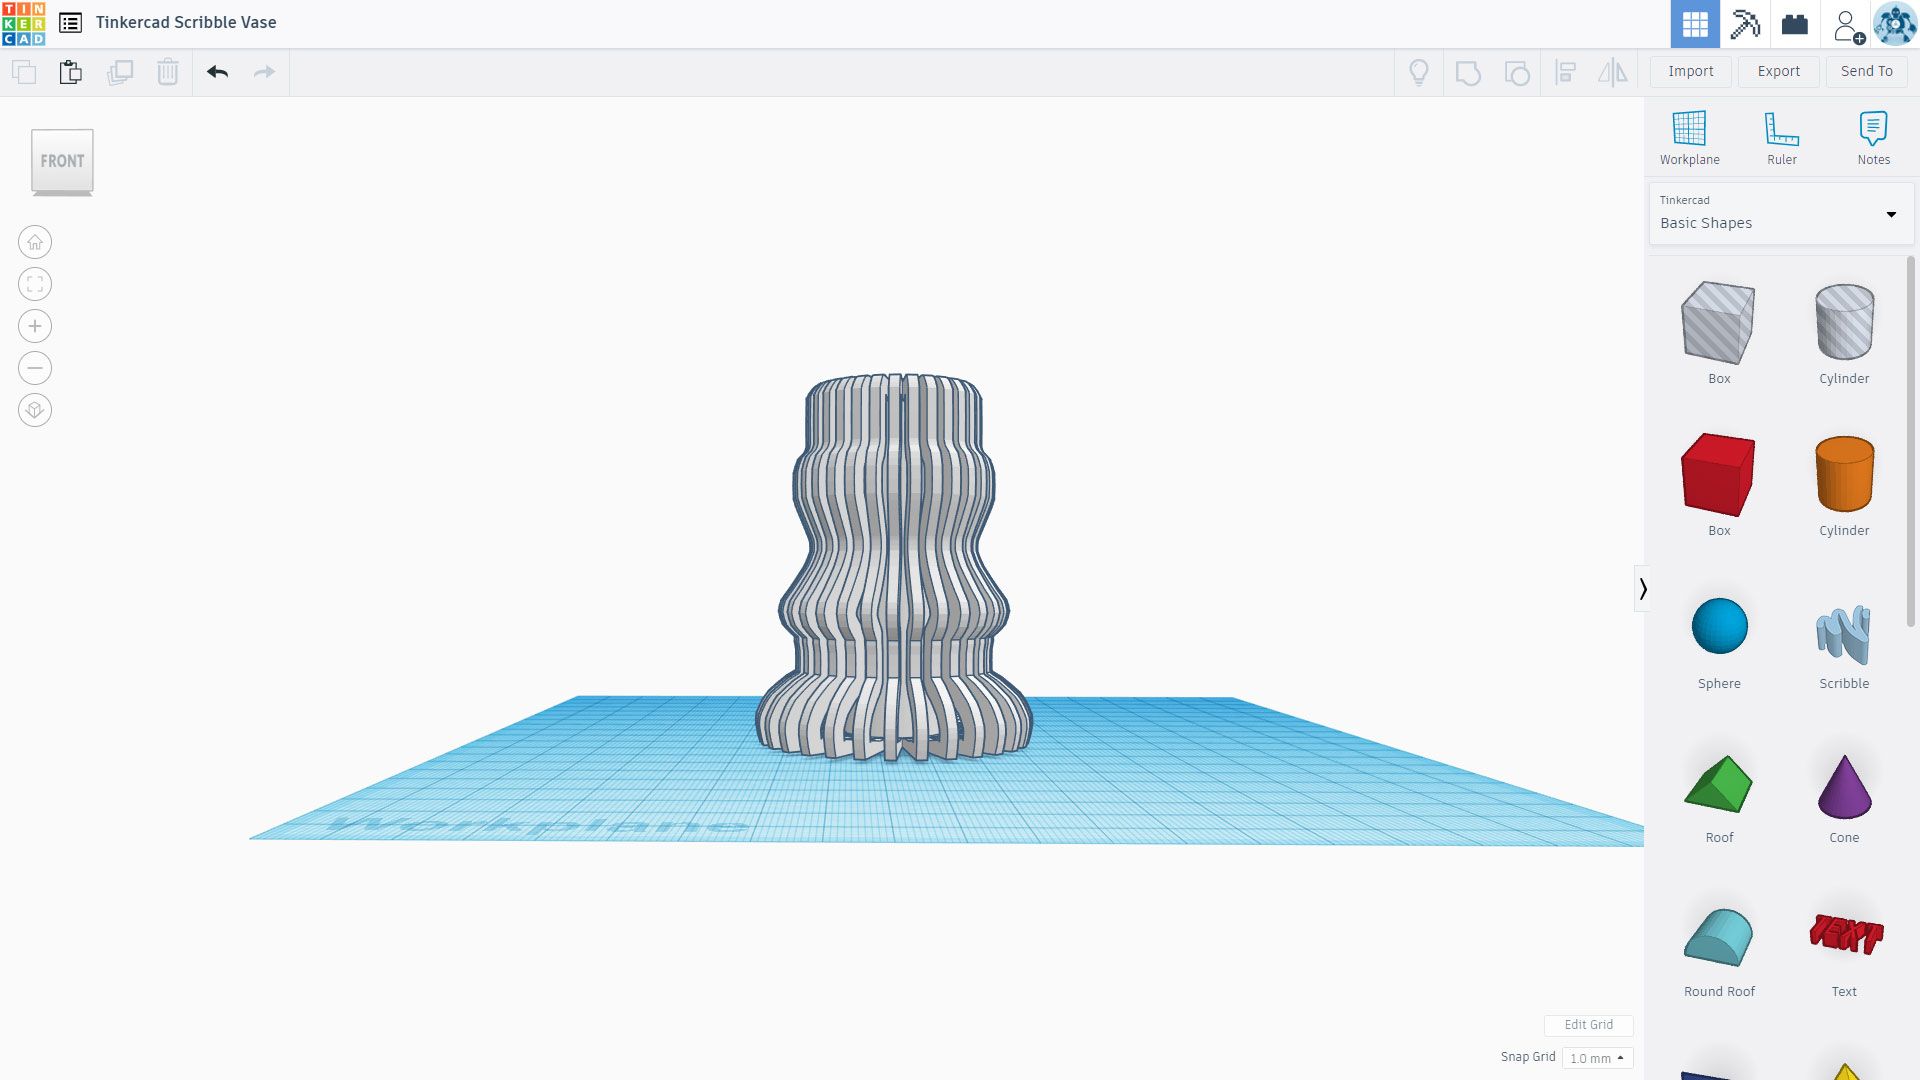
As you can see from the above image, the vase is sitting on a workplane grid, which helps with positioning when designing but doesn’t help much when it comes to aesthetically pleasing visuals. Step 1 is to put your model into some basic context. Where might you find your design? What are the foundations of its environment? In our example below, we’ve simply created some box shapes to represent a wall, a floor, a ceiling and a table. Something to remember is that if the purpose of your Tinkercad design is to create visuals, don’t be too precious about the size and accuracy of things. Otherwise you could end up spending too much time on fine details that can’t be noticed in your final outcome.
STEP 2: Populate
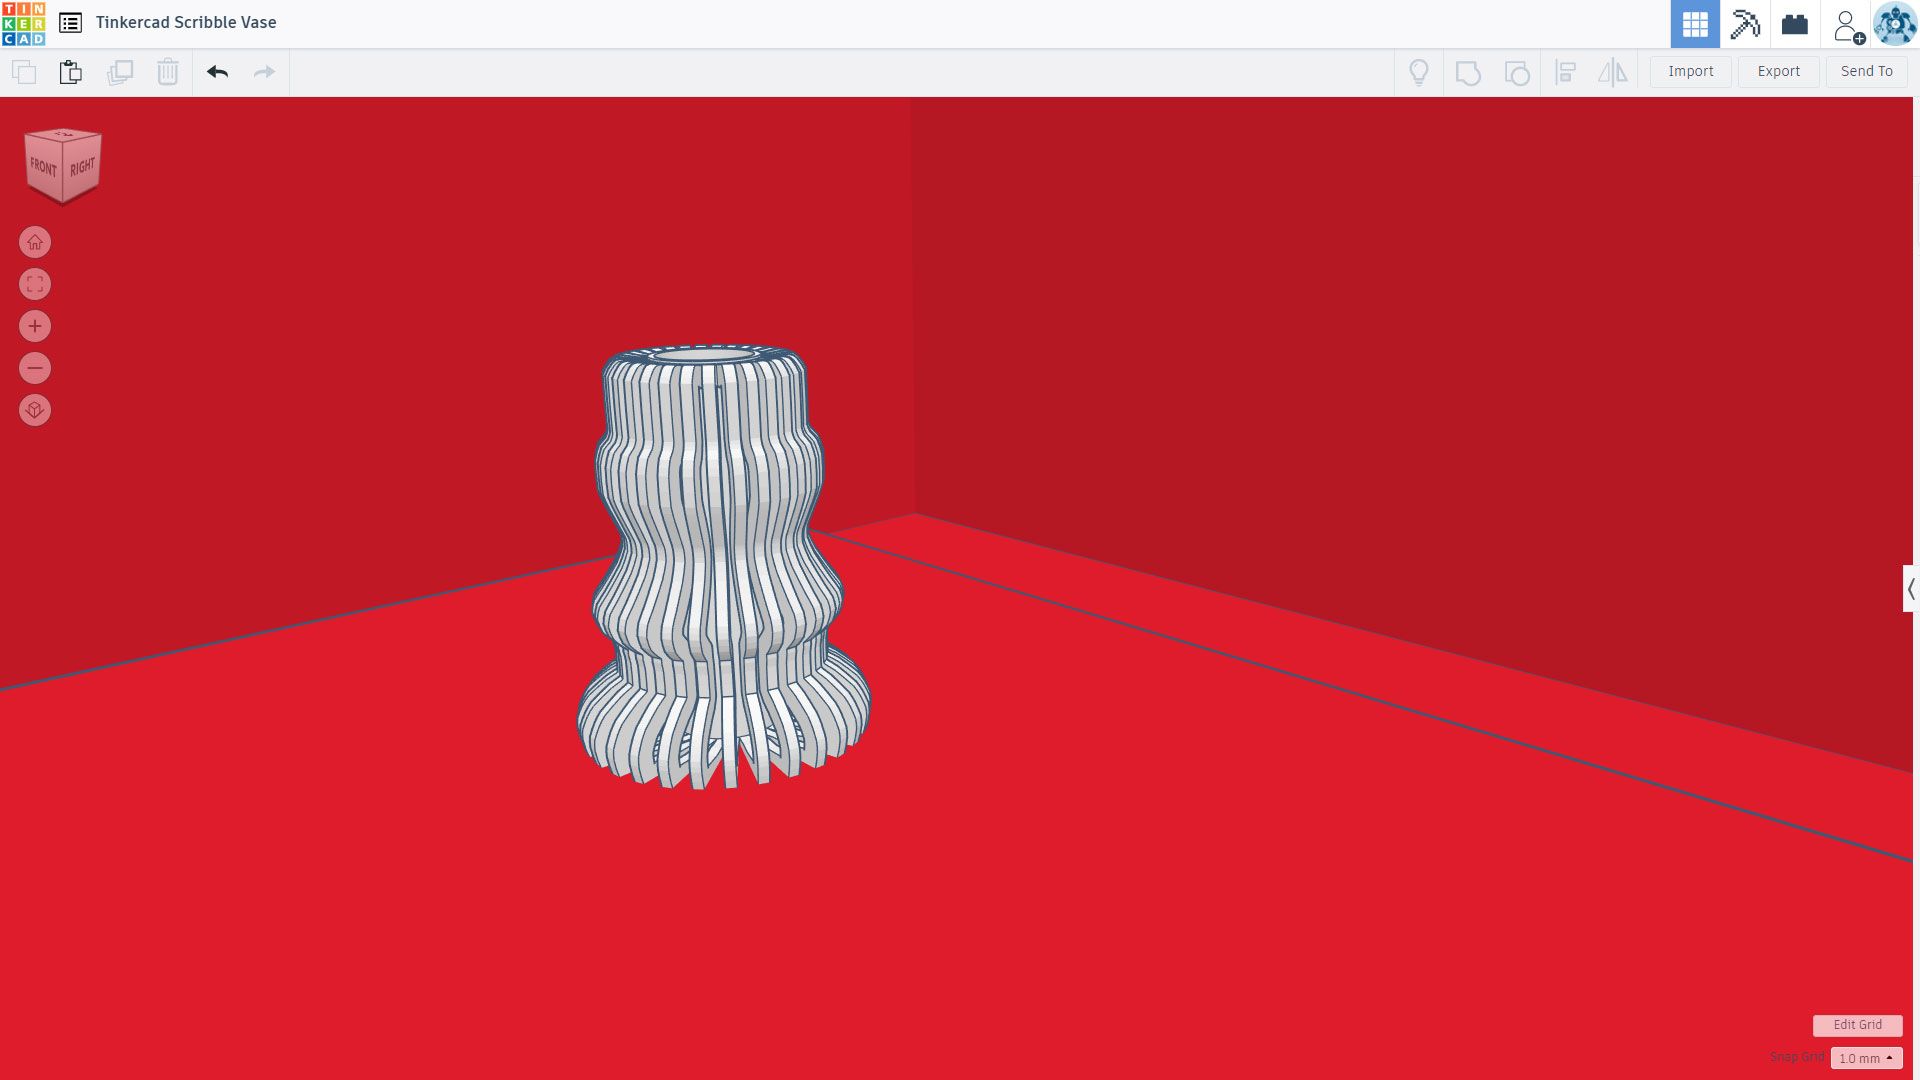
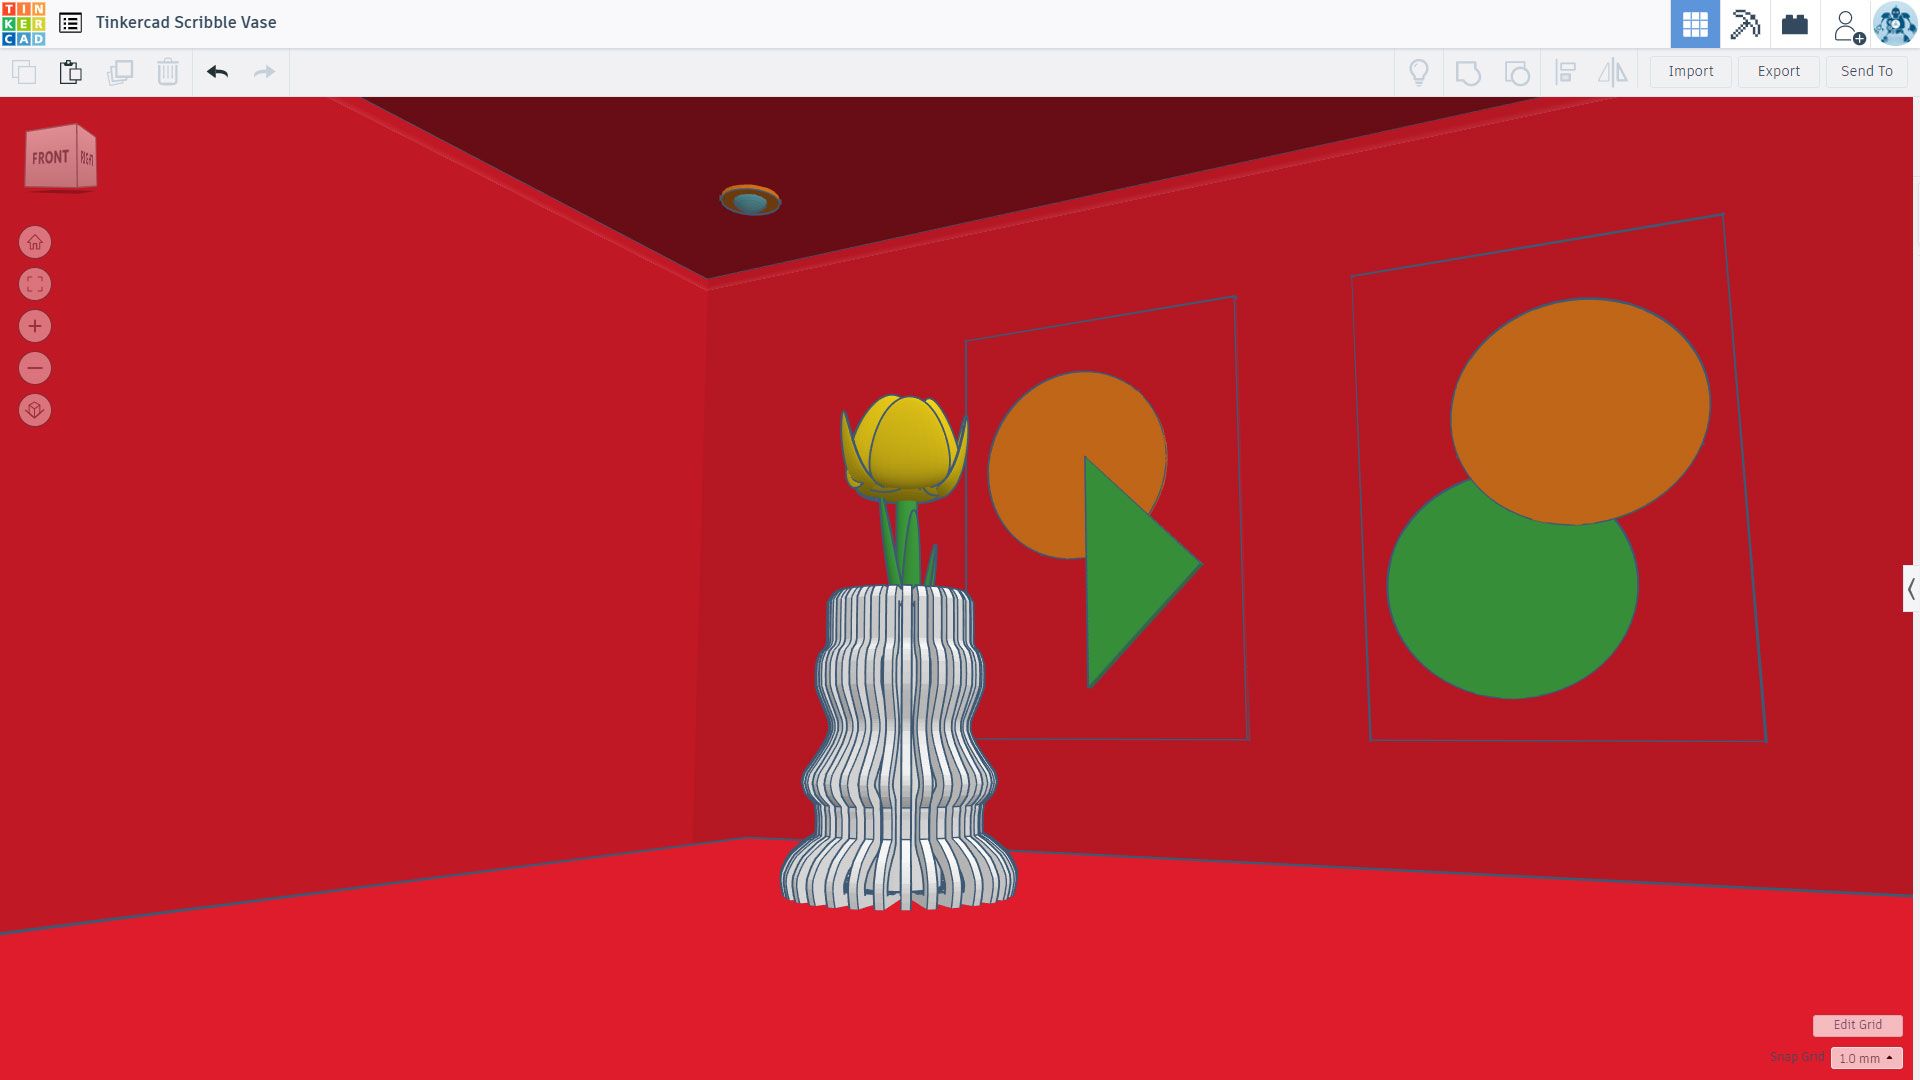
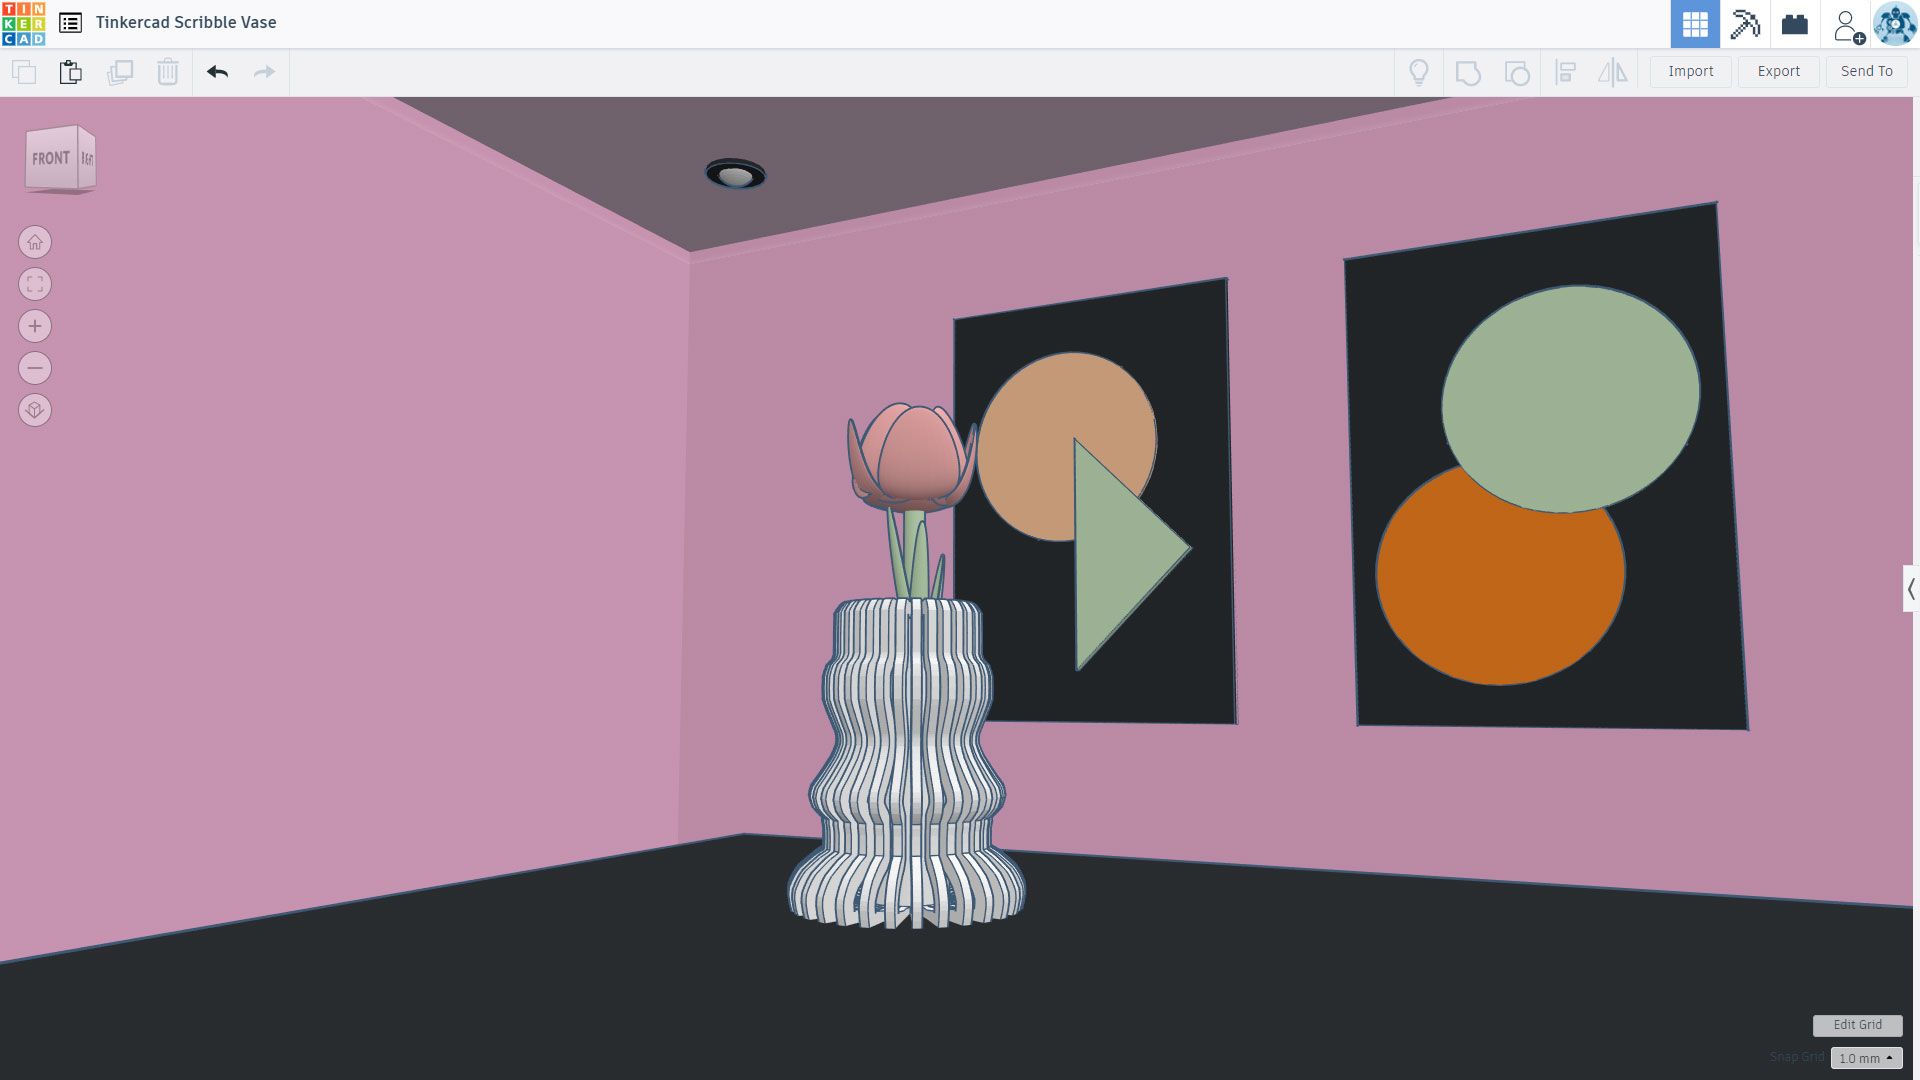
With your design in some basic context, it’s time to add some more details by populating your scene. What other objects and features might you find in your environment? In our example below, we’ve added some abstract artwork to the walls, a ceiling light and a flower to the vase itself. A great tip in this step is to make use of Tinkercad’s Gallery, where you can search for objects and copy them into your design. And don’t feel like this is ‘cheating’ – many designers use stock assets in a similar way!
STEP 3: Colour
Step 3 is all about adjusting the colour scheme of your scene. You might want to go for bold contrasts or something more faded like our pastel palette below. Rather than using Tinkercad’s preset colours, you can head into the custom menu and input your own custom HEX values for a wider range of colours. And if you’re looking for a resource to find complimentary colours, check out Coolors.
STEP 4: Scene Positioning
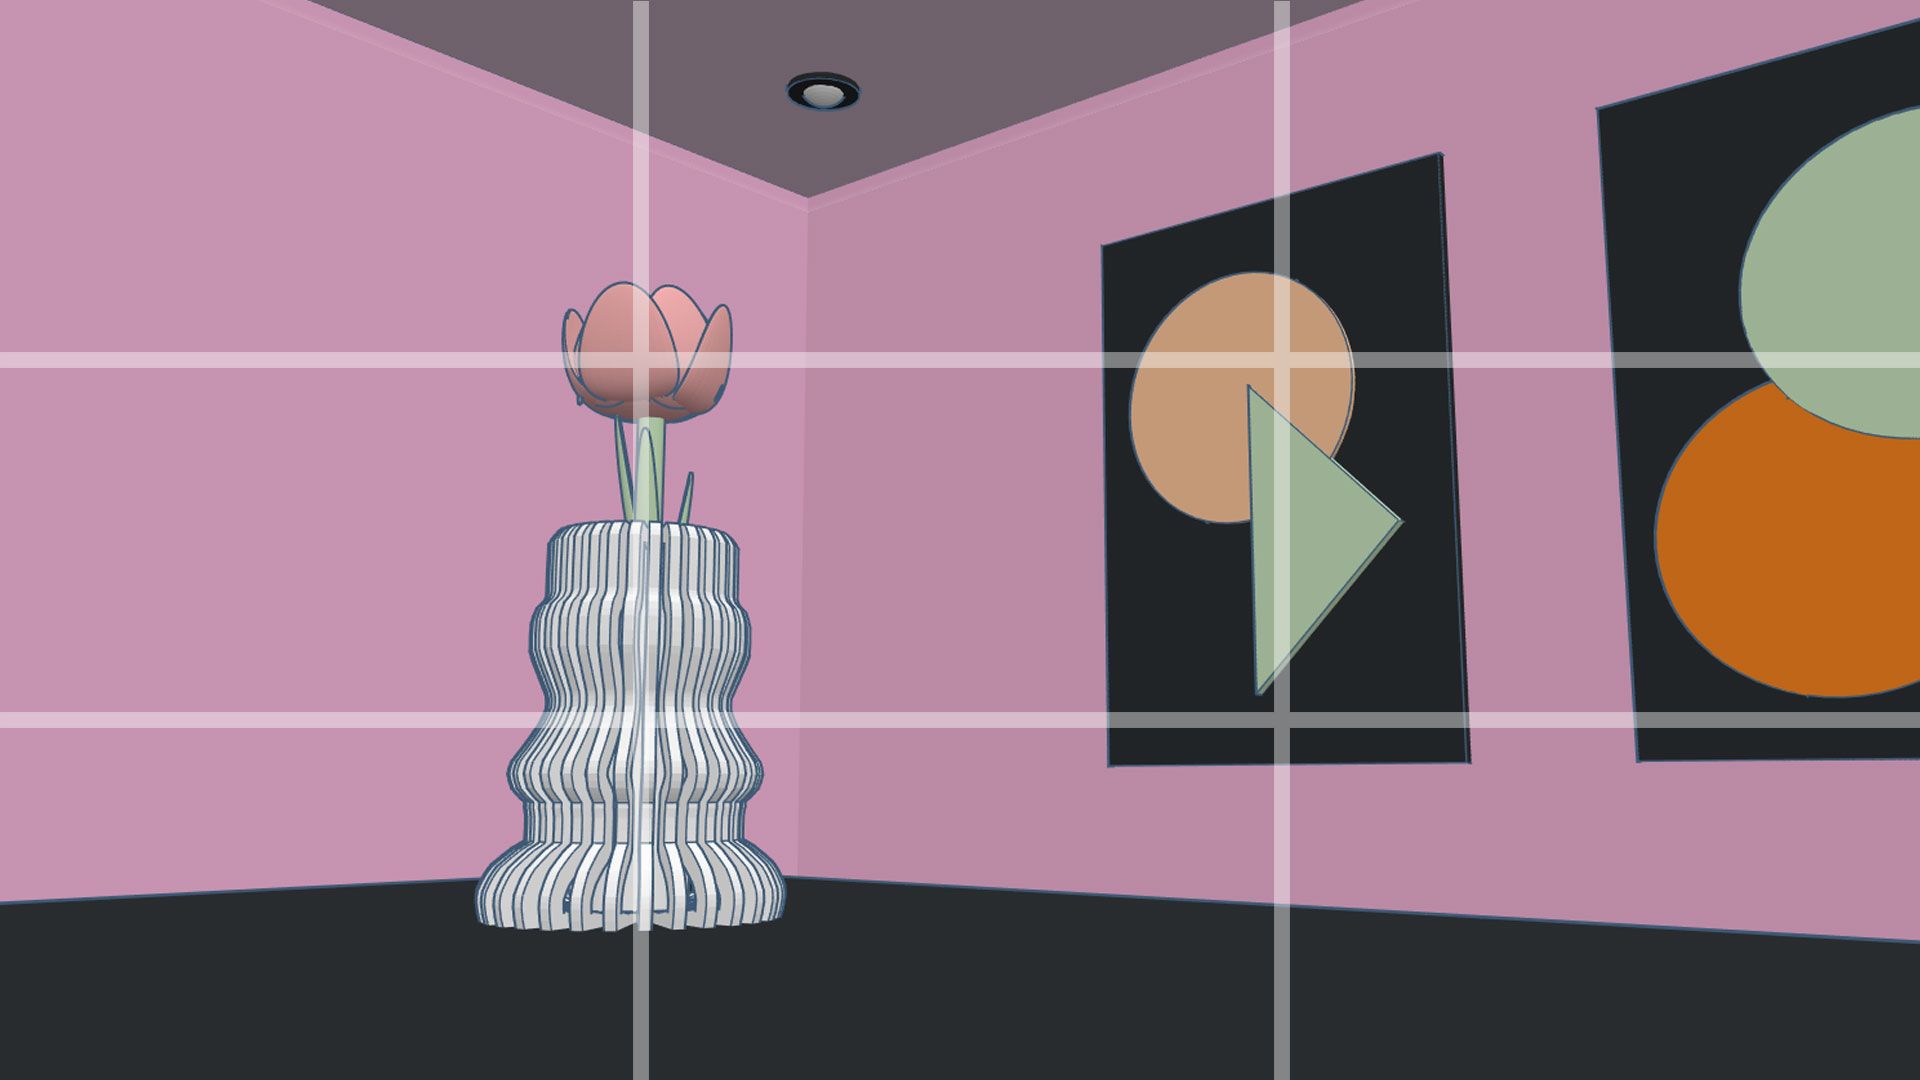
At this stage, your scene should be coming to life and you can now start thinking about the final visual. Rotate the view of your scene to where you want it to be for your final image. It might seem logical to position your design at the centre of the image but this can often lead to shots that don’t have a dynamic or natural feel. Give the rule of thirds a try by imagining your image is split into a grid of 3 horizontal sections and 3 vertical sections. Then position the most important and interesting features at the intersections of the grid and along the lines.
STEP 5: Add Effects (Optional)
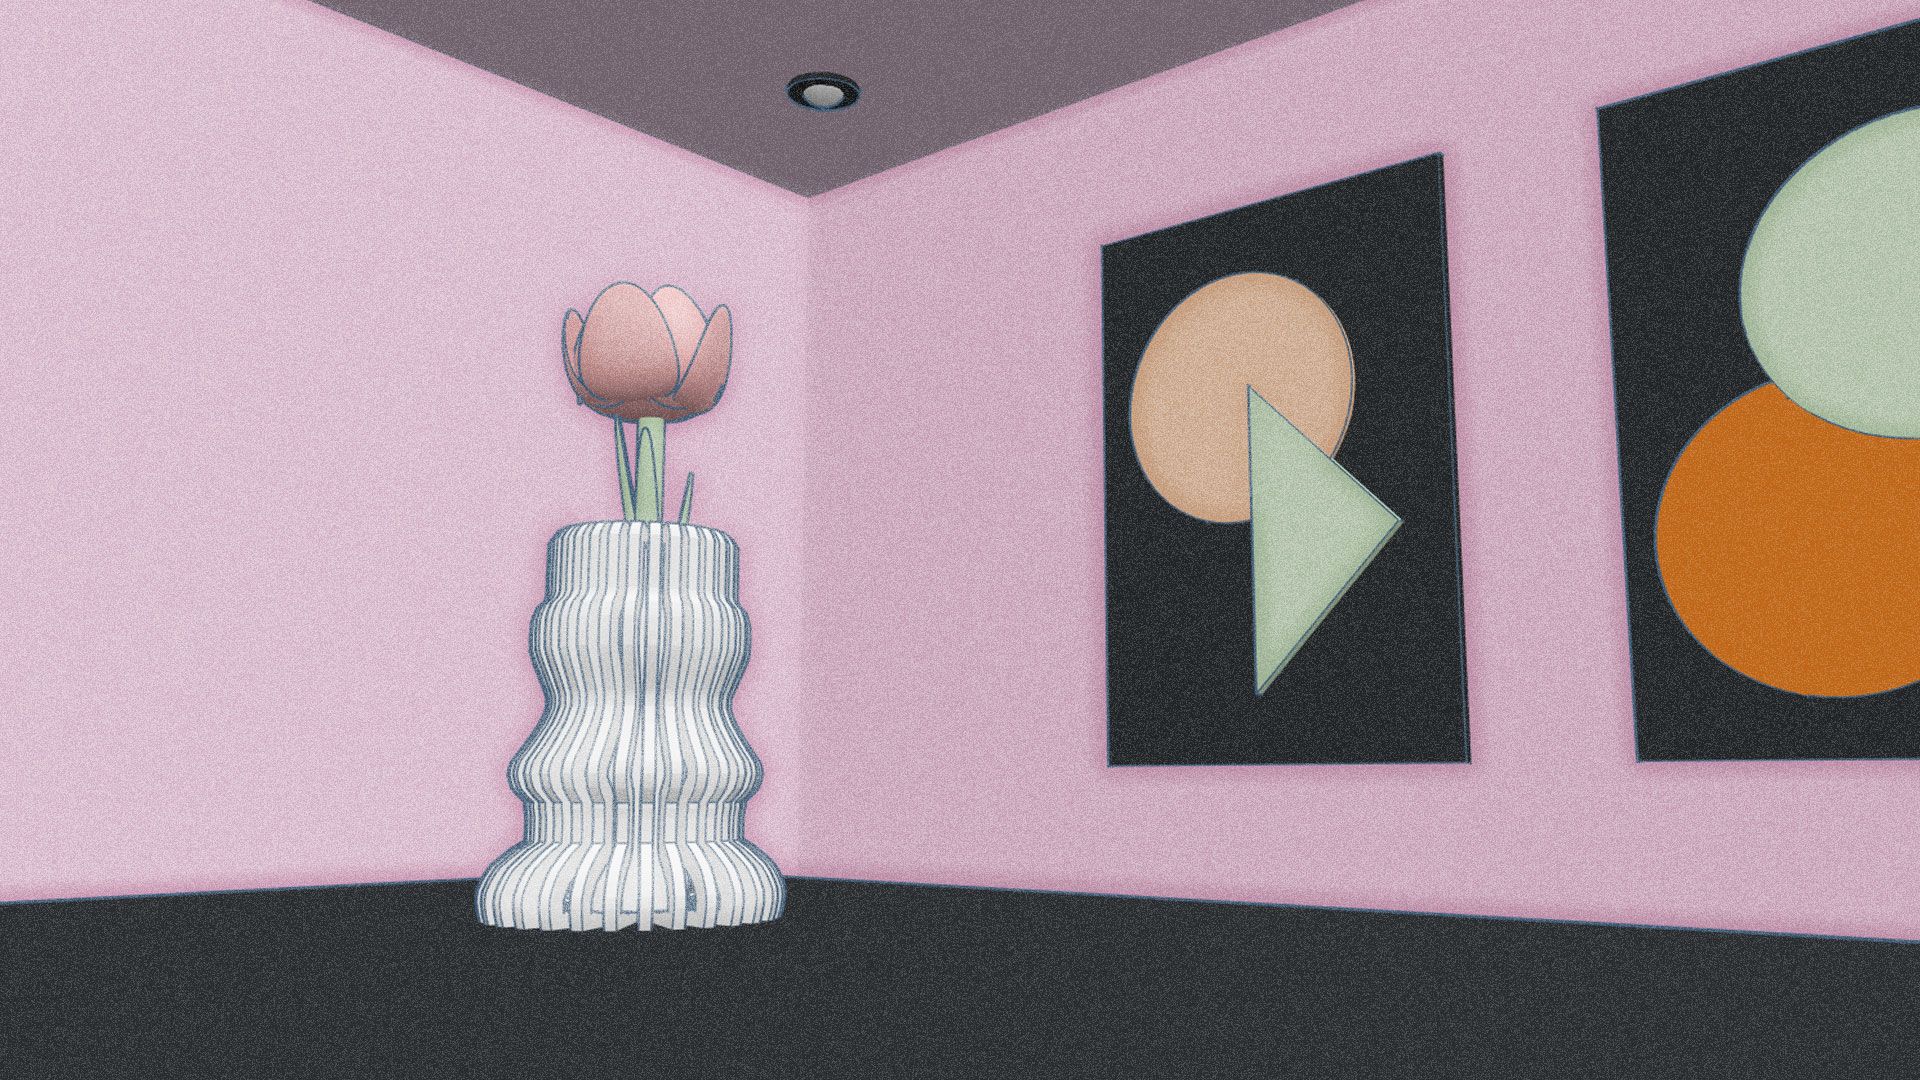
The final step is optional and highly dependent on the visual style you’re looking to achieve. With your scene completed and positioned, head to the ‘Send To’ button in Tinkercad and download a picture of your design. The picture will be in a PNG image format, which can then be uploaded to a graphics software such as Photoshop. From here, you can apply a filters to achieve a whole range of visual styles. In our example below, we’ve gone for a grainy glow filter but feel free to explore the options in whatever software you are using.
You could take things further by adding lighting effects, shadows etc but we hope this blog has given you some inspiration and guidance in getting started. We believe beautiful visuals don’t have to be photorealistic and we encourage you to experiment to find a style that works for you and the context of your work.
Finally, if you’re looking to get started with Tinkercad, don’t forget to check out our free trial to PrintLab!