Design Thinking and 3D Printing in Schools | 3 Example Methods
In today's blog, we're going to be sharing 3 creative design thinking methods used by Year 9 students at The Prince of Wales Island International School in Malaysia. The methods were used in a sequence as part of the make:able challenge - a global competition hosted by PrintLab and Autodesk, where students design and make a product or prototype that improves the day-to-day life of someone who struggles with mobility in their hands.
22nd March 2021 • Make:able
“Design thinking is a human-centered approach to innovation that draws from the designer’s toolkit to integrate the needs of people, the possibilities of technology, and the requirements for business success”.
Tim Brown, Executive Chair of IDEO
Method 1: Challenge Mapping
Challenge mapping is a human-centred activity, which helps you to identify the pain points in an individual’s daily routine. Its purpose is to provide you with a prioritised overview of activities, experiences and emotions that can be analysed before taking action upon your insights.
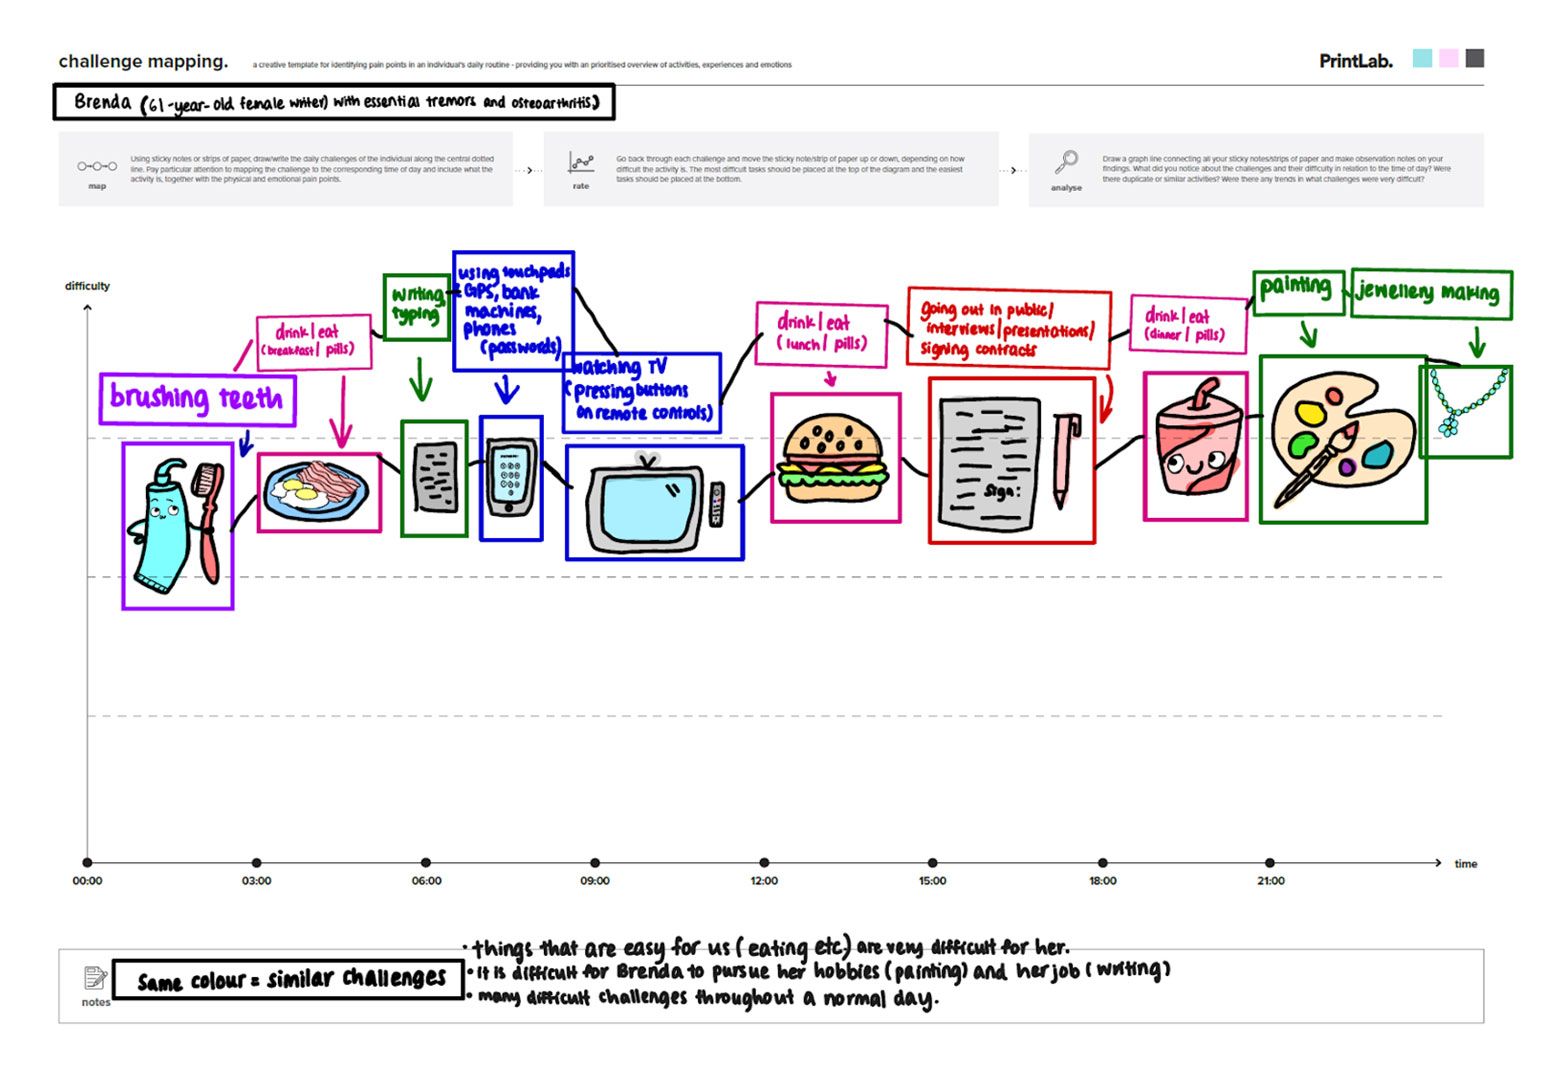
In the example shown above, students were developing a challenge map for Brenda, a 61 year old female writer with benign essential tremors and osteoarthritis. They began their journey by watching a video kindly provided by Brenda, where she discussed her day-to-day challenges and acted out physical movements that caused frustration. The video content allowed students to perform an analysis and observation exercise to gain a thorough understanding of Brenda’s challenges throughout a typical day – and these were mapped out on to the challenge mapping template. This method formed the foundations of the design process.
Method 2: Icon Sketching
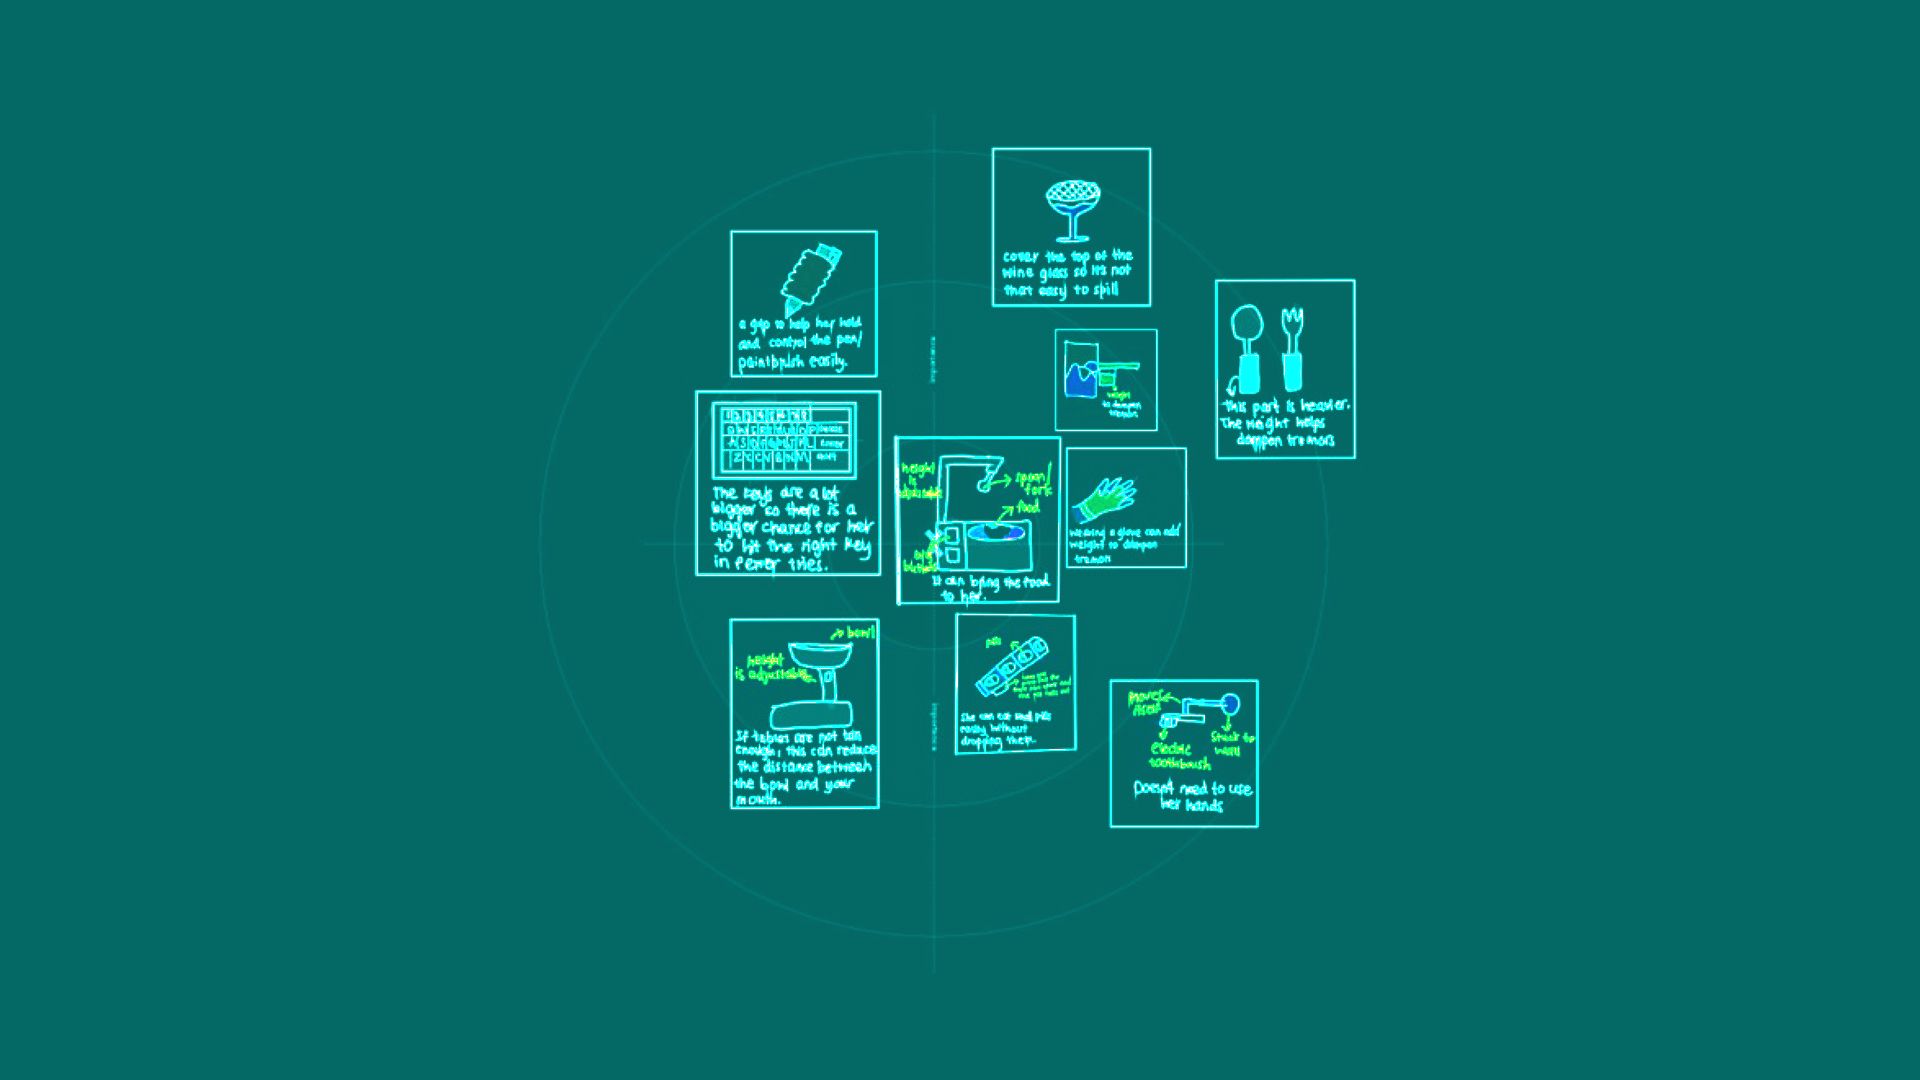
Icon sketching is a simple activity that helps you to generate a large number of ideas in the early stages of the design process, which deters you from becoming fixated on the first ideas that come to mind. It involves drawing basic icons to represent ideas – from practical solutions to wild proposals. The aim is to go for quantity over quality and by keeping your drawings within the frame of the small blocks, you are limited to the amount of detail you can apply.
![]()
The example above shows students using their challenge map as a reference to begin brainstorming visual ideas through icon sketching. As you can see, a broad range of ideas were explored with minimal detail. And each design carefully considered the needs and wants of their end user.
Method 3: Priority Diagramming
Priority diagramming is a method that helps you to map out ideas and design features in order of importance. The process is simple – you assemble a set of data and in within a team, you discuss the ideas and place them on the bulls-eye chart. The most important ideas are placed in the centre of the diagram and the least important sit on the outskirts. The key to this process is to be dynamic and continue to shift/move ideas as you go along (sticky notes work great for this type of activity).
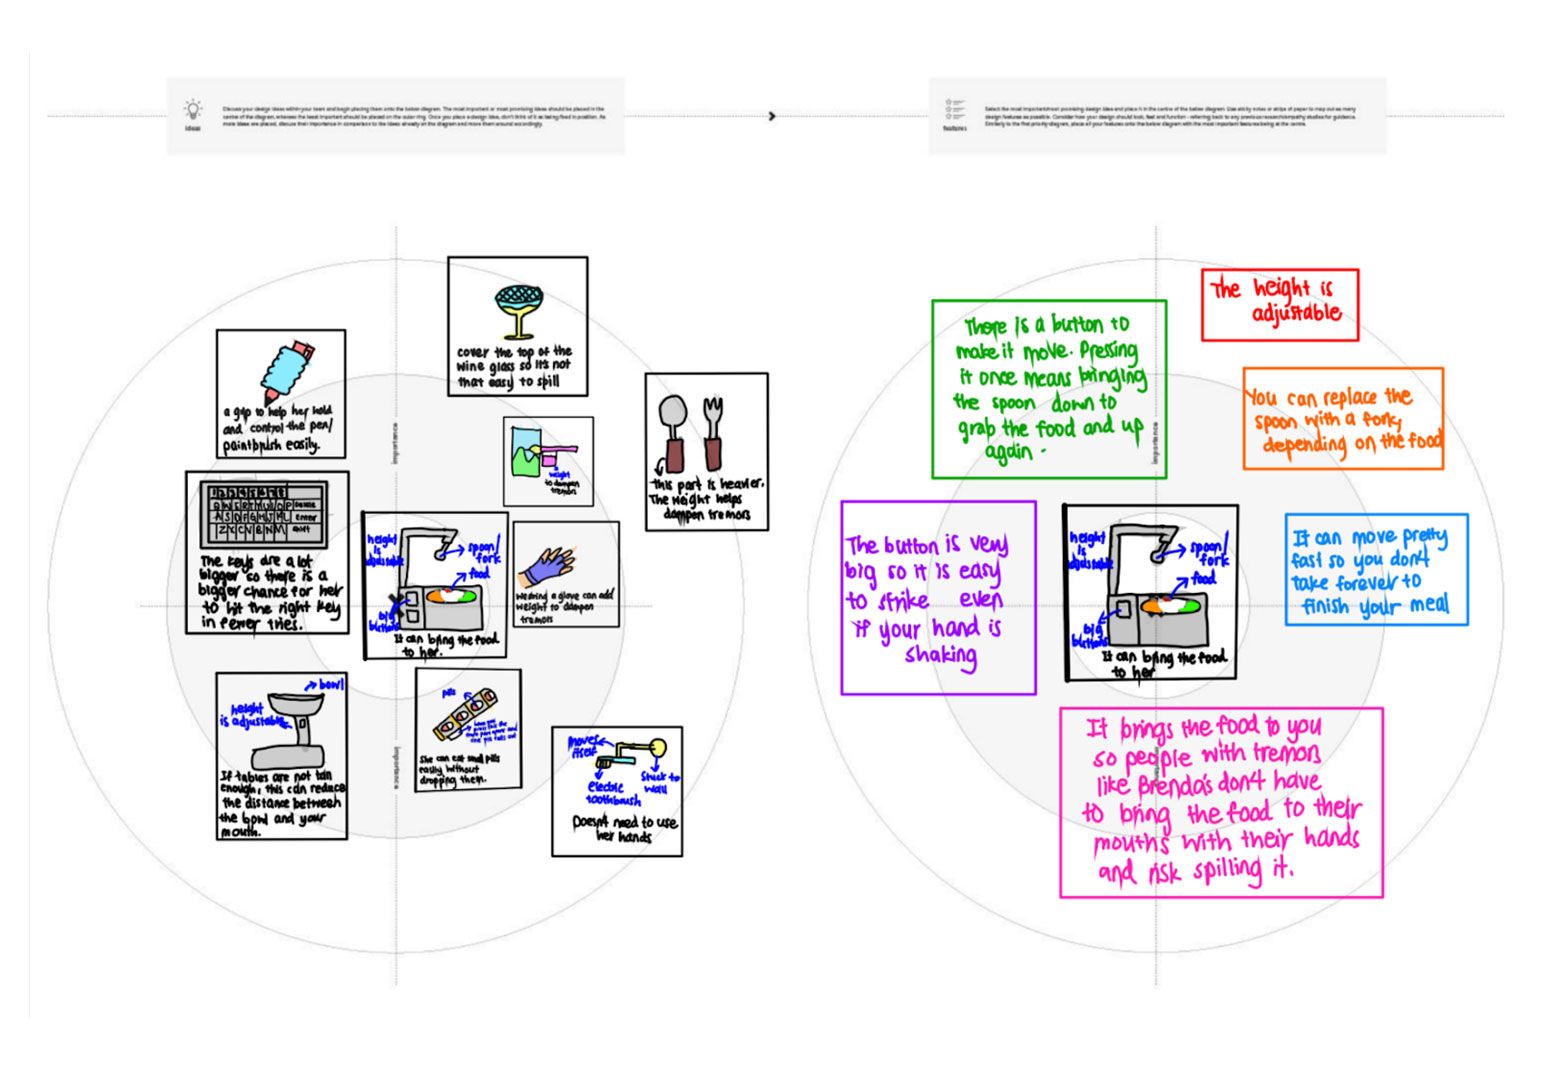
In the example above (left), you can see that students took their icon sketches and used the priority diagramming method within their team to figure out which idea to take forward. Once the single key idea was chosen, an additional priority diagram was created to identify a set of design criteria. Again, these ideas were mapped out in order of importance.
—
The 3 methods shared with you today are just part of the design process students are going through to develop a solution to improve Brenda’s life. We’ll be sharing the rest of their design process in the near future and a big thank you to Sam Hodge (Head of Design and Technology) and the students at The Prince of Wales Island International School for sharing their experience with the make:able challenge. Don’t forget to give them a follow on Instagram here to keep up-to-date with their amazing work!