Fusion 360, 3D Printing and Assistive Technology at Wimbledon High School
Today we're delighted to share some of the amazing work from Wimbledon High School in the UK, who have been creatively using PrintLab curriculum, Fusion 360 software and 3D printing. We sat down with Design Technology teacher Nick Sharman to discuss 3D printing in education before honing in on a recent Year 9 project, where students designed assistive devices for people with disabilities. Check out the interview and example outcomes below!

7th May 2020 • Case Studies
Hi Nick, thank you for taking the time to speak with us today. Firstly, could you tell everyone a little about yourself and how you got involved with 3D printing?
Hi Jason, I am currently Head of Design Technology & Engineering at Wimbledon High School and have been teaching for 11 years. However, I did take 2 years out of teaching to work as an engineer and sales rep for an educationally-based Technology company. I had always had an interest in 3D printing from when I was a University studying Product Design, although I started to see the real-world application whilst servicing Stratasys machines that were being used in the industry.

How is 3D printing used at your school? More specifically, how is it embedded into the curriculum?
Over the past year, we have been introducing more and more 3D CAD/printing into our curriculum and I see it as a growing area of interest. We introduce our student into 3D CAD in year 6. Using Tinkercad, they design and build a jitter monster based on their centralised topic of learning. In year 7 & 8, we will be introducing the self-water plant pot, this will be taught alongside their science lessons where they learn about photosynthesis.

Year 9 students start the year with a talk from a member of the public who has a disability. This gives the students a real brief and context for the assistive device project and students gain real-time feedback from their client. At KS4 students start to delve deeper into the use of Fusion 360 and apply their existing knowledge to create an acrylic revision stand that they use to collect revision samples and notes in. These are not 3D printed but laser cut. From this stage on we find that students have enough understanding to apply their learning to create most objects they can envisage.
It was great to see that you chose our ‘Assistive Device Academy’ project to teach recently and we were extremely impressed with the devices created by your students. How did they find the project and what did they learn?
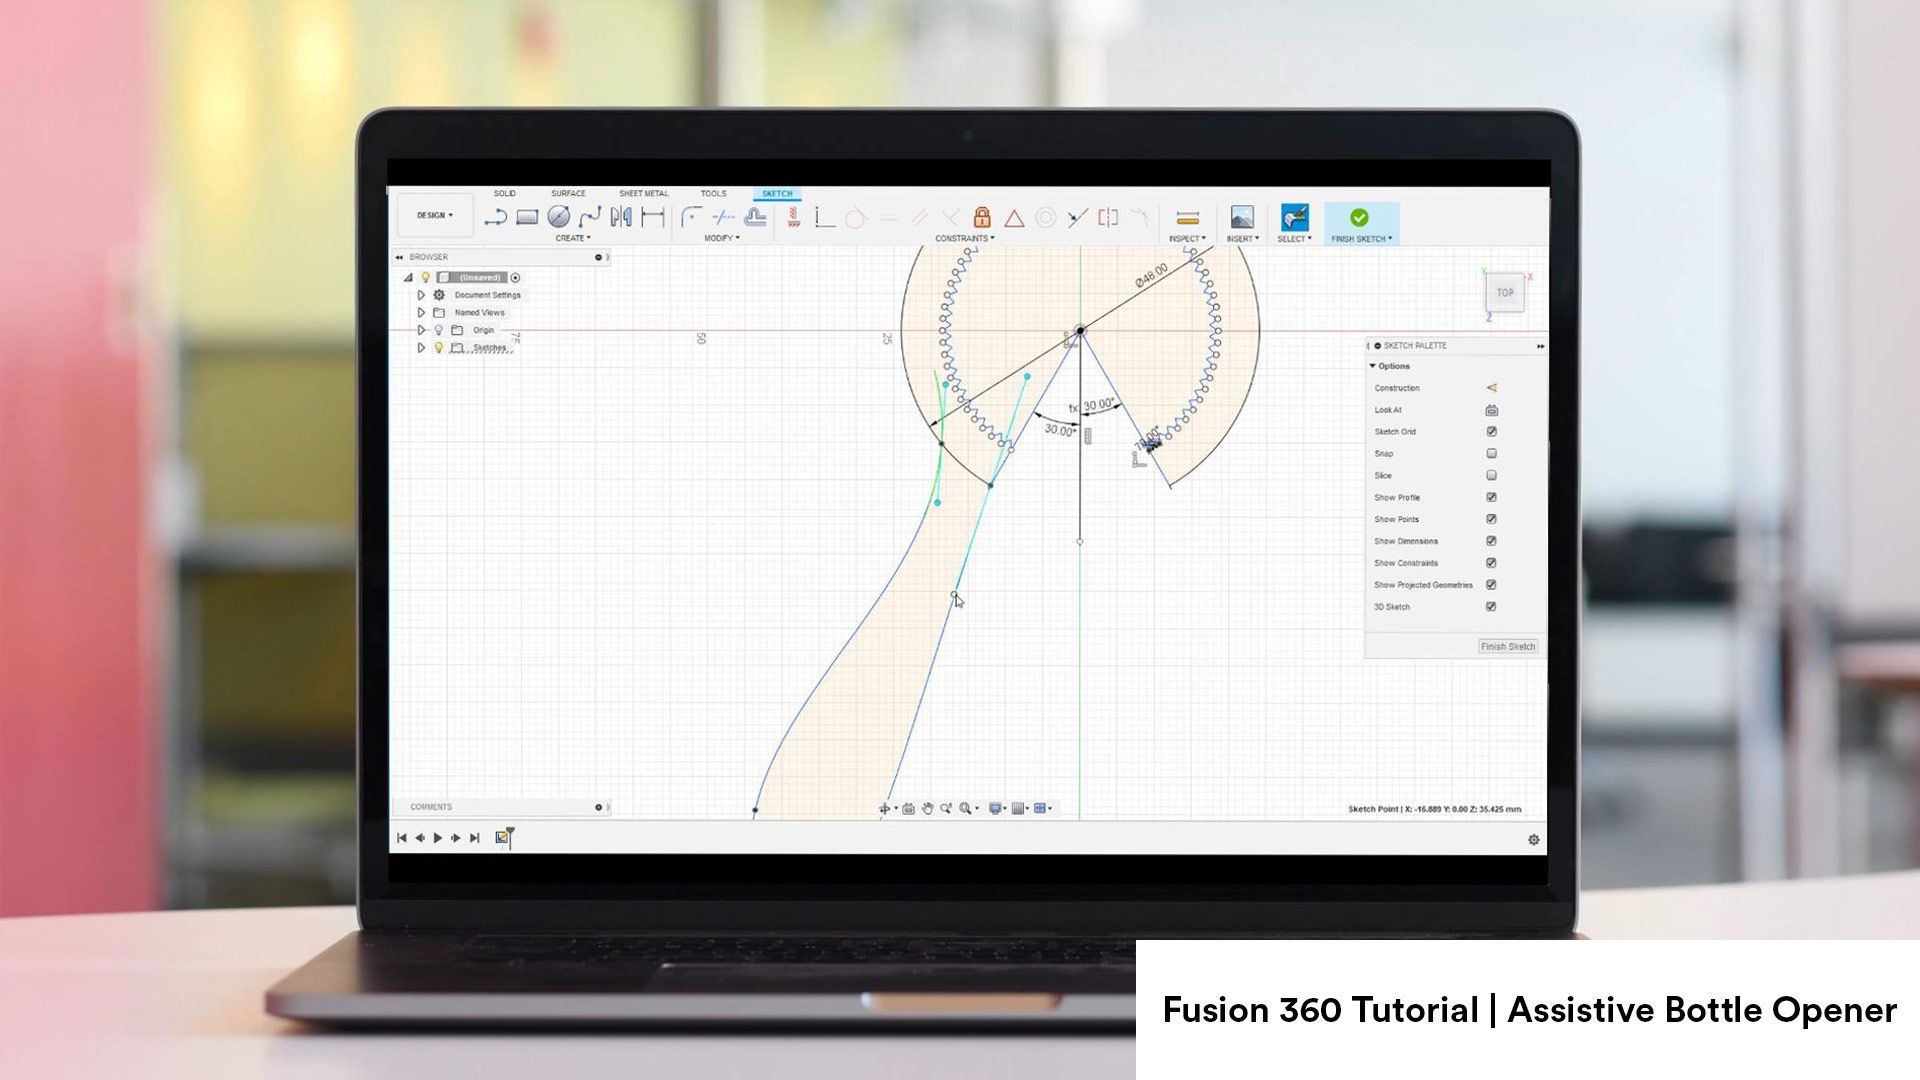
The students really enjoyed the project and they had such a wide array of outcomes, to deliver this project we used Fusion 360 and they picked the programme up quickly. At points they did find following the tutorials slightly confusing, however they all managed to create at least one of the samples before moving on to their designs. The biggest learning curve for the students was translating a sketch on to a 3D object. They quickly learnt that developments have to be made to design when you move from 2D to 3D. The idea of creating a final out come straight away became obsolete and quickly found out they had to make lots of little iterations.
What are your thoughts on Fusion 360 for Year 9 students? Were there any challenges?
The main challenge that I found was getting the students to think in three dimensions whilst working on a 2D screen. However, once students understood the basics of Fusion and become familiar with the interface they became more and more confident.
How did you find the Assistive Device project as a teacher?
The project was well structured and easy to deliver using the PrintLab resources. Having all the .stl files ready to print was super handy. Although, I would recommend doing the tutorials as a teacher before you start the project. By completing the tutorials before delivering the project I was much more confident when students came across problems. I could also foresee where students might struggle and give them some pre-guidance.
Was this an assessed project and if so, how did you go about this?
Yes, we assess our students based on a range of criteria that they are given before starting their project, this is within their Google slides portfolio. We look at the project holistically, focusing on 4 areas – Communication, Problem Solving, Design ideas and Testing & Evaluating. We use our own assessment system called WimLevels to show progess, aswell as written and verbal feedback throughout.
What advice would you give to teachers looking to get started with 3D printing?
Firstly, don’t pay for software! There are so many options out there that have educational licencing for free. I would personally recommend TinkerCAD for up to year 8 and Fusion 360 for anyone above. I would also recommend investing in 3D printers that are reliable and easy to maintain, we have a bank of Flashforge Inventor 2’s and they work well for what we do. Lastly, I would recommend PrinLab, the interface and resources are great, always updated and relevant to not only DT lessons, but there are also loads of cross-curricular links.
—
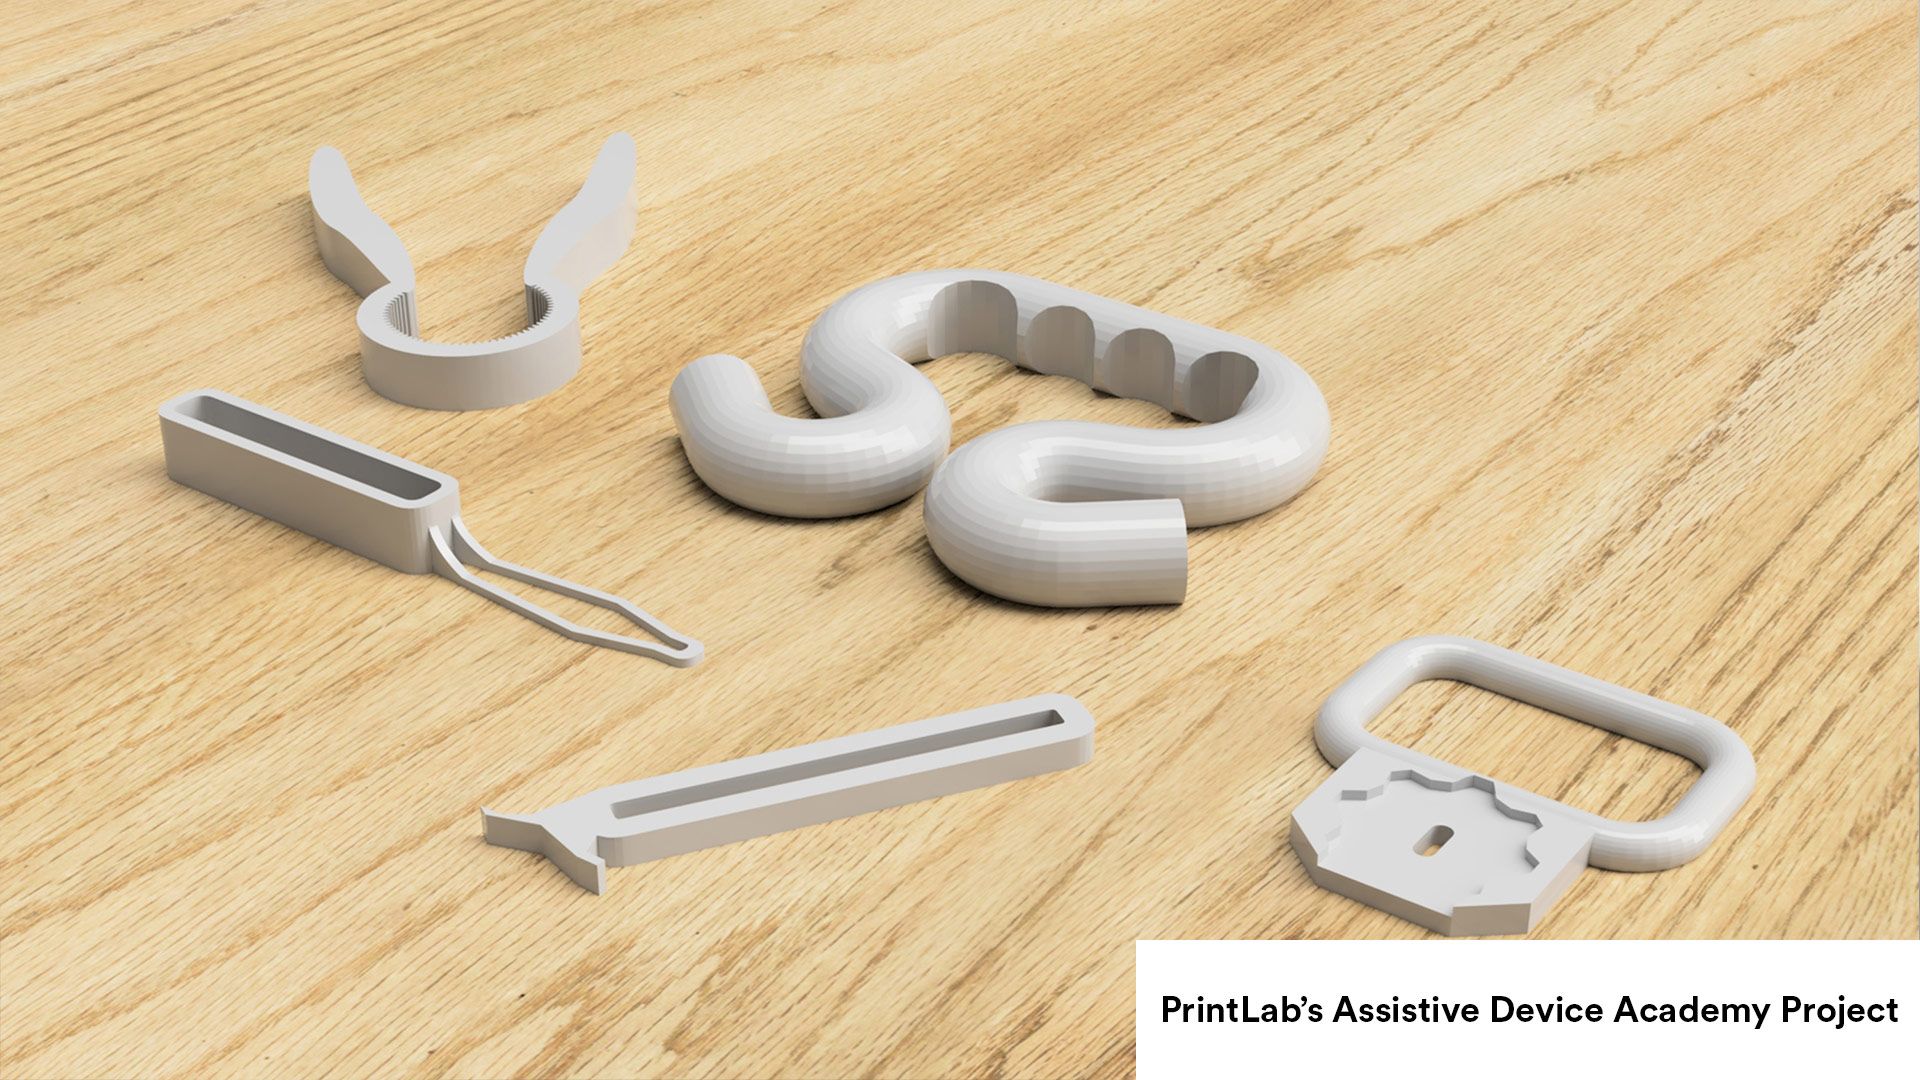
Let’s now take a look at some of the student outcomes from the Assistive Device Academy project, together with their own comments:
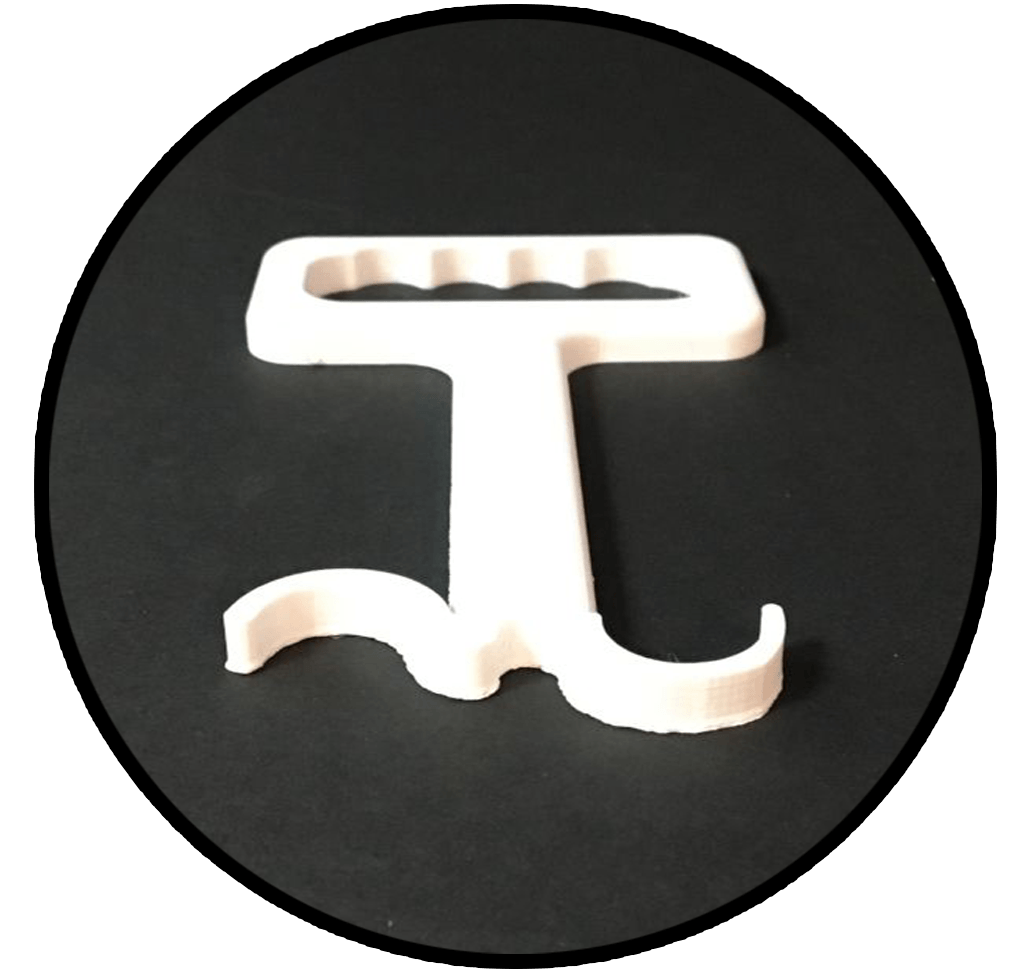
Assistive Mug Holder
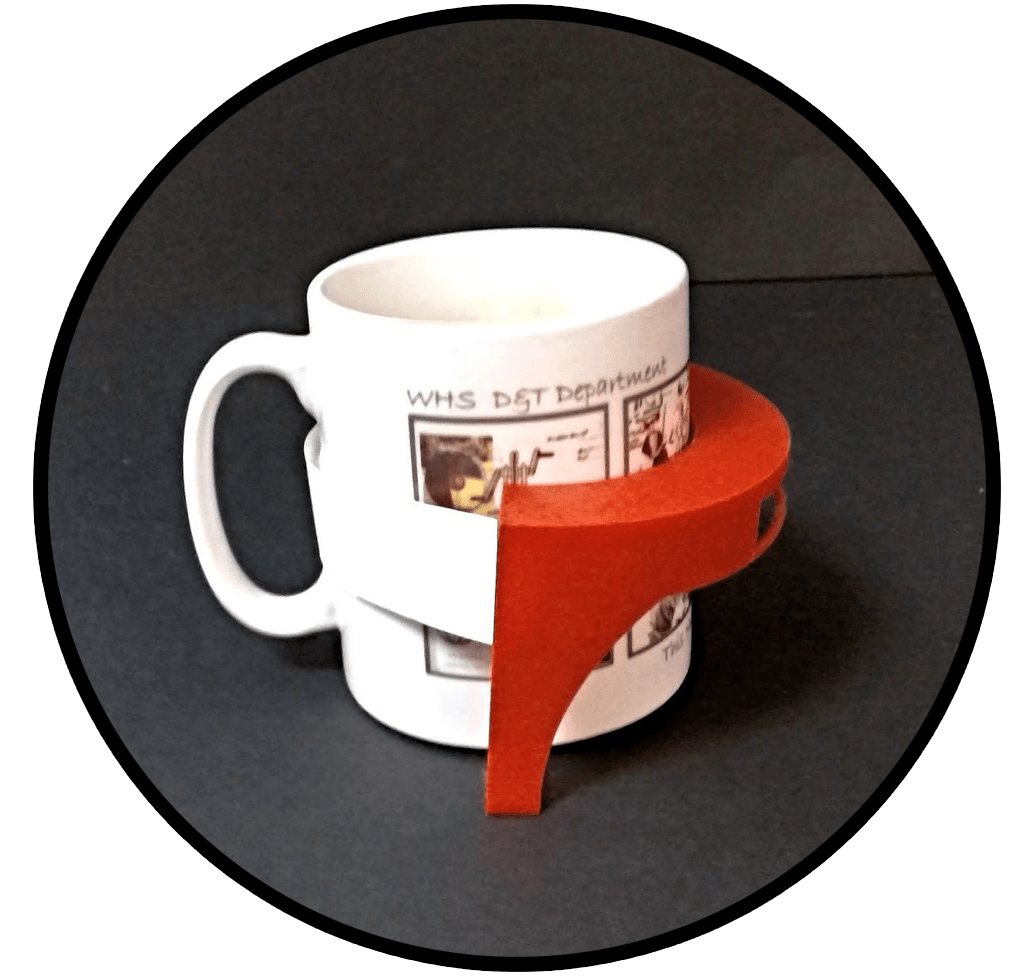
“The overall design of the product was successful. It completed the task I made it to do, make holding a mug easier. However, the slip which was meant to allow the person’s fingers to slip through and allow the structure to rest on them was not wide enough or structurally sound enough to allow that to happen”.
Assistive Fork
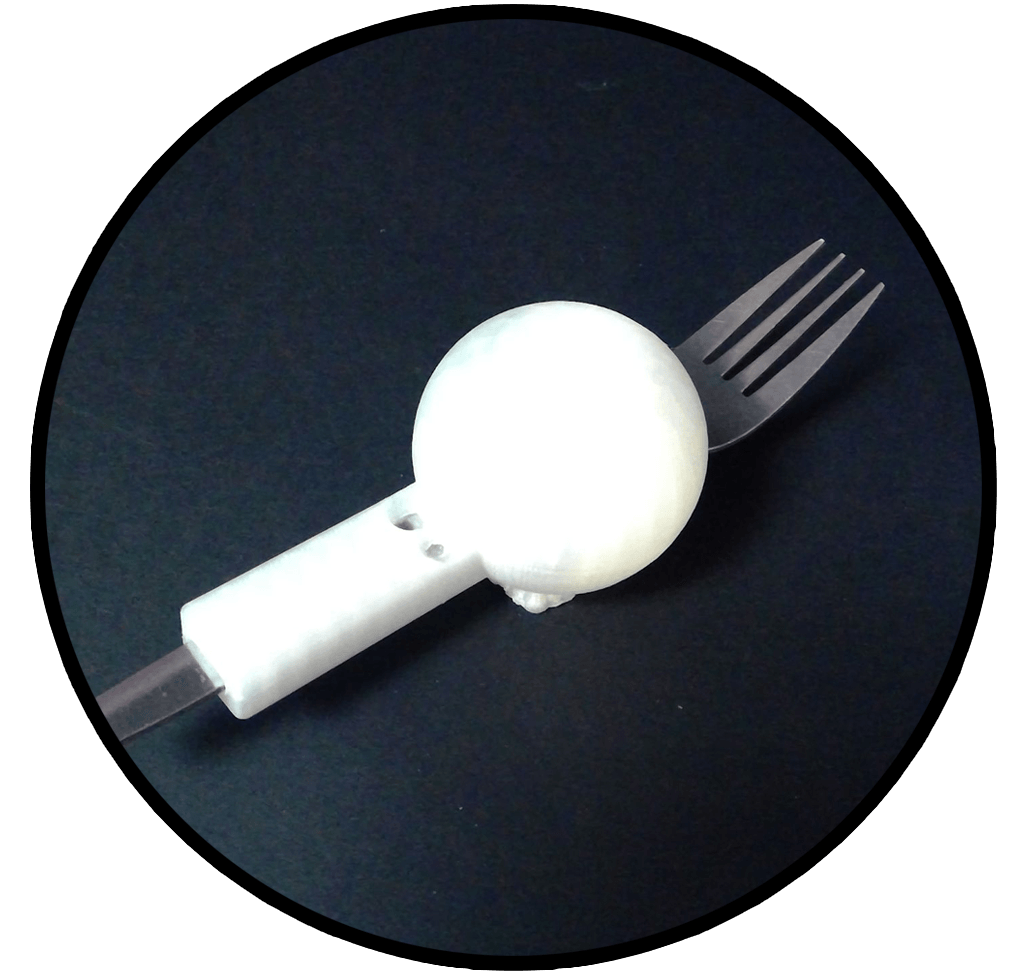
“The ball on my assistive device is very comfortable to rest on so the user with be able to easily hold the fork. Also, the user is able to insert the fork in 2 different ways (one with more control and one with less) so they can choose which way works better for them”.
Zip Assist
“This is a zip mechanism. You attach the hook to the zip and you either pull up or down. The hook that faces upwards pulls the zip up and the hook that faces downwards pushes the zip down”.
Seat Belt Assist
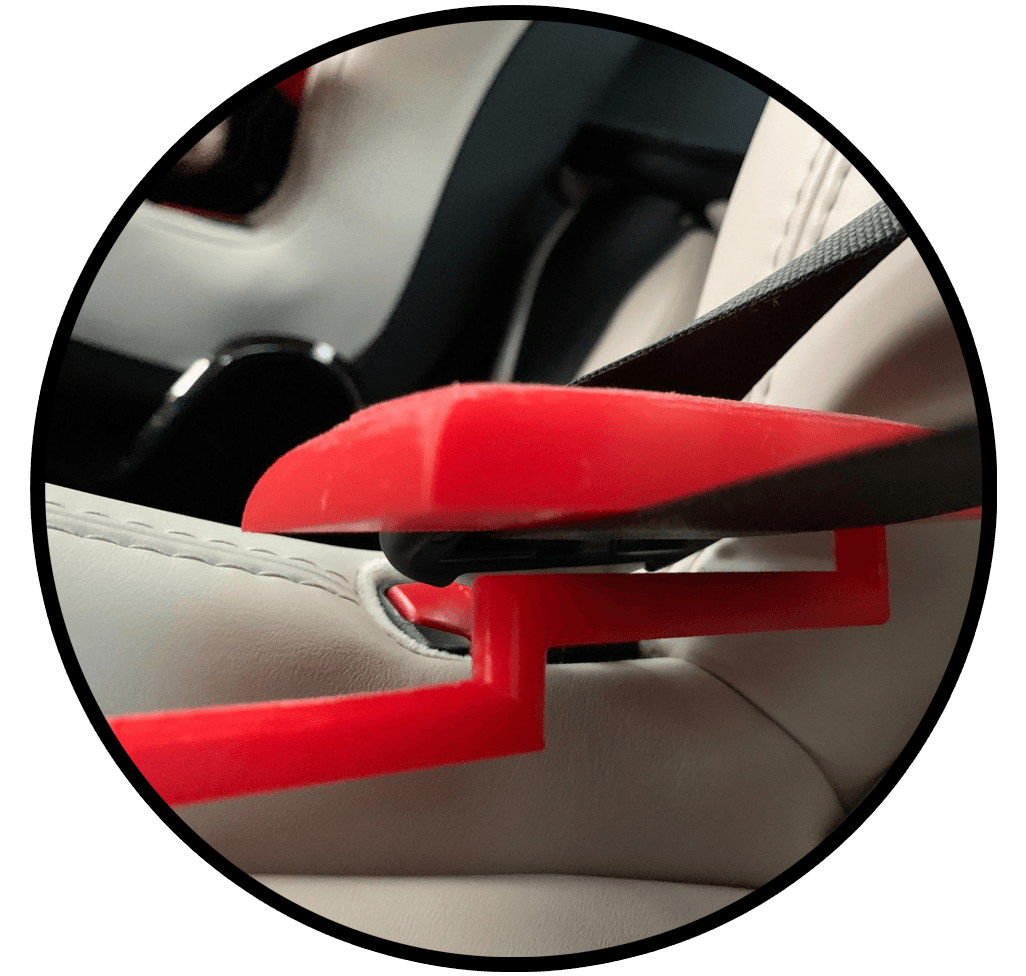
“My target market is anyone who suffers from arthritis or loss of motion in their hands and back. I have created this product to hopefully relieve pain to those struggling to put on their seatbelt”.
Exercise Cube
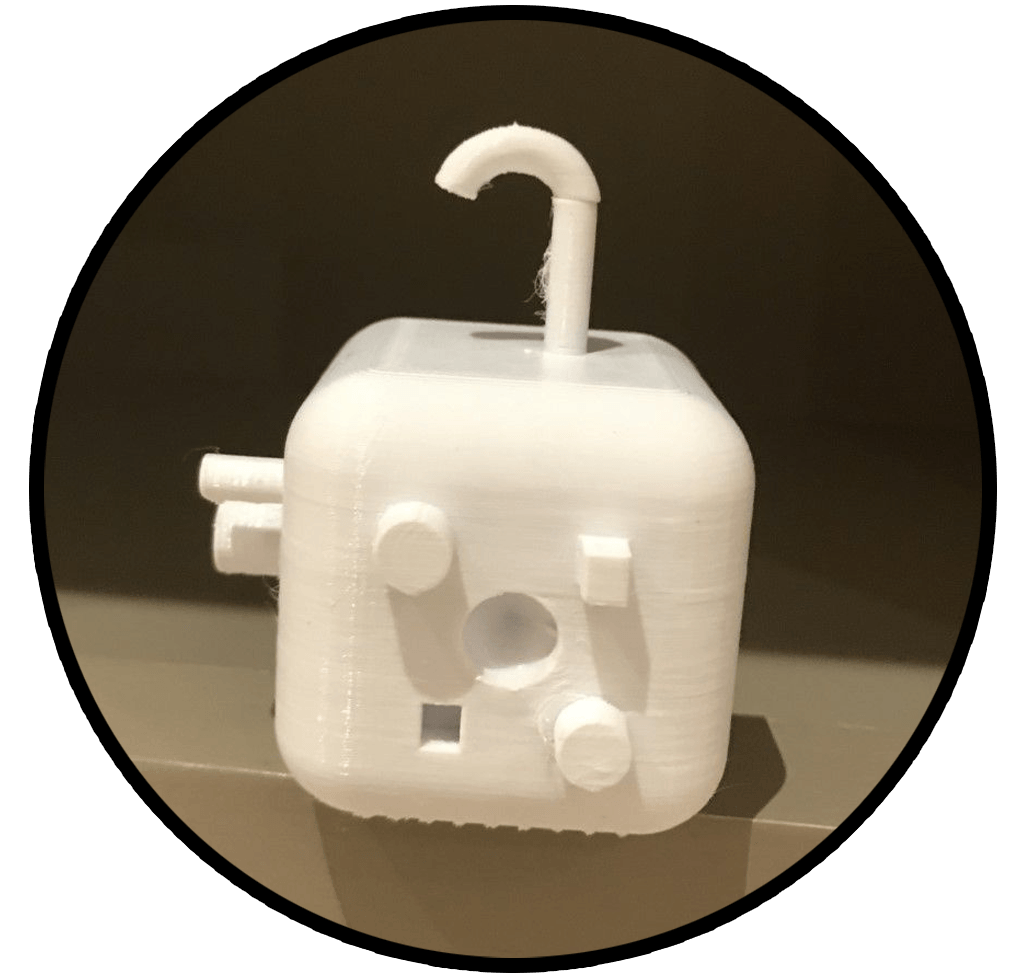
“This exercise cube has 4 surfaces, each with different components to help strengthen fingers of those with arthritis. For example one has sticks coming out with they would have to twist engaging the stiff muscles and joints”.
—
A huge thank you to Nick and the students at Wimbledon High School for sharing their experience with us! It really inspires us to see students combining technical skills with a deep sense of empathy. Due to the amazing interest we had in the Assistive Device Academy, we developed it into something even bigger and better! Introducing the Make:able Challenge – a 3D printing and assistive technology design challenge, brought to you by PrintLab, Autodesk & partners. Going beyond a competition, the Make:able design challenge centres around an online challenge toolkit, which takes you through a step-by-step process to design and make an assistive device for a real end user. Learn more and sign up for free here!