3D Printing at St Andrew’s College, New Zealand
This week, we take a closer look at a school in New Zealand who have used our educational curriculum to give students an authentic 3D printing experience. Having launched only recently, we at PrintLab are absolutely thrilled to see so many teachers and educators using our platform to support them in teaching kids about 3D Printing and technology and then applying this learning tool to key curriculum subjects.

6th September 2016 • Case Studies
Vicki Pettit is a maths teacher and head of education at St Andrew’s college in Christchurch, NZ and wanted to reinforce her mathematics lesson by incorporating hands-on making and 3D printing. She saw our Makerversity DIY sand timer lesson as a perfect fit.
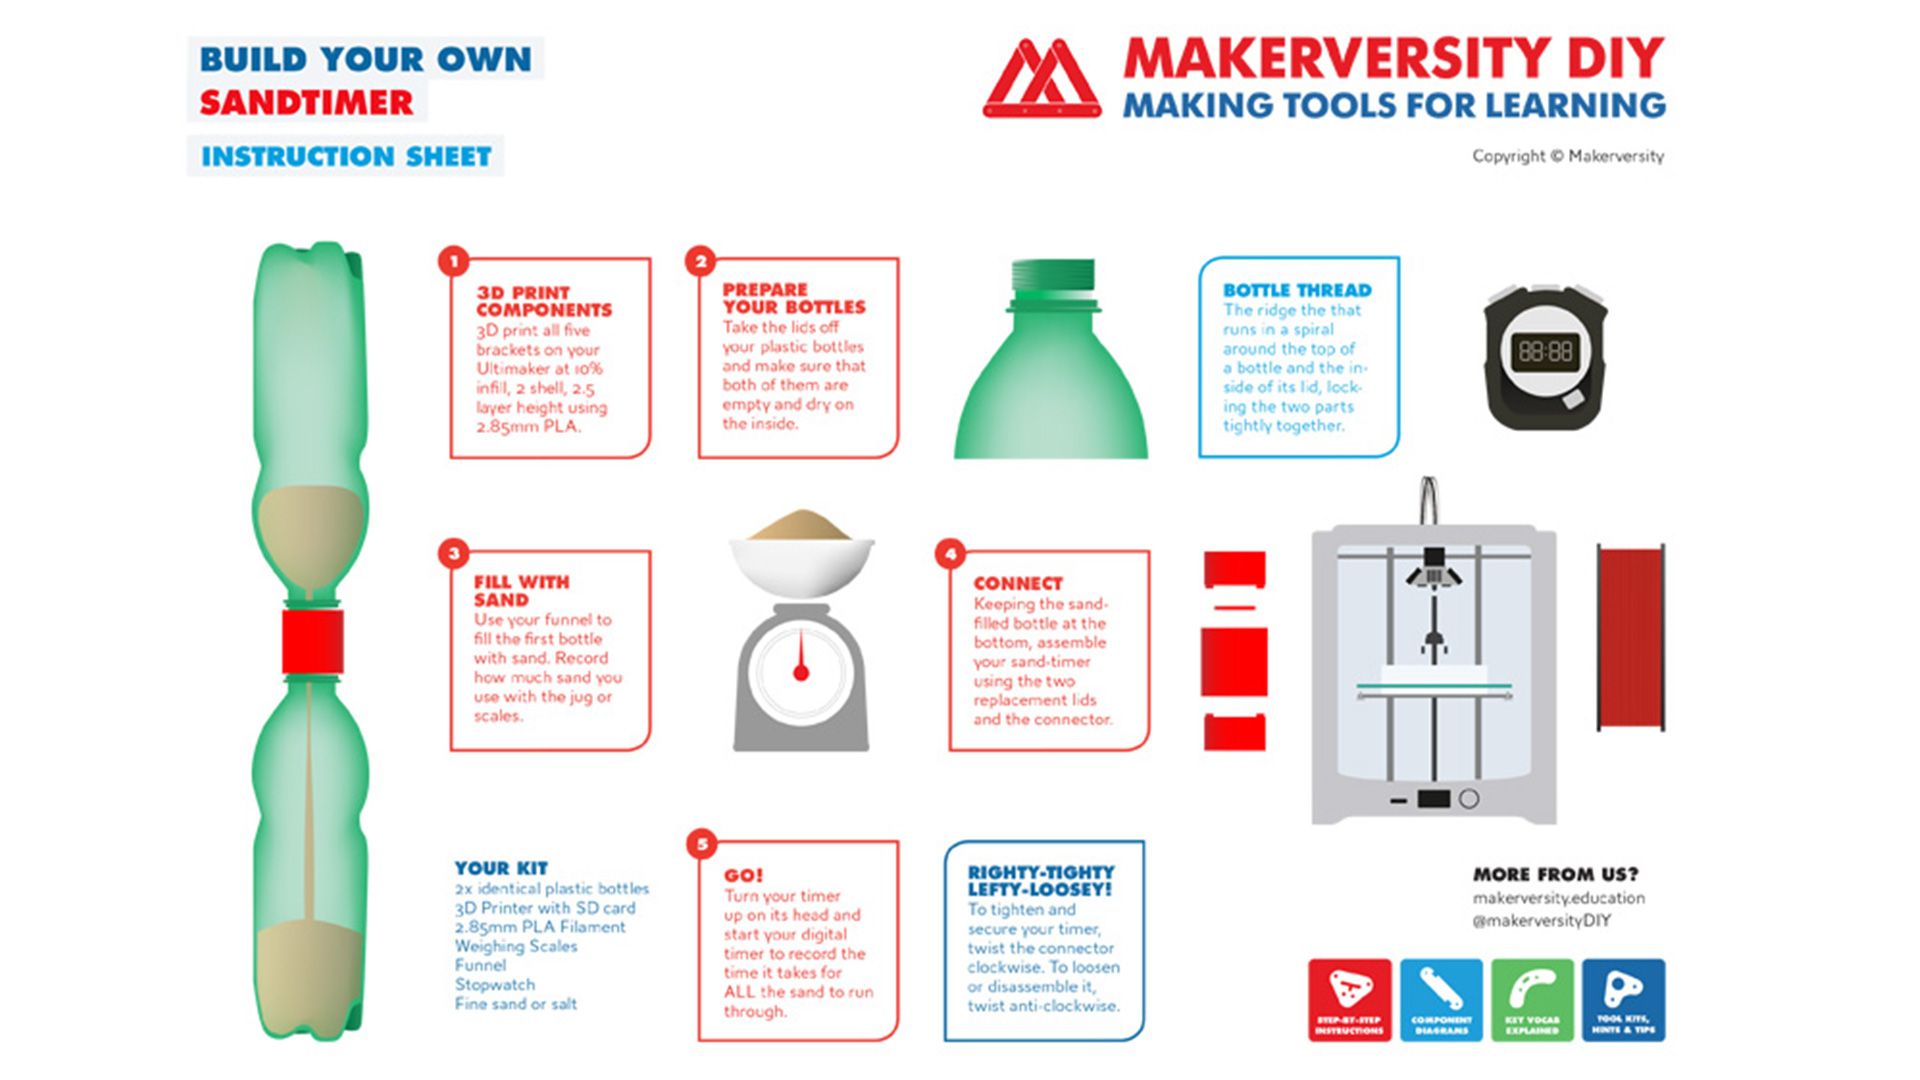
This lesson uses bespoke, 3D printed components alongside everyday household items to enable children to produce their very own timer. In this case, teacher and students opted to use salt rather than sand which shows some flexibility in the lesson and could be used as an opportunity to explore a discussion on materials, density, mass and alternative suitable materials that could be used to measure time.
The lesson is a great opportunity for pupils to hone fine motor skills through a simple hands-on activity, whilst teaching accuracy, numeracy and measurement skills. Vicki reports her personal experience of the lesson as follows;
1. The starting point for me was finding an authentic reason and purpose for incorporating 3D printing within our Year 8 mathematics class.
2. Coincidentally we were starting a new programme called Club 100 aimed at improving students’ basic facts in mathematics. Students move up through levels and this is displayed on a poster in class. I decided to have the students design and print their initials in tinkercad and this would serve as a token to move up the levels.
3. This served as a beginning and simple task to learn the software.
4. Found and downloaded the Makerversity DIY sandtimer lesson from Printlab.
5. First print run determined that the files were not the right size for our bottles. So I shared the files with the class on OneDrive and the students set to work in groups adjusting and printing bottle caps to fit two different size bottles.
6. We discussed how to change to scale – holding down shift in tinkercad. Measured and documented each prototype and what needed changing. Next time I would ask students to rename files or number files to avoid reprinting the same file twice.
7. Next came the sleeve to fit over the top – the same process followed as above – also needed resizing.
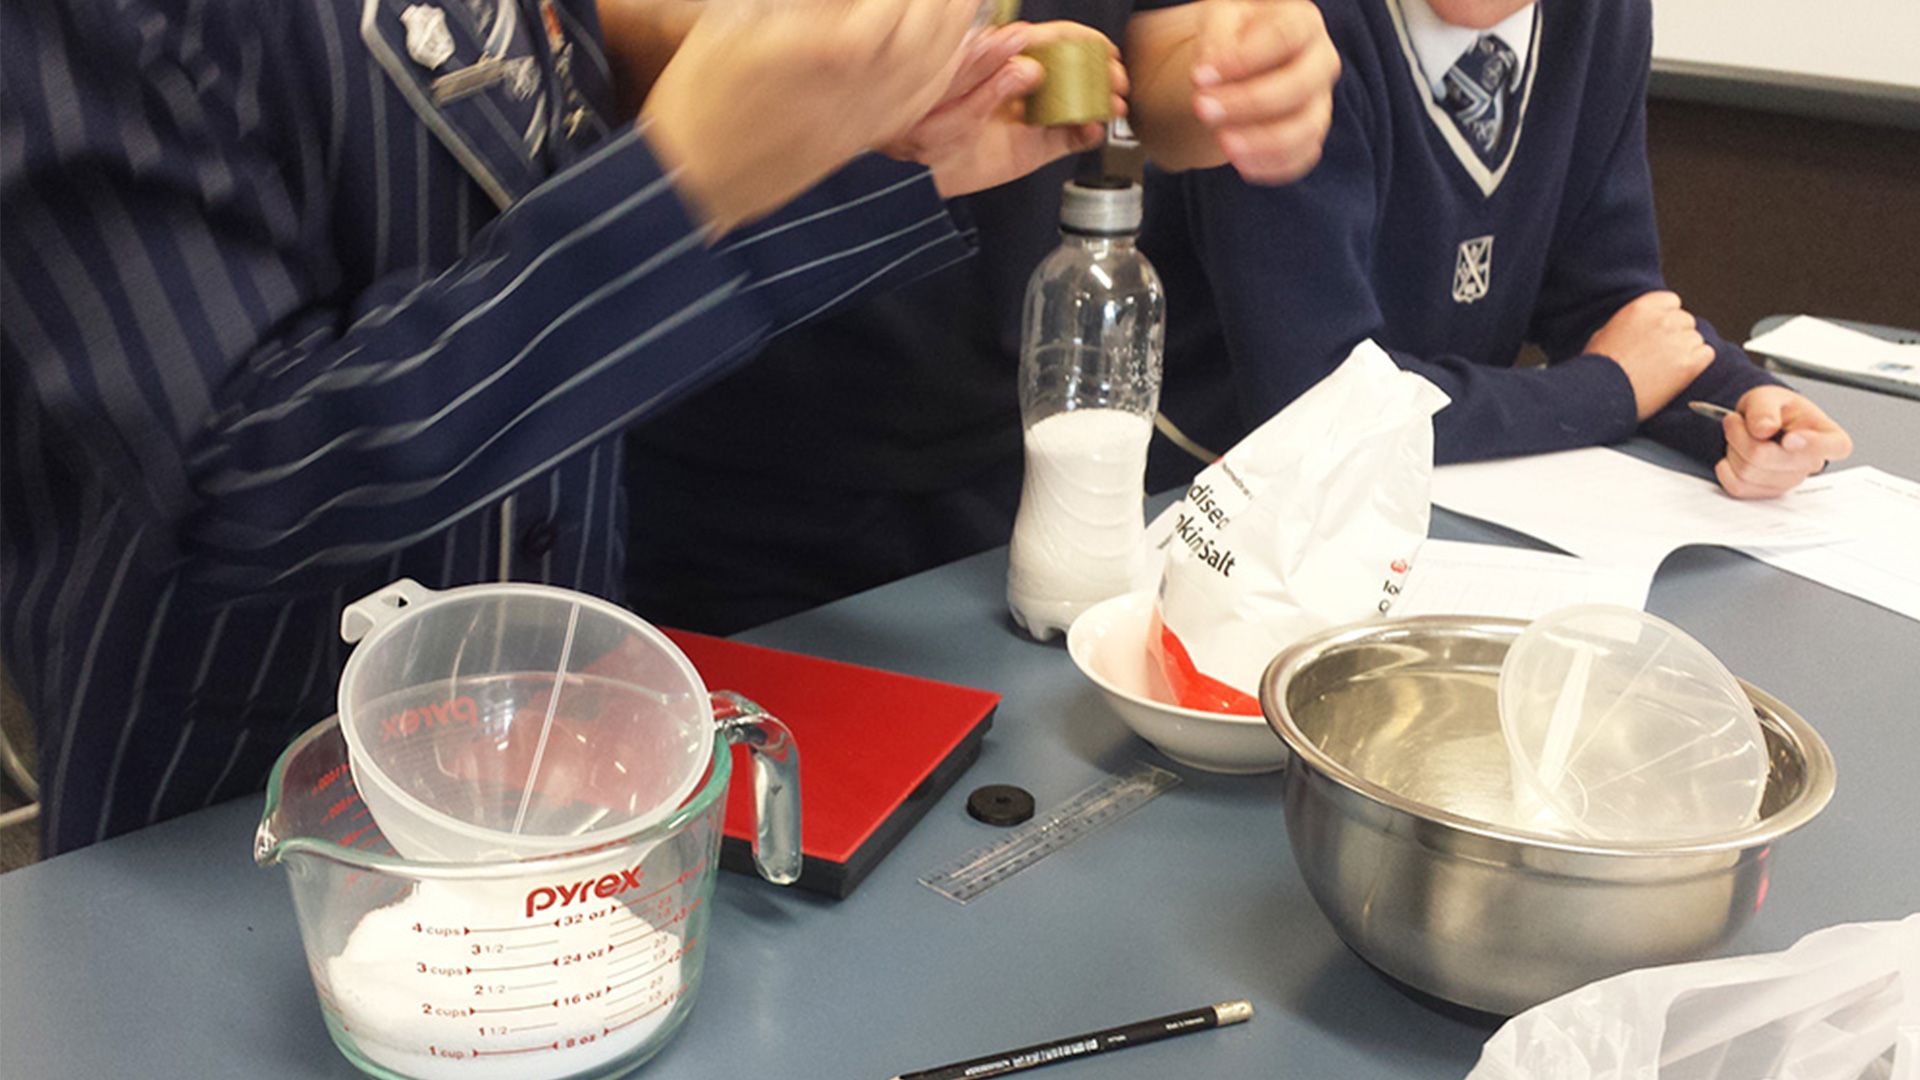
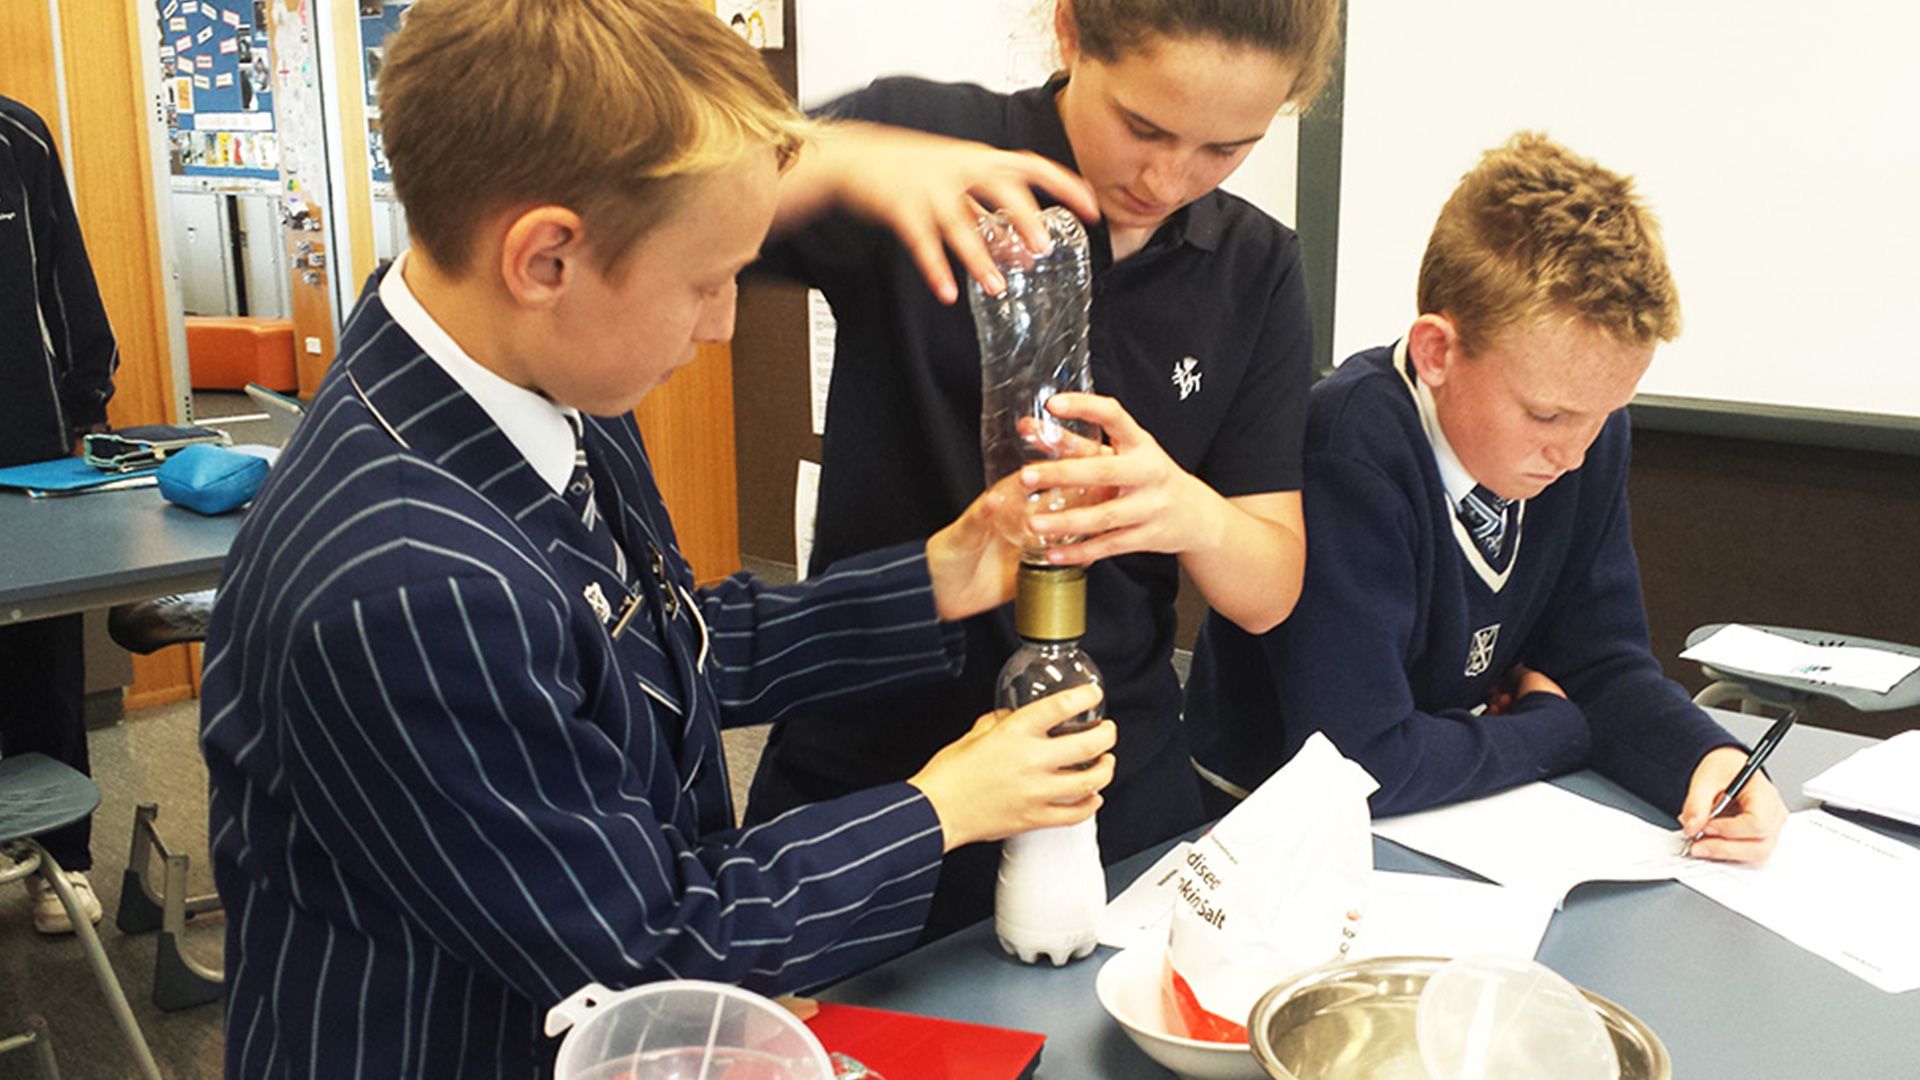
8. Once we had the sizing correct we set to printing enough copies for each group to have a set. Then students got underway with measuring the salt, assembling in the timer, timing and adjusting.
9. Once students had succeeded in making a 1 minute timer, the challenge was to adjust for the following times: 3, 4, 5, 6 all for use in our Club 100 maintenance work.
Vicki went on to say, “Students have loved making. It has been a great learning curve. The students are deservedly proud of their work”.
A very positive experience from the teacher, but what did the students think? As with many lessons, teachers can often hold enthusiasm, but a real test of the lesson lies with the student experience. Did they enjoy the lesson? Were they inspired and motivated to learn? Did they gain understanding and skills from the lesson? Below we have some valuable student input on the lesson that was conducted at St Andrew’s college.
Firstly from Joe and Arthur:
“In maths for the last 2 weeks we have been looking at volume and lots of other types of measurements leading up to making the salt timer. For a start we had to work out the measurements of the end of the bottle to make the screwed on lid. We then had to make a sleeve so the caps were secure and no salt would slip through the caps. We also had to make a little circle washer that would only let a little bit of salt fall at a time so there was an even flow of salt. Next we assembled all of the equipment and put the timer together. We all estimated how much salt we thought we would need. We started off trying to make a one minute timer and we put 100g of salt in which clearly wasn’t enough and only turned out to be about 15 seconds. So we put in 300g but it was only 45 seconds. So we tried 400g and it worked perfectly.
The hardest part would have had to have been making the lid for the bottle because it took us at least 5 tries. But then sometimes there would be failure prints where the lid fell apart. Also getting the perfect time was very difficult because it would never be the same every time. We all learnt a lot from this and worked out that it was almost impossible to get it the same time every go”.
They concluded, “We all loved doing this project we all found it so much fun and in doing so we also learnt heaps. I’d certainly encourage other teachers to try this in their maths class”.
And secondly from Bella and Scarlett:
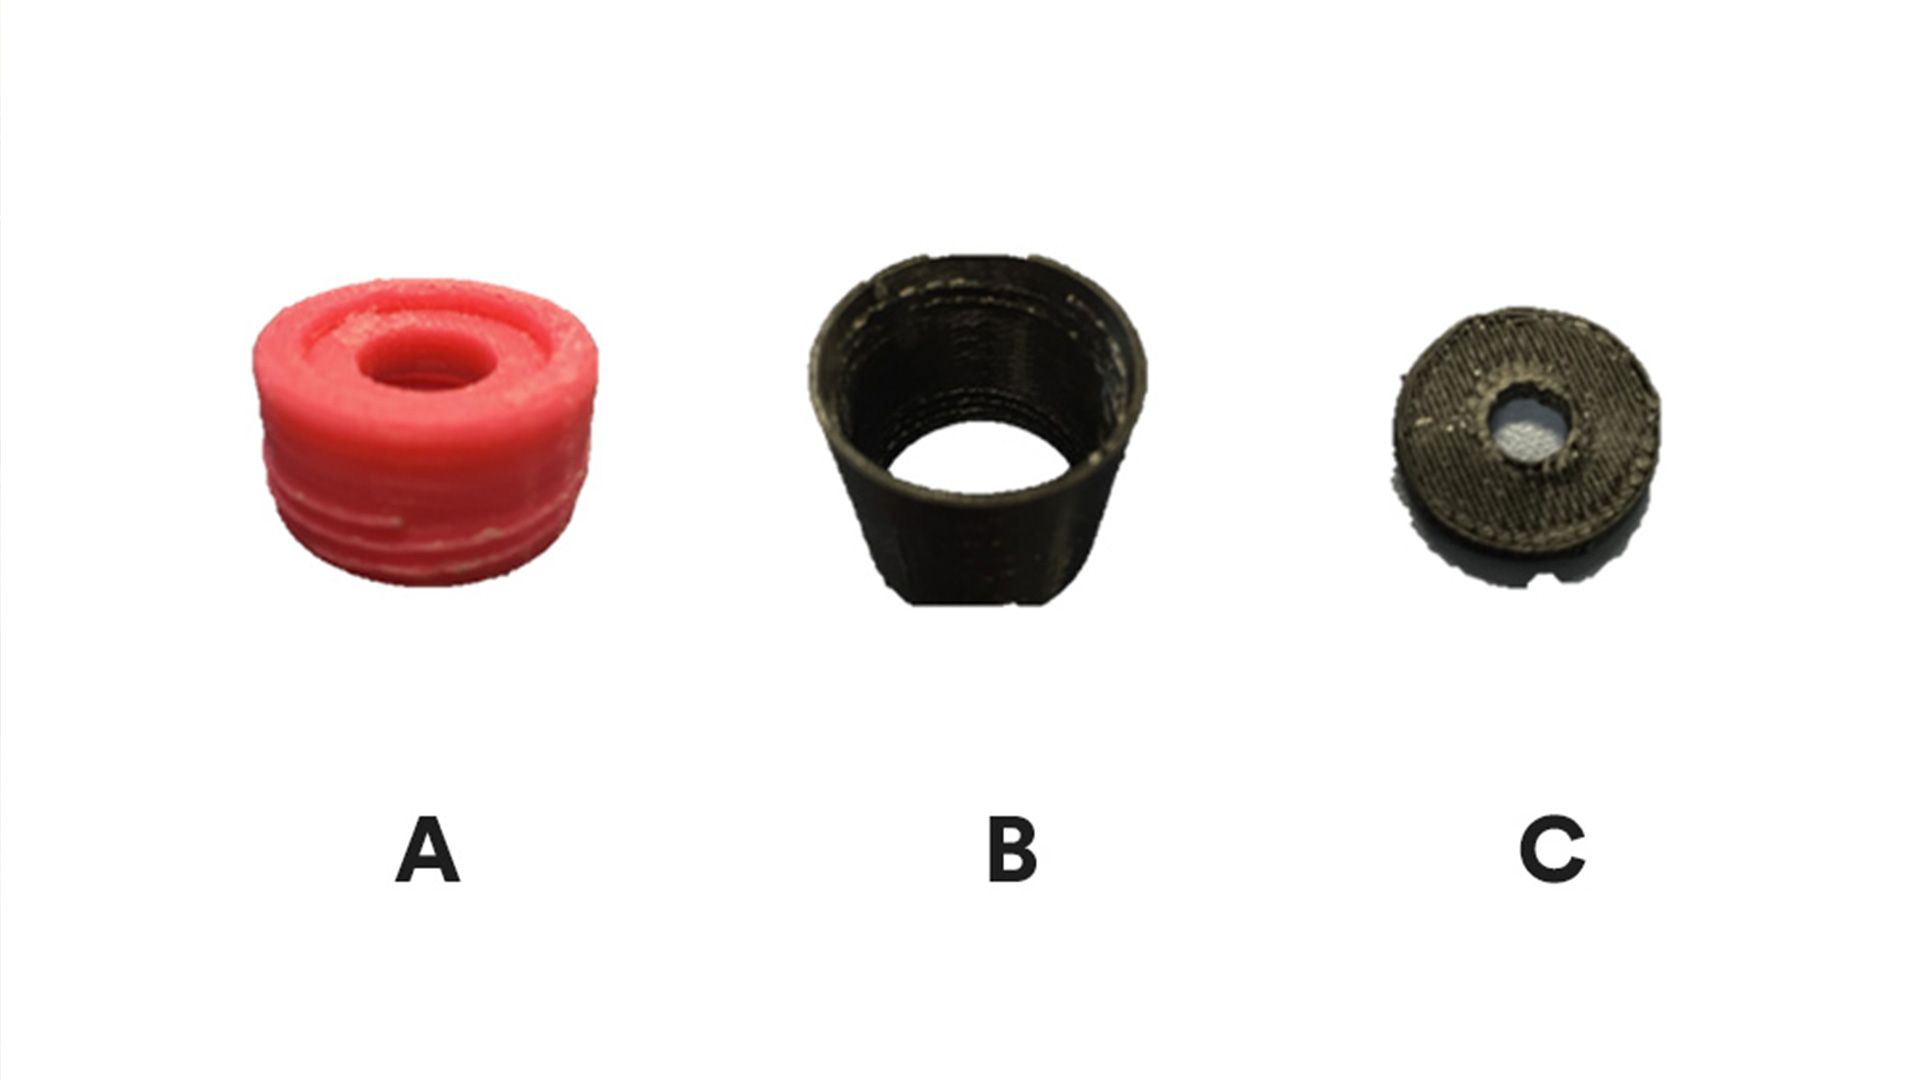
“This experiment was to find out how much sand was needed to time one minute, then four minutes. Along the way we also had fun with 3D printing. Using the 3D printer, we made 2x pink caps (A), 1x black sleeve (B), 1x black washer (C). The hardest thing was probably doing the first measurement of salt because we had no idea how much salt it would take to time one minute. My favorite part of this experiment was being able to successfully make a 4 min salt timer, with coloured salt!
The first thing we did was get two matching pump bottles and the 3D printed pieces, then we measured 500g of salt and put it into one pump bottle and then timed that. 500g equaled 3:20 minutes. Next we roughly divided 500g by 3 and got 157g. 157g measured exactly 1 minute on all the tests we did. Now we had to find 4 minutes so we multiplied 157g by 4 and got 465. That timed 3:03 minutes. Then we added another 157g to get 621g and that was also perfect on all the tests we did. Overall this was a really fun experiment and we learnt a lot. Now we can use our timers for our daily maths quiz”.
Lastly, we would like to say a huge thank you to Vicki Pettit and our official New Zealand sales partner MindKits for passing on this great classroom case study. If you live in New Zealand, be sure to check them out as they are extremely friendly, helpful and knowledgeable on all things education and technology.