PrintLab Design Tip 1: Considering Overhangs
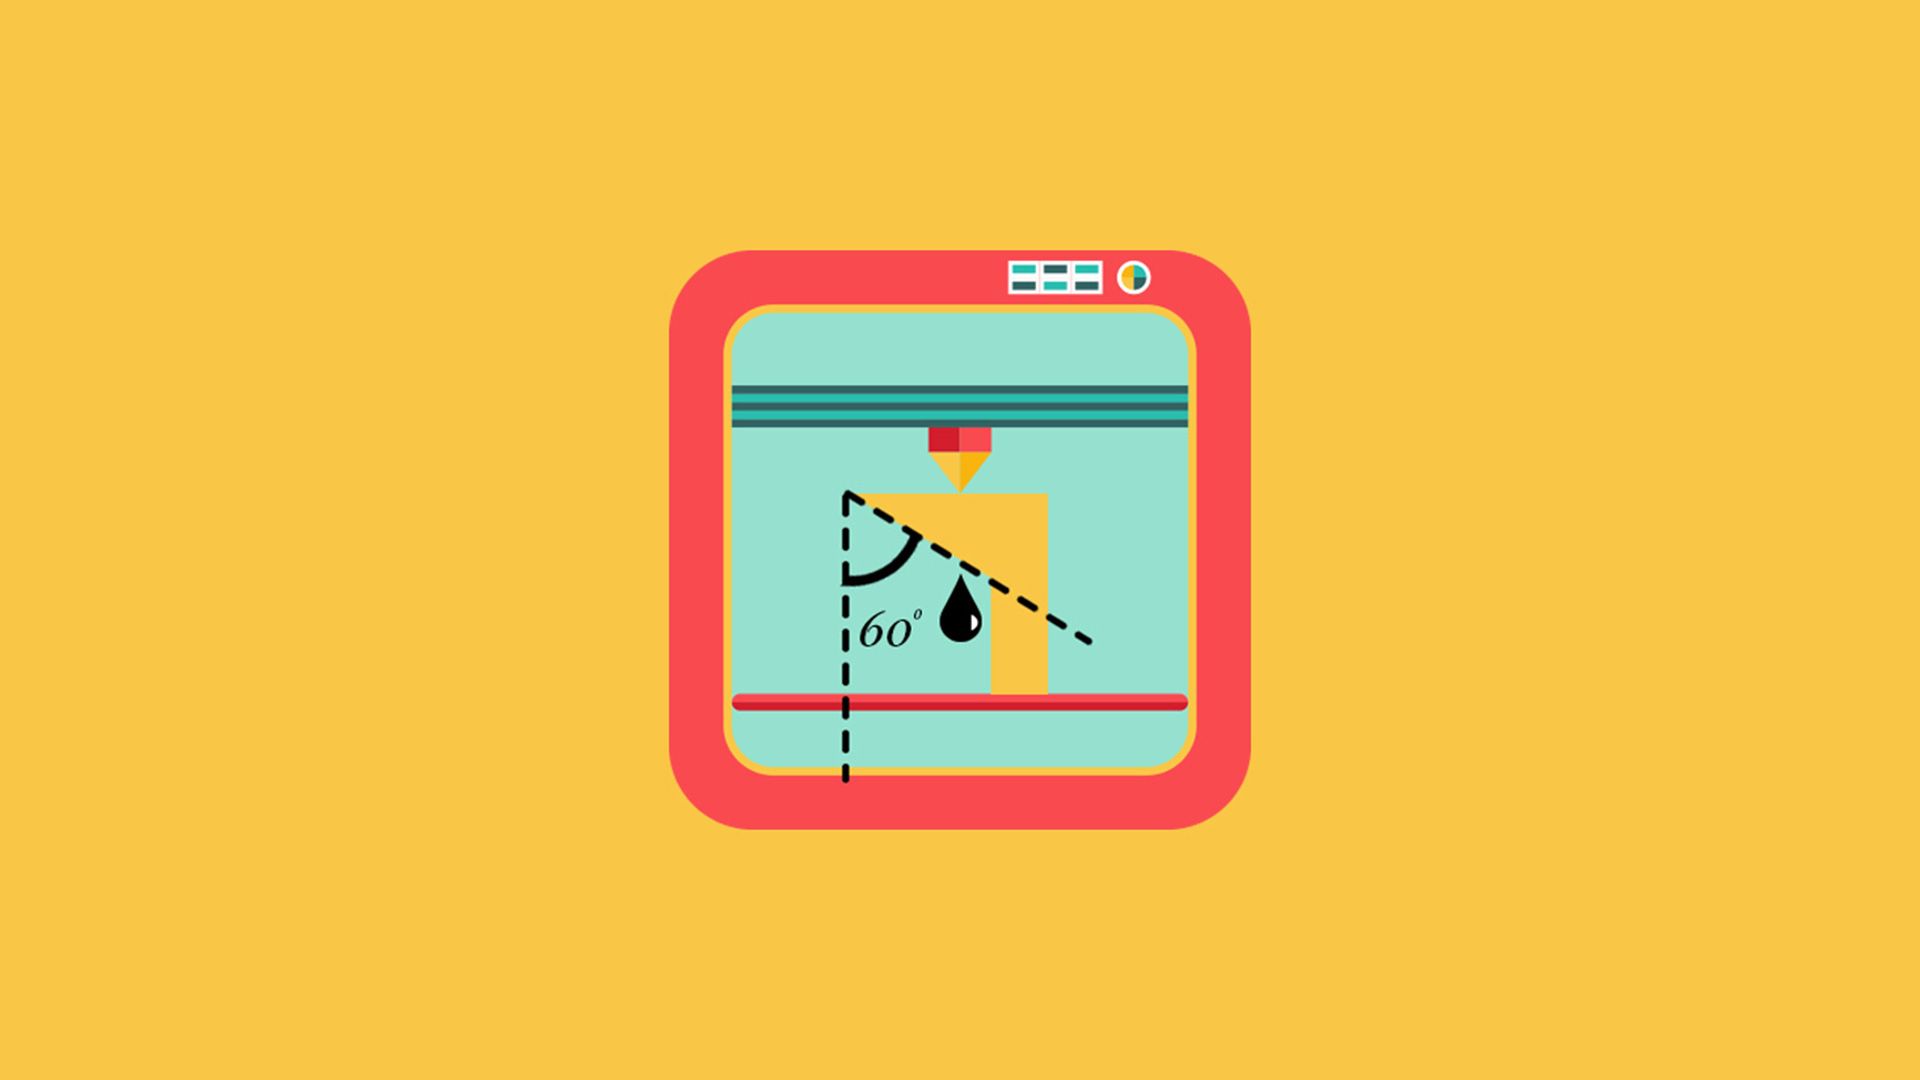
Introducing Overhangs - We're kicking off this series of design tips with probably the most important - designing with the 45 degree rule. Let's begin with some basics. FFF (Fused Filament Fabrication) is the most common 3D printing method and the one which we'll be focusing on today. Overhangs are especially important to consider for FFF machines because of the extrusion process, which involves layers of molten plastic being laid on top of each other. Overhangs occur when the layers don't sit directly on top of the one below which means that the nozzle is partially extruding into thin air.
26th July 2016 • Tips
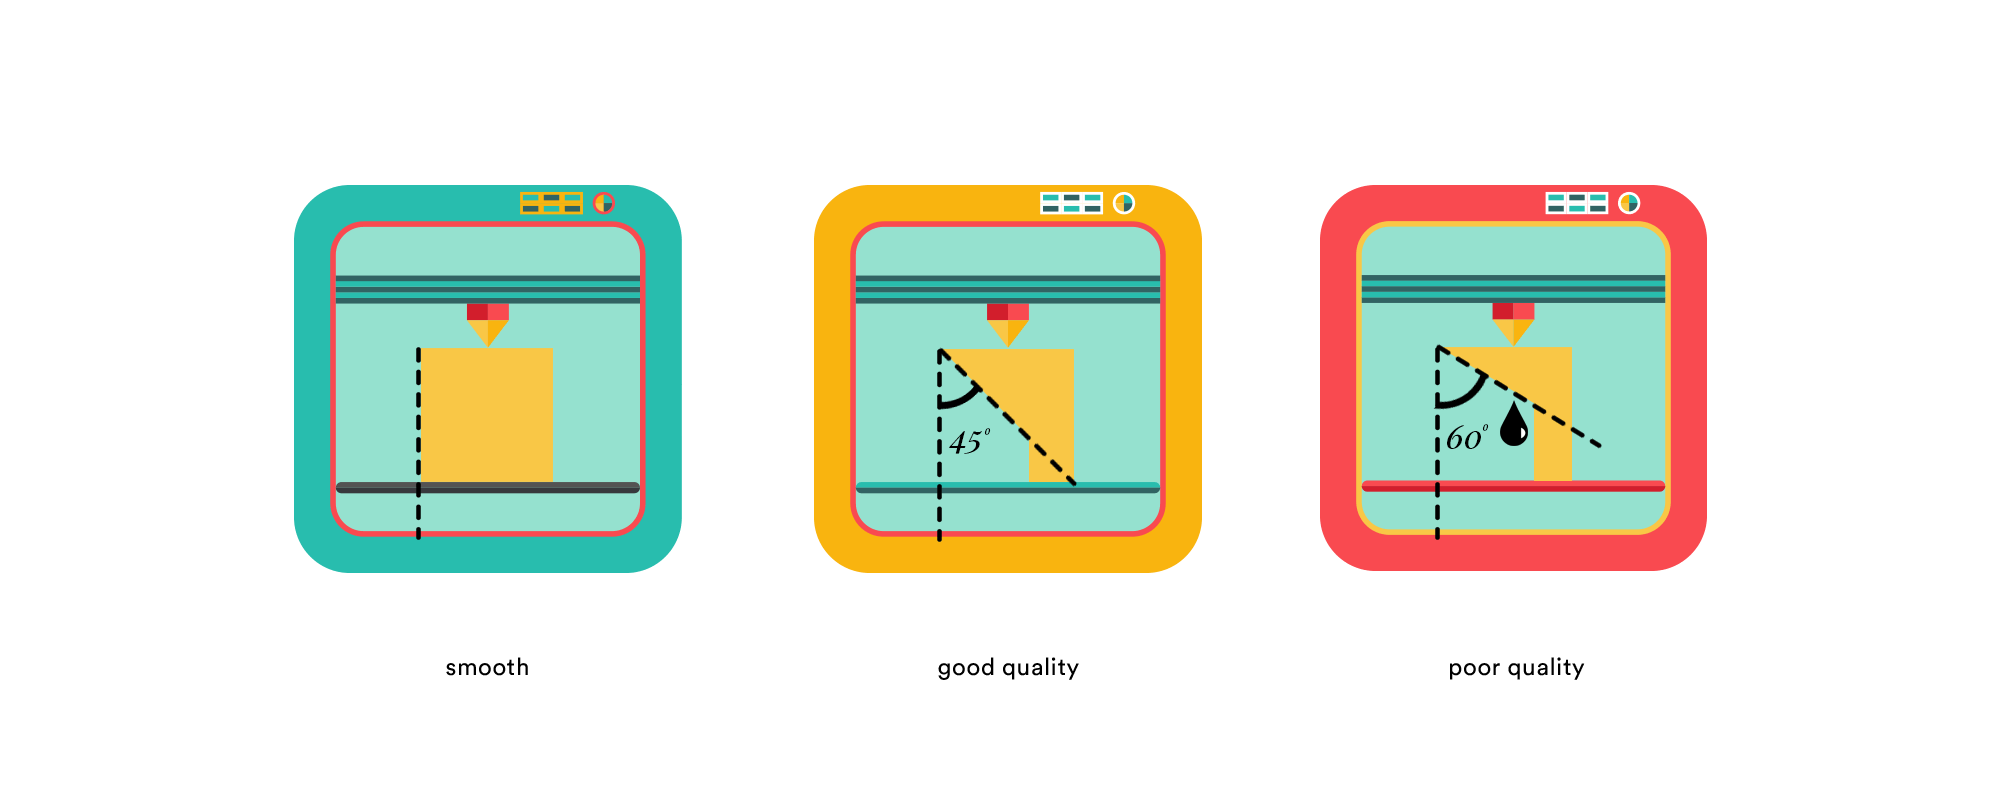
Most slicing software can automatically generate support material which can be snapped or washed off when the print has finished. However, more often than not, the model will have rough surfaces that require either sanding… or throwing away. The best way to achieve great looking prints is to respect the limitations of the printer you are using. Most FFF machines act in a similar way and the below drawing should give you a guideline into what prints well and what doesn’t.
Zooming In
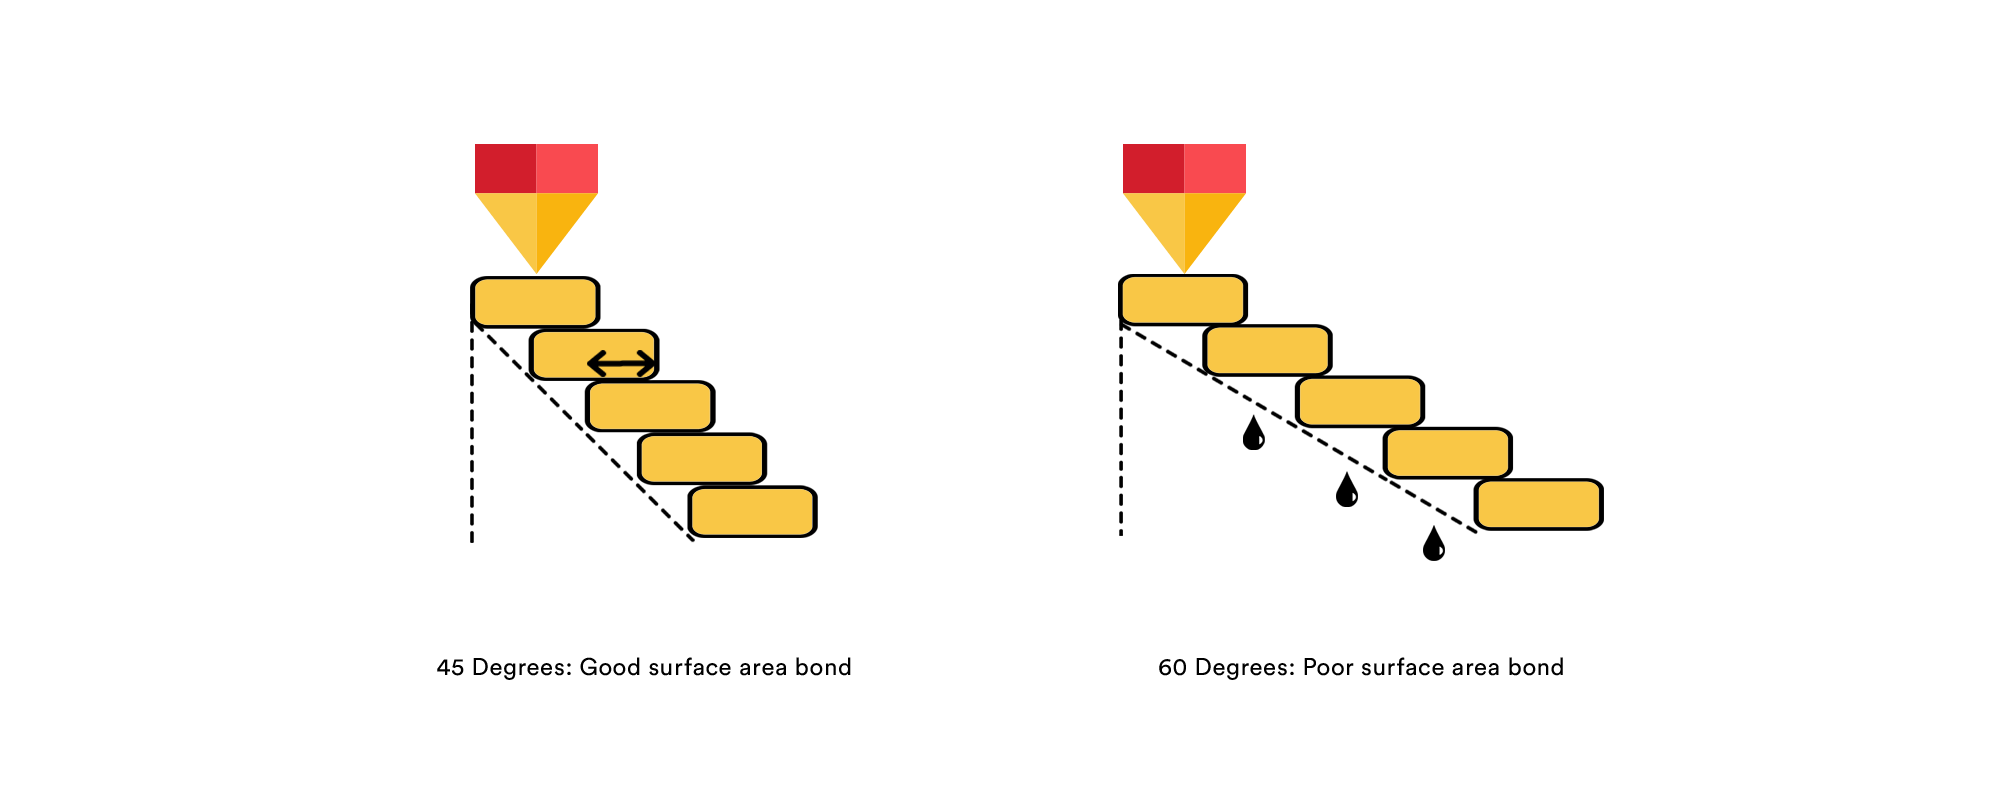
So, now we have a guideline into how to design, let’s look at why we have to do this. Imagine each successive layer as a plastic bead. In order to get this bead to stick to the one below, we need surface area. The more surface area the bead has to stick to the one below, the better the bond, the less droop and the smoother the print. Take a look at the below diagram – you can see that with overhangs of 45 degrees or less, you get at least half a bead bonding to the one below. As the angle becomes greater, the plastic will not bond as well and will droop because of gravity. It’s important to remember that each printer and each material acts differently so the best way to learn is by experimenting.
Cooling
Ok, so we’ve established the best way to design for smooth surfaces, but what if you want or need a steeper overhang without support? There are several things you can try but we think you’ll find the most success in concentrating on cooling the layers to avoid excessive drooping. Try lowering the temperature of your nozzle, most PLA is printed at around 210 degrees but can actually print much lower than this, we’ve seen great results from printing at 190 degrees (just keep an eye out for underextrusion!). In addition, set the cooling fans on the printer to 100% and beware of a high heated bed temperature as this can also radiate heat onto your print.

Wrapping up
As the 3D Printing Revolution evolves, there are hundreds of great designers who can be mentioned. The one that comes to mind (maybe due to the current craze) is Flowalistik and his series of low-poly Pokemon. Each model requires zero support and we are pretty sure this isn’t a coincidence. You can check out his work here. We’d also love to see your designs so feel free to share them with us through your PrintLab account!
Time to wrap up the first design tip post and if we could reiterate one point, it would be to respect the limitations of your printer and experiment with your tools. We are always on hand to help so if you have any more questions or even have some tips for us, get in touch at hello@weareprintlab.com