Giving Students Ownership of the 3D Printing Process
Organising and managing 3D prints for large groups of students is no easy task, but there are various ways to make the process streamlined and less stressful. This might involve the use of 3D printer cloud management software, or it might involve simpler methods like the one we will be focusing on today. Let’s welcome our pioneer, Jim Cairns, to the blog to talk about his process and how he gives students ownership of the 3D printing process! Over to you Jim.
18th September 2023 • Tips
Hello, fellow educators and 3D printing enthusiasts! I’m Jim Cairns and I teach middle school math and 3D printing at Bellevue Christian School in Washington State. I am writing a blog post to share my experience of improving student ownership in my junior high 3D printing class.

I used to receive the STL files from my students and then slice and print them myself. This process was time-consuming and prone to errors. If one student did not orient their design correctly, the whole print would fail. If I had multiple student designs in a single failed print, it was difficult to identify the source of the problem and provide feedback. I learned a lot about the best practices for 3D printing, but my students did not. I wanted to change that and empower my students to learn how to prepare and execute their own 3D prints.
Last year, I began having students slice and start their own prints during class time. This would reduce my workload and increase their engagement and learning outcomes. The main challenge was how to manage the time constraint. I could not have all the students start a print during class, as some prints would take longer than others. I needed a way to have some students start their prints later in the day. I developed a system through trial and error that has worked quite well.
The system consists of the following steps:
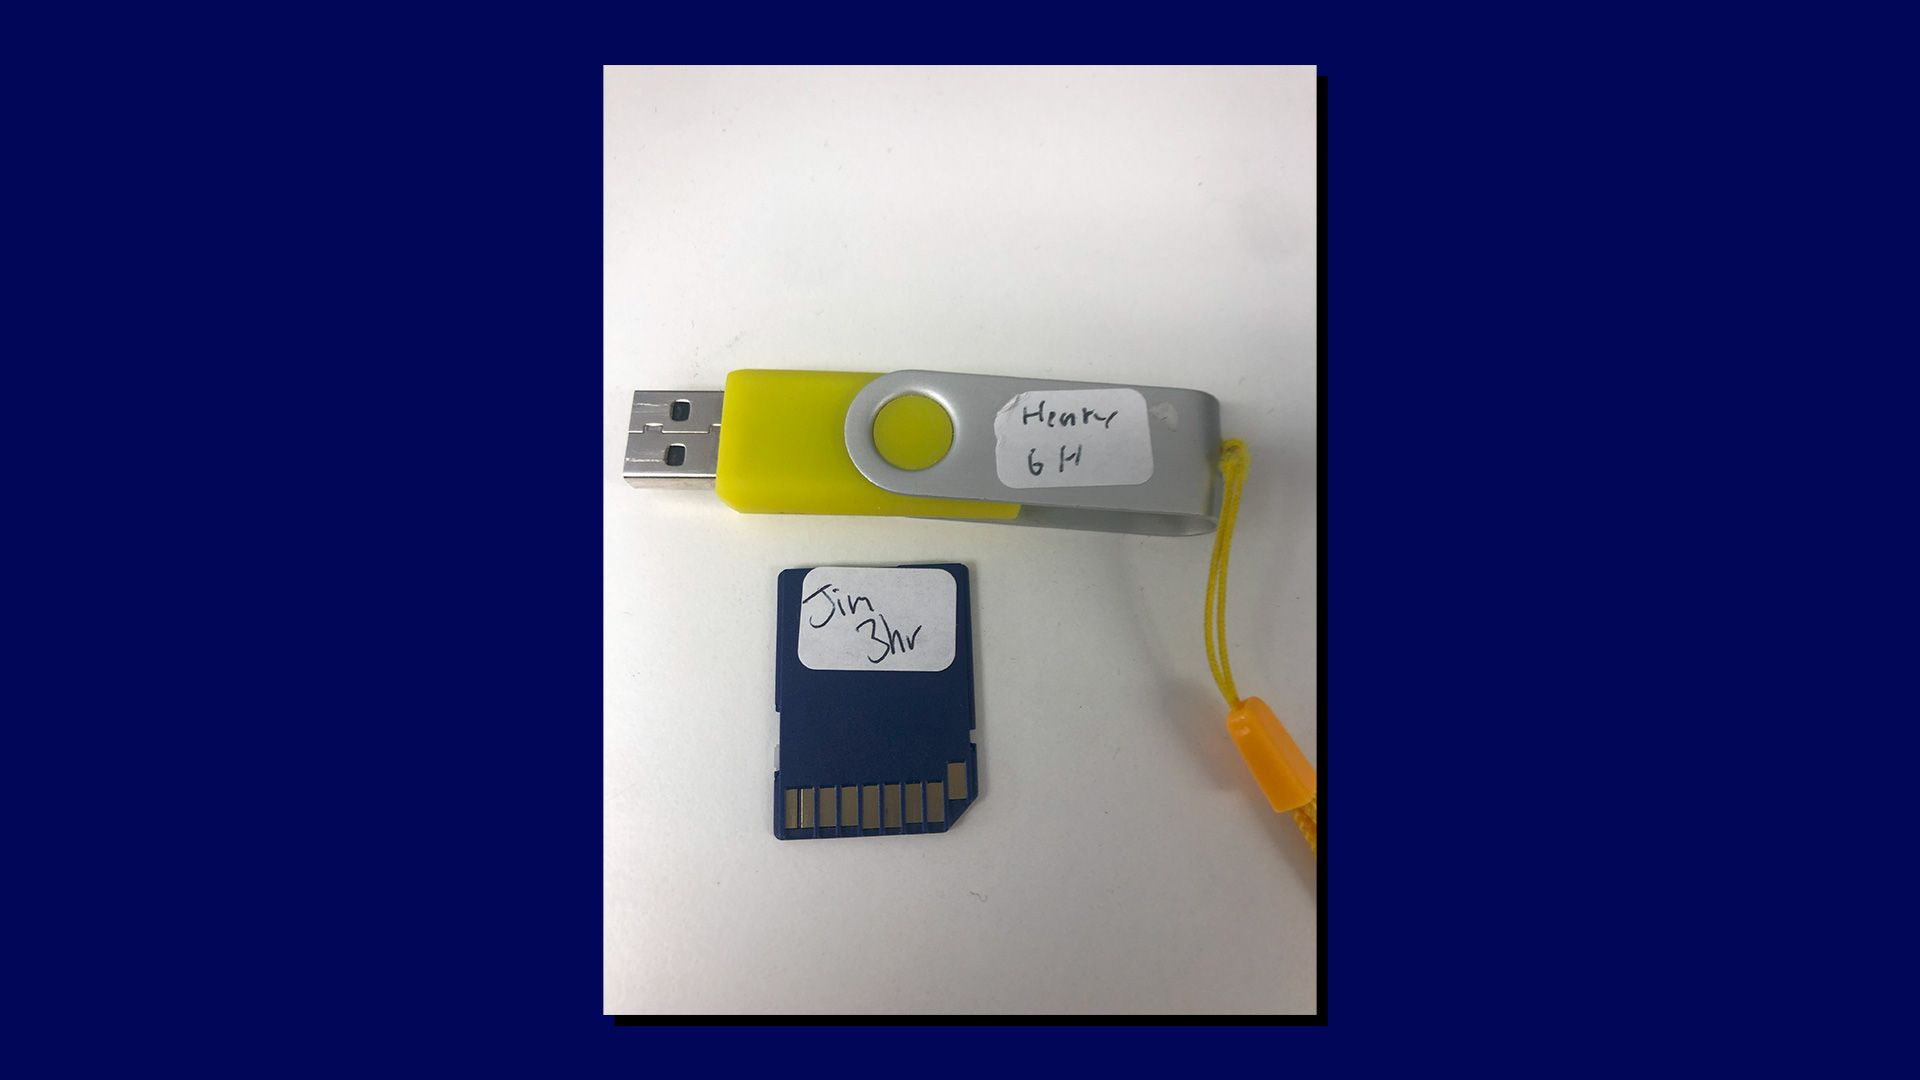
- Students save their G-code files on a USB drive or an SD card and label it with their name and print time rounded to the nearest hour. I used 0.5×0.75 inch removable labels.
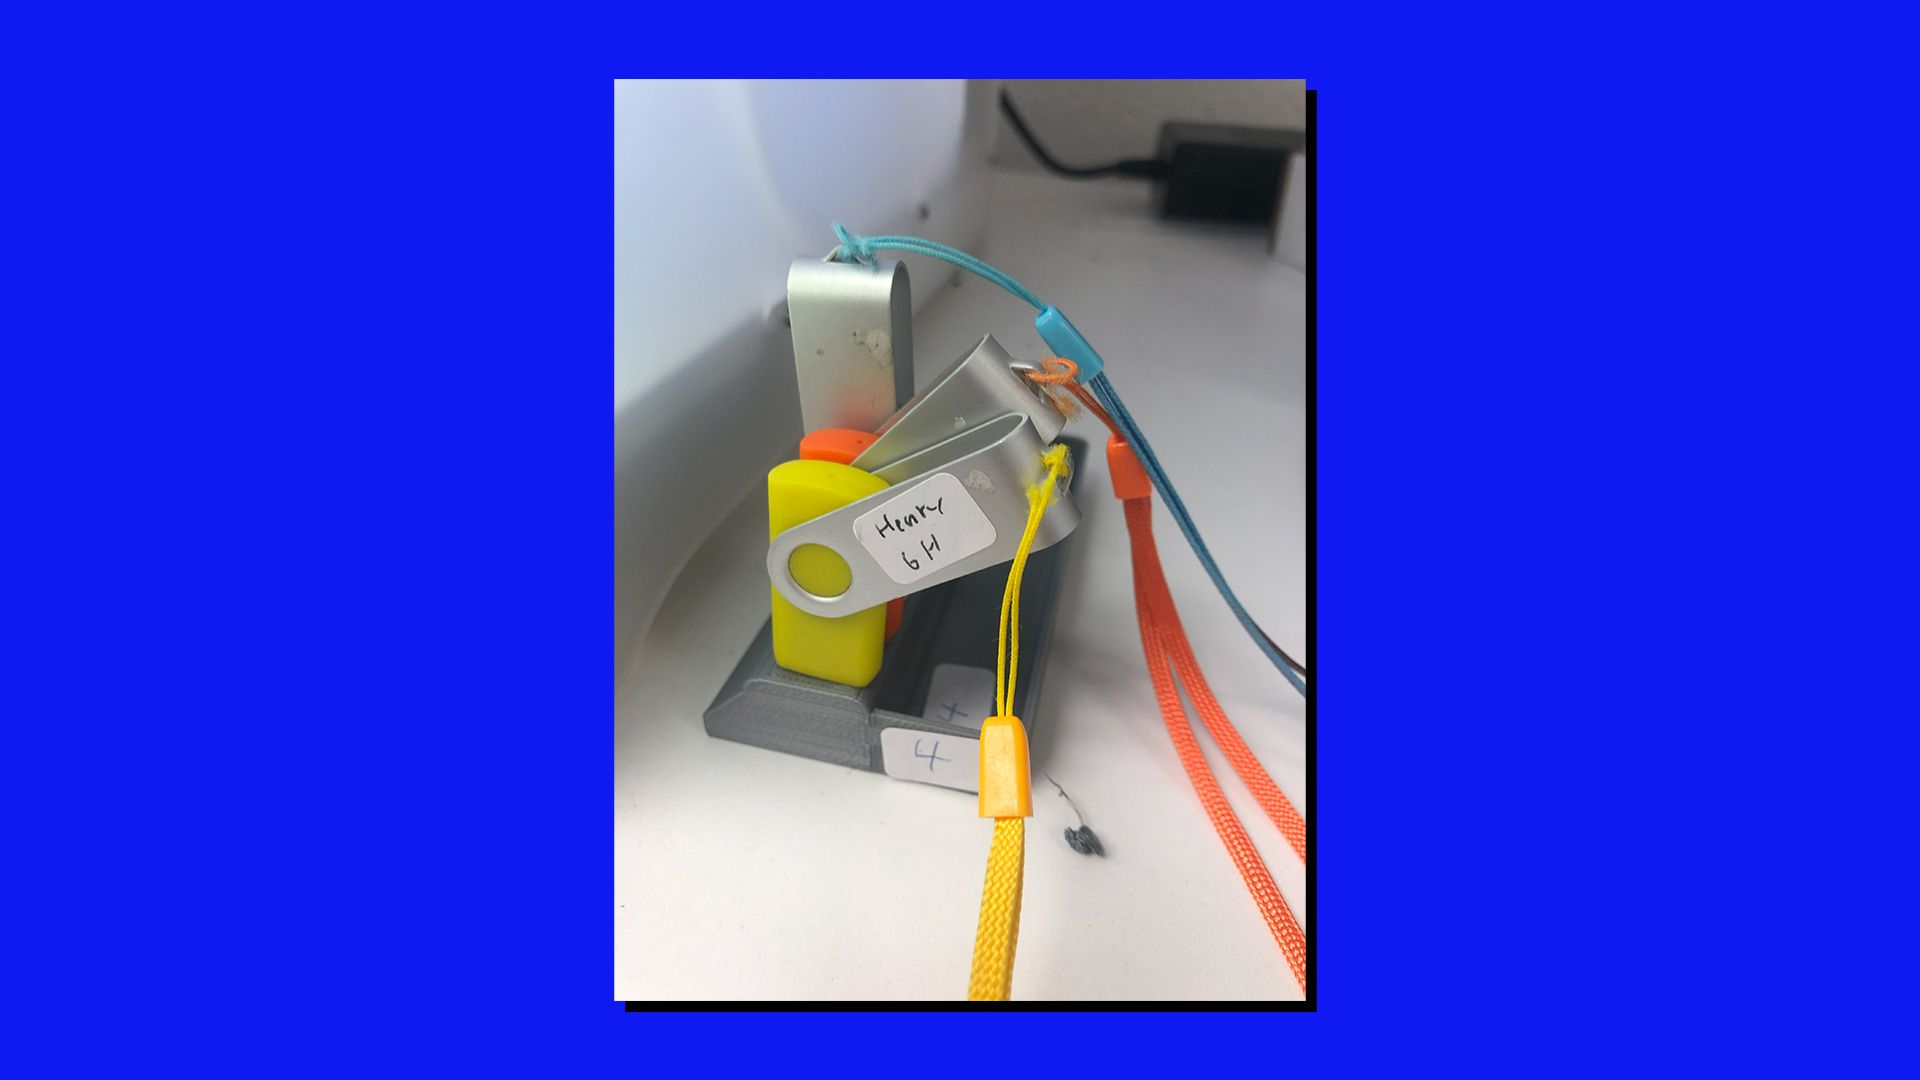
- They place it in a queue. I used a 3D printed stand that I downloaded from thingiverse.com.
- I come in later that day and started the prints during my lunch break or after school. One enthusiastic student would come in during homeroom and start their prints themselves as well.
- Once a print is done, I place the label from the USB drive or the SD card to the completed print so I know who it belongs to the next day in class.
Some additional tips: If I have a large class, I sometimes require two or three students to share one USB drive or SD card before they give it to me, as it is not possible to start 24 prints in a two-day period before my next block class.
I hope this is helpful! This system will be tested this coming year as I have two sections instead of one each semester. I am hopeful it can continue as the student engagement increase in the creation process makes it worth giving ownership to my students.